Introduction
The ZappySys SSIS PowerPack expands SQL Server Integration Services (SSIS) capabilities by enabling API integration, advanced JSON/XML parsing, and seamless cloud connectivity. This guide provides a detailed walkthrough of the installation process to help you set up the SSIS PowerPack in Visual Studio 2022.
Prerequisites
Before starting, make sure the following requirements are met:
- Visual Studio 2022 with the SSIS Project extension installed.
- A valid ZappySys license or trial version.
Steps
Enable SSIS in Visual Studio 2022
We have an article for this step; you can check it here
Install SSIS PowerPack in Visual Studio
-
Visit the ZappySys website to download the installer:
-
Run the downloaded installer with administrator privileges.
-
Follow the on-screen instructions to complete the installation:
- Select the installation folder (the “Typical” option is recommended).
-
After installation, open Visual Studio to verify the integration.
-
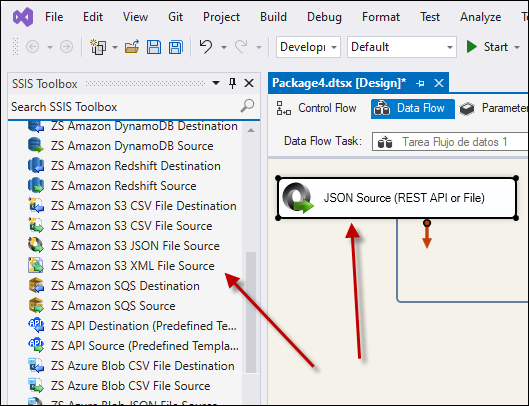
Check the SSIS toolbox in your project for ZappySys components and connection managers.
-
Example: JSON Source, REST API Task, and others should now appear in the toolbox.
-
Troubleshooting
Custom Setup - Add 64-Bit Runtime
-
When prompted during installation, ignore the warning about no SSIS Runtime/Designer detected.
-
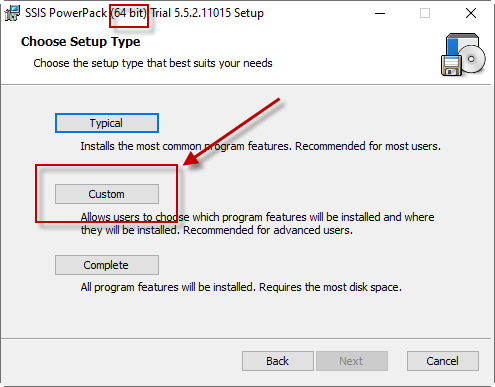
Choose Custom Setup during the installation process:
-
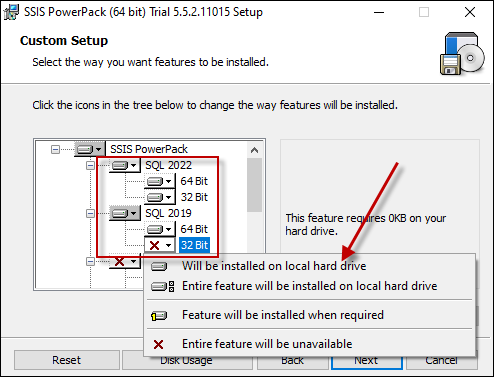
Enable the 64-bit and/or 32-bit runtimes manually:
Components Not Visible in Toolbox
- Ensure you are working in an SSIS Project type.
- Refresh the SSIS toolbox by right-clicking and selecting Reset Toolbox.
Missing Dependencies
- Verify that the required .NET Framework is installed on your system.
- If any dependencies are missing, the installer will prompt you to install them.
Video Tutorial

Conclusion
Installing the ZappySys SSIS PowerPack in Visual Studio 2022 equips you with advanced tools to handle API integration, JSON/XML processing, and more. Following this guide, you can set up and configure the PowerPack seamlessly. For additional help, contact the ZappySys Support Team.