Introduction
SQL Server Integration Services (SSIS) is a powerful tool for data integration and workflow automation. Setting up SSIS in Visual Studio 2022 is straightforward when you install the appropriate extensions and tools. This guide walks you through the step-by-step process to enable SSIS functionality in Visual Studio 2022 for creating, managing, and deploying ETL packages.
Prerequisites
- Visual Studio 2022 installed on your machine.
- Administrator privileges for installing extensions.
Steps
Step 1: Open Visual Studio
- Launch Visual Studio 2022.
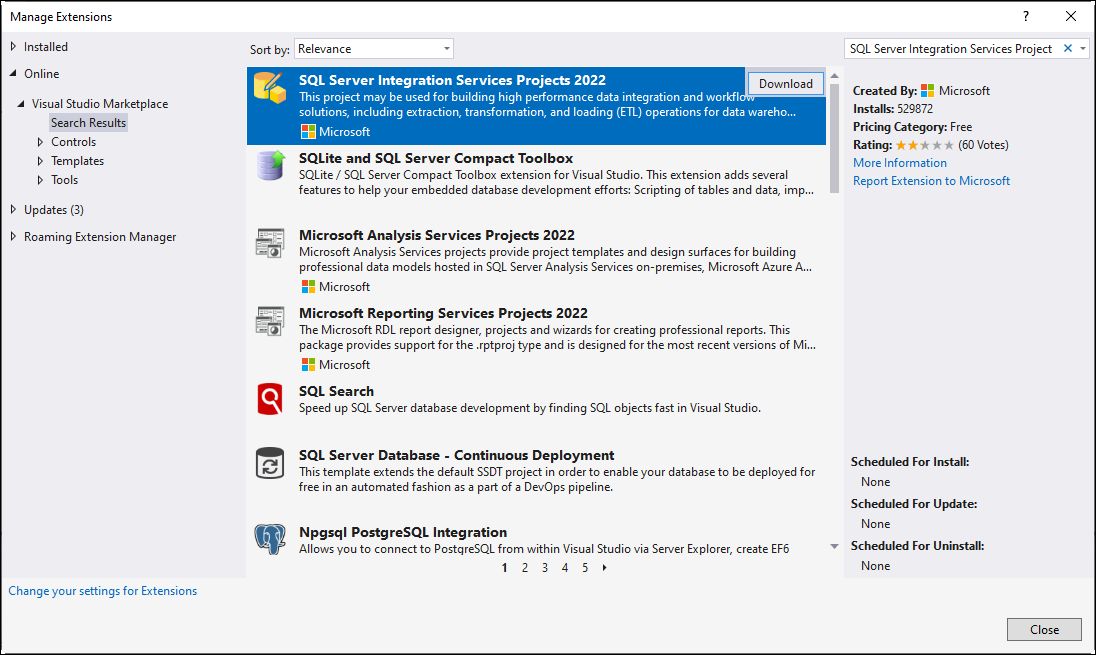
- Go to the top menu and select Extensions > Manage Extensions.
Step 2: Search for the SSIS Extension
- In the Manage Extensions window, switch to the Online tab.
- Use the search bar to look for SQL Server Integration Services Projects or download it here.
Step 3: Install the SSIS Extension
-
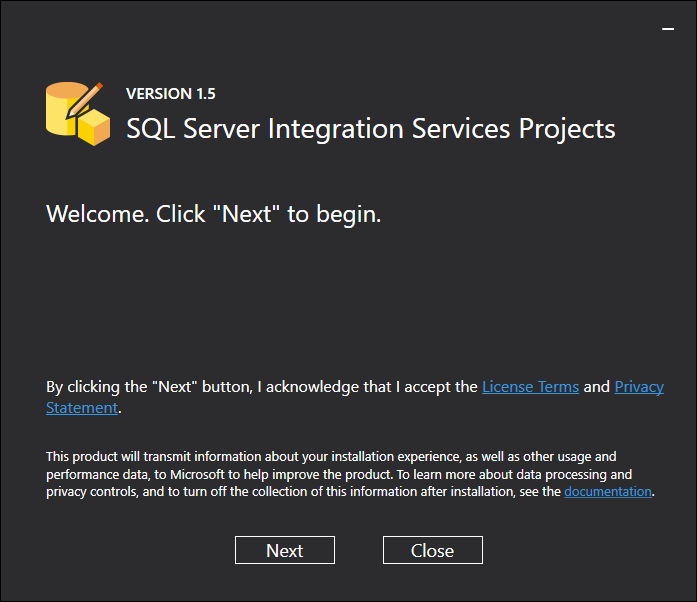
Follow the prompts in the Visual Studio Installer to complete the setup.
-
After installation, restart Visual Studio.
Step 4: Verify Installation
-
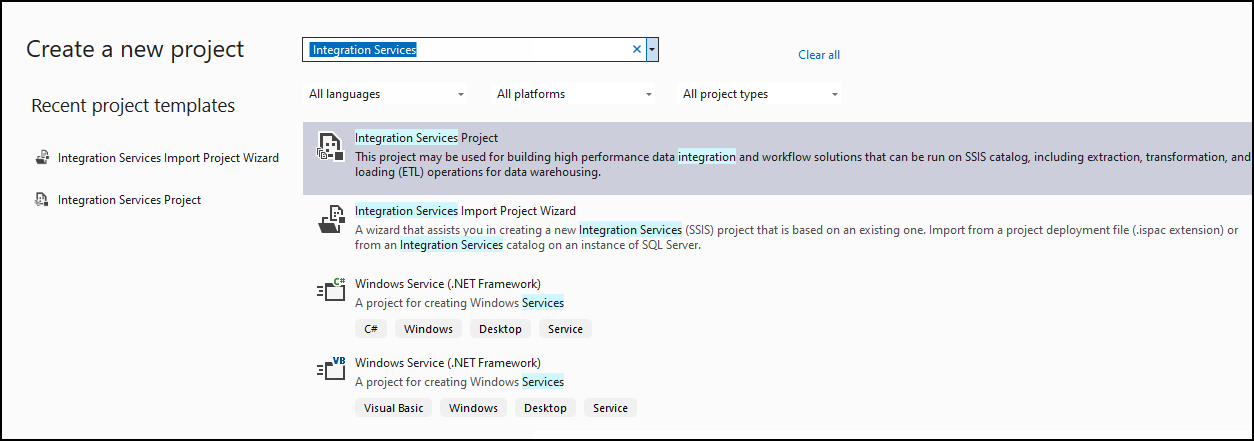
Open Visual Studio and go to Create a new project.
-
Search for Integration Services in the project template search bar.
-
Select Integration Services Project and click Next.
-
Configure the project name and location, then click Create. You should now see the SSIS Designer interface, including the Control Flow, Data Flow, and Parameters tabs.
Troubleshooting
SSIS Templates Not Visible
- Refresh Extensions: If the SSIS templates are not visible, go to Extensions > Manage Extensions and verify that the SQL Server Integration Services Projects extension is installed and enabled.
- Reset Templates: Click Tools > Import and Export Settings, and reset all settings to their default values.
Missing Dependencies
- Ensure you have installed the required SQL Server tools (e.g., SQL Server Data Tools) during the Visual Studio installation process.
Why Add ZappySys SSIS PowerPack?
The ZappySys SSIS PowerPack is a collection of over 70+ advanced components and tasks that extend SSIS functionality and allow seamless integration with modern data sources and platforms.
Benefits of Using ZappySys SSIS PowerPack
-
API Integration:
- Directly connect with REST APIs, SOAP services, and JSON/XML data sources.
- No need for custom coding or additional tools.
- Components like: REST API task, JSON source, XML source and more.
-
Cloud Connectivity:
- Integrate with cloud services such as AWS S3, Google Drive, Azure Blob Storage, and more.
- Components like Amazon S3 Task, Google Drive Connector, Azure Blob Storage Task and more
-
Simplified Data Handling:
- Processed flat files and Excel files and delimited data with ease.
- Perform real-time validation and transformations.
- Components like CSV source, Excel source and more
-
Secure Data Exchange:
- Includes built-in support for OAuth, SSL, and token-based authentication.
- You can use our OAuth connector, HTTP connector and more
-
Time Efficiency:
- Reduces development time with prebuilt components
Steps to Install ZappySys SSIS PowerPack
- Download the installer for trial or paid users.
- Run the installer as an administrator and follow the on-screen instructions.
- Restart Visual Studio and verify the components are available in the SSIS Toolbox.
Adding ZappySys to your setup transforms SSIS into a modern, powerful ETL tool capable of handling complex workflows and integrations. If you are using Visual Studio 2022 this article can help you
Conclusion
SSIS in Visual Studio 2022 is essential for efficiently creating and managing ETL workflows. Enhancing it with the ZappySys SSIS PowerPack provides the advanced functionalities required for modern data integration scenarios, ensuring seamless connectivity, robust transformations, and secure data handling.
If you have any challenges, the ZappySys Support Team or the Visual Studio Community can assist you.


