Introduction
Loading data from SQL Server to Salesforce using SSIS (SQL Server Integration Services) allows you to seamlessly transfer information between on-premises databases and cloud-based Salesforce. This process involves utilizing specialized SSIS components to establish a connection, extract data from SQL Server, and load it into Salesforce. Here’s a concise guide to help you accomplish this task:
Prerequisites
Ensure you have the following installed:
- SQL Server Data Tools (SSDT): Install SQL Server Data Tools, the development tool for SSIS.
- ZappySys SSIS PowerPack: Download and install the ZappySys SSIS PowerPack.
You can use SSIS Salesforce Destination Connector, SSIS Salesforce API Task, and SSIS Salesforce Connection Manager.
Steps to Load SQL Server Data to Salesforce using SSIS
-
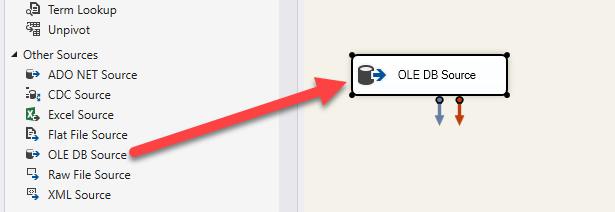
Read the data from the source, being any desired source component. For example, we will use the ZappySys OLE DB Source component, drag-drop the OLE DB Source component, and configure it to load from the SQL database.
-
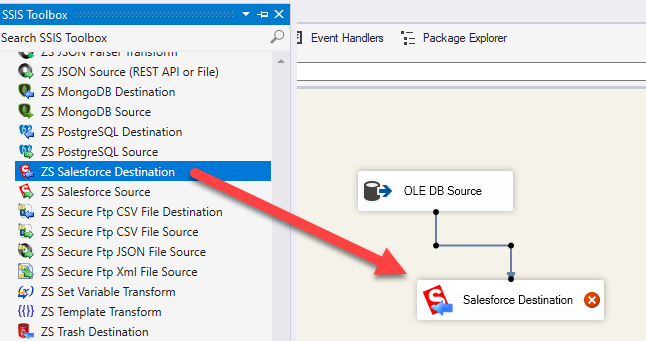
From the SSIS Toolbox drag and drop ZS Salesforce Destination on the Data Flow Designer surface connect the source component with it, and double-click to edit it.
-
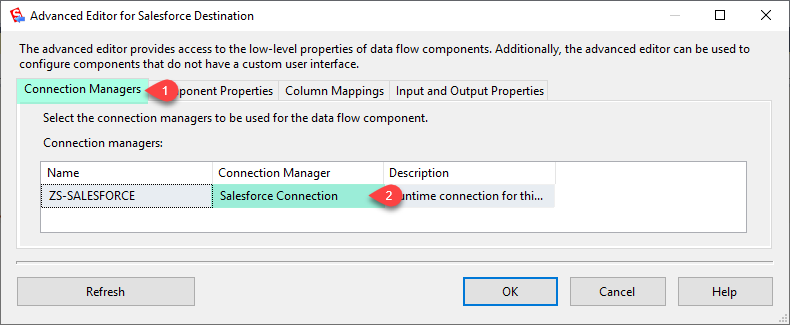
Select New Connection to create a new connection:
-
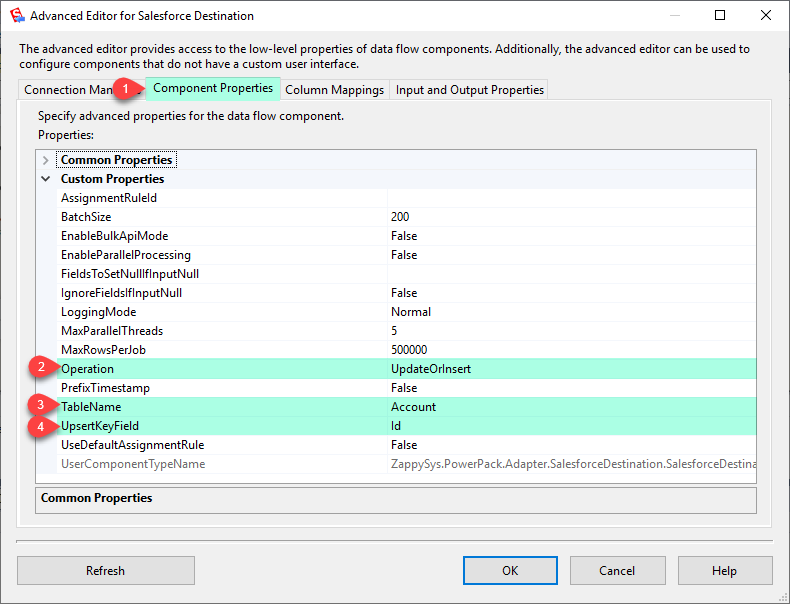
Now, In the Component Properties, Set Operation to UpdateOrInsert, and select TableName and UpsertKeyField.
-
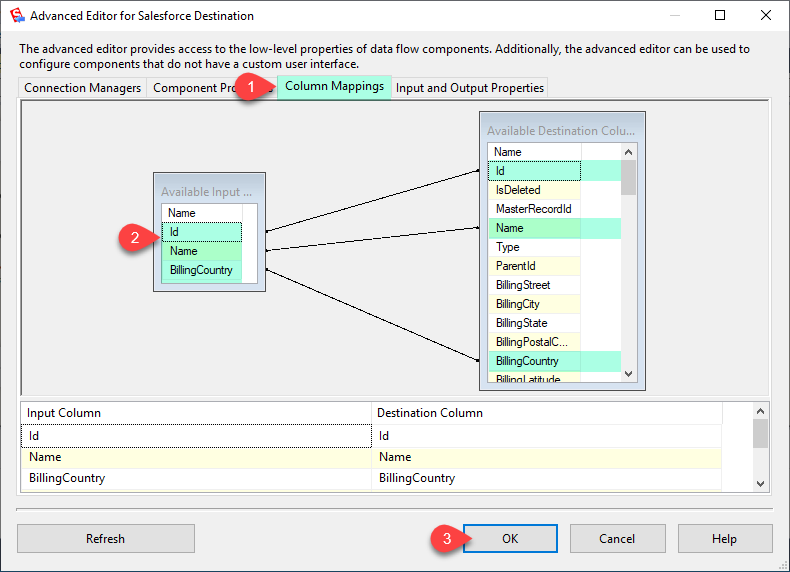
In the Columns Mappings Tab, Map Primary Column and others you want to update or insert records.
-
Now, Click on the OK button to save the SalesForce Destination configure setting UI. That’s it; We successfully configured the SalesForce Call. In a few clicks, we configured the Salesforce call using ZappySys Salesforce Connector.
Conclusion
In this short guide, we’ve outlined the basic steps to load data from SQL Server to Salesforce using SSIS. This process involves setting up connections, configuring components, and mapping columns appropriately. We’ve used OLE DB Source, Salesforce Destination & Salesforce Connection Manager.
