Introduction
In this article, we will demonstrate how to download files from the web using ZappySys SSIS tasks and then compress them using the ZS Compression Task in SSIS. This method allows you to automate downloading files and managing their compression within your SSIS package.
Prerequisites
- SSIS PowerPack: Download and install the ZappySys SSIS PowerPack from here.
Method 1: Downloading Files Using the REST API Task
-
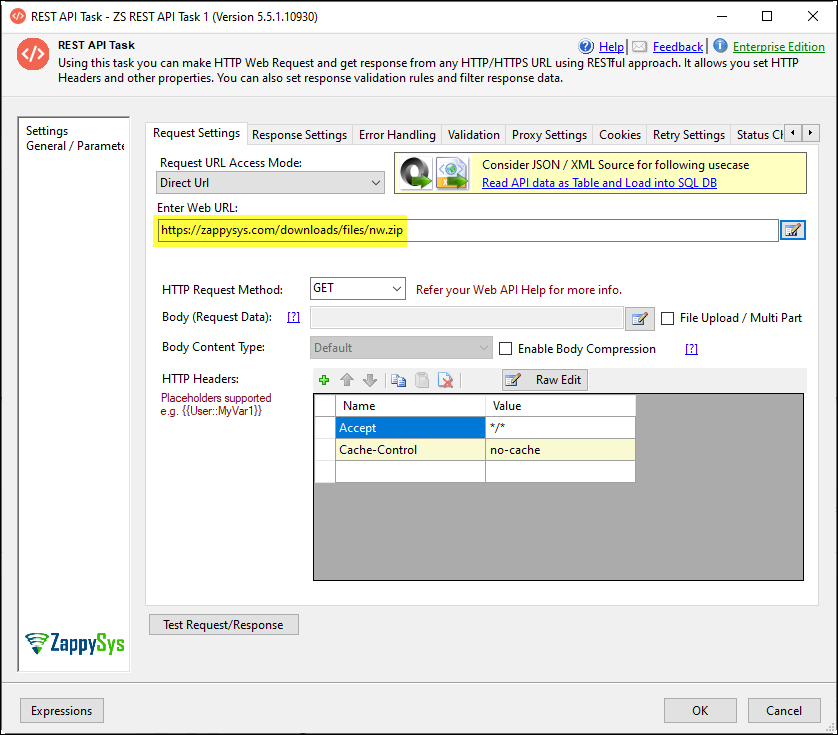
Drag and drop ZS REST API Task from the SSIS Toolbox into the Control Flow.
-
Double-click the task to edit. In the Request Settings tab, enter the following URL to download the file:
https://zappysys.com/downloads/files/nw.zip
-
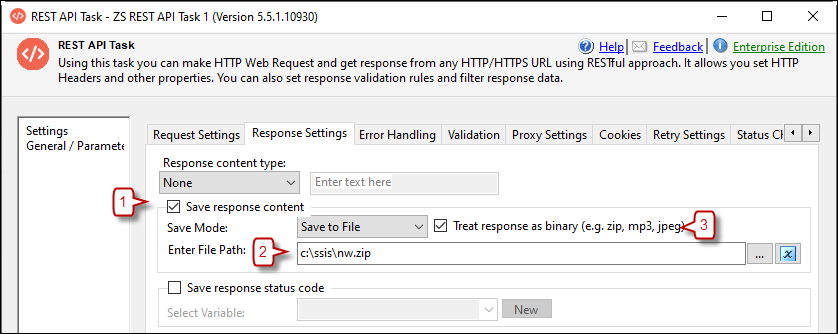
Go to the Response Settings tab.
-
Check the Save Response Content option.
-
Set the Save Mode to “Save to file.”
-
Specify the target file path, e.g.,
c:\ssis\nw.zip. -
Check the Treat response as binary option to download binary files such as ZIP, images, or media files.
-
After configuring the task, click OK and execute the package. It will download the file to the specified location.
Downloading From Secure Pages
If you need to download files from a secure page that requires authentication, follow these steps:
- Use an HTTP Connection or OAuth Connection in the REST API Task for secure file downloads.
- Configure the appropriate connection settings for authentication.
Method 2: Downloading Files Using the Download File Task
-
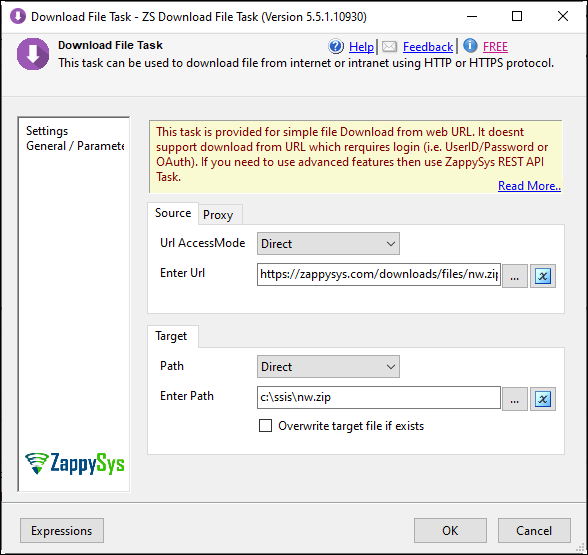
Drag the ZS Download File Task from the SSIS Toolbox into the Control Flow.
-
Set the Url Access Mode to Direct.
-
Enter the following URL:
https://zappysys.com/downloads/files/nw.zip -
Specify the target file path, e.g.,
c:\ssis\nw.zip.
-
Click OK and run the package to download the file.
Compressing Files Using the Compression Task
Once the file has been downloaded, you can compress it using the ZS Compression Task in SSIS.
-
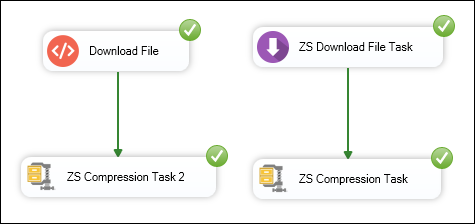
Drag and drop the ZS Compression Task from the SSIS Toolbox into the Control Flow and connect with the REST API or Download file Task.
-
Double-click the Compression Task to open the editor. Select the Compress File(s) option. Choose between:
- Create a single archive: Compress multiple files into a single ZIP archive.
- Create multiple archives: Compress each file individually.
-
Set the file source from the previous step and the target file path for the compressed archive:
D:\Zappysys\Test\new.zip. -
Chose the OverwriteAll option
-
After configuring the task, click OK and run the package. The file will be compressed as specified.

Additional Compression Options
- Compress with Folder Structure: Preserve the folder structure when compressing.
- Uncompress Files: Decompress one or more files to a specified location.
- Variables and expressions in the path: You can check our article here about how to use variables and expressions in the path
Video Tutorial
")
Conclusion
You can easily automate downloading files from the web and compressing using ZappySys SSIS PowerPack components such as the REST API Task, Download File Task, and Compression Task. This is an efficient way to manage large datasets or files within your SSIS workflows. If you need further assistance, contact the ZappySys support team.