When attempting to add an existing SSIS Package (DTSX file) to your project or importing a project from SSISDB Catalog using the NEW > Project > Integration Services Import Project Wizard option in SSDT, you might encounter the following error.
Introduction
The task with the name "???????????" and the creation name "SSIS.ReplacementTask" is not registered for use on this computer.
Contact Information:
REST API Task; ZappySys LLC (c) All Rights Reserved; SSIS PowerPack; http://www.zappysys.com/support
Possible Cause
The SSIS Upgrade Engine cannot locate Task DLLs for the original version. For instance, if you’re trying to add an SSIS 2012 Package to a project with TargetVersion SQL Server 2017 and lack ZappySys DLLs in the specified folder (e.g., C:\Program Files (x86)\Microsoft SQL Server\140\DTS\Task), it indicates either the absence of SSIS 2012 designer or SSIS PowerPack for that version. If the folder is missing, it implies that SSIS Designer is not installed. Download the correct SSDT BI here
For SSIS 2012 = C:\Program Files (x86)\Microsoft SQL Server\110\DTS\Task
For SSIS 2014 = C:\Program Files (x86)\Microsoft SQL Server\120\DTS\Task
For SSIS 2016 = C:\Program Files (x86)\Microsoft SQL Server\130\DTS\Task
For SSIS 2017 = C:\Program Files (x86)\Microsoft SQL Server\140\DTS\Task
For SSIS 2019 = C:\Program Files (x86)\Microsoft SQL Server\150\DTS\Task
Solution:
There are two ways you can fix this error.
Method-1:
Change your source package to the correct version by adjusting TargetVersion in the project from where you’re copying the SSIS package. Ensure both projects have the same version to prevent the execution of the upgrade process.
Note: The latest version of SSDT for VS 2017 (v 15.8.1 or later) doesn’t include SQL Server 2012 Support. To open packages designed in SSIS 2012 format, use SSDT for VS 2015 or (SSDT 15.8.0 or lower). After SSDT installation, re-install SSIS PowerPack
Method-2:
Change the Target Project TargetVersion to the same version as the source package version.
Method-3:
If importing a project from SSIS Server using Integration Services Import Project Wizard option in Visual Studio results in package corruption, try the following workaround.
Instead of directly importing from the server, export the .ispac file via SSMS to the local disk, and then use the Import Wizard option in Visual Studio. Follow these steps
-
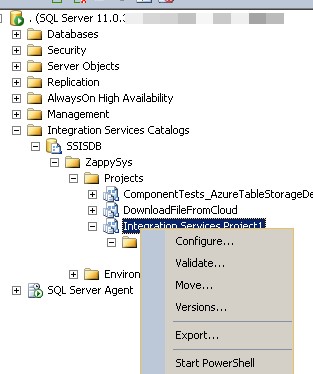
Open SSMS > Connect to SQL Server where SSISDB is located
-
Expand to your SSIS Project. Right-click on the Project Node and click Export
-
This will save as an .ispac file (SSIS Deployment File).
-
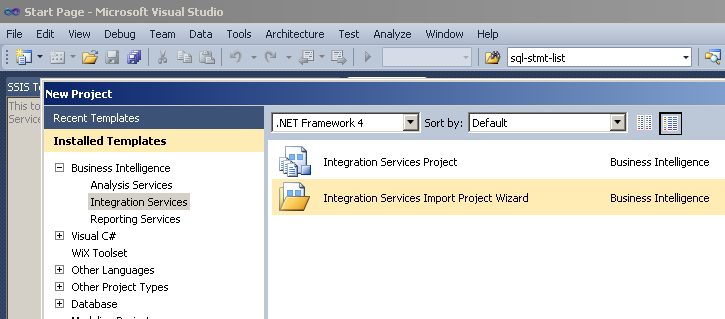
Now, go to Visual Studio (i.e., SSDT).
-
Click NEW > Project >Integration Services Import Project Wizard option
-
On the second screen, select the ‘Import Project Deployment File’ option if it’s not the default.
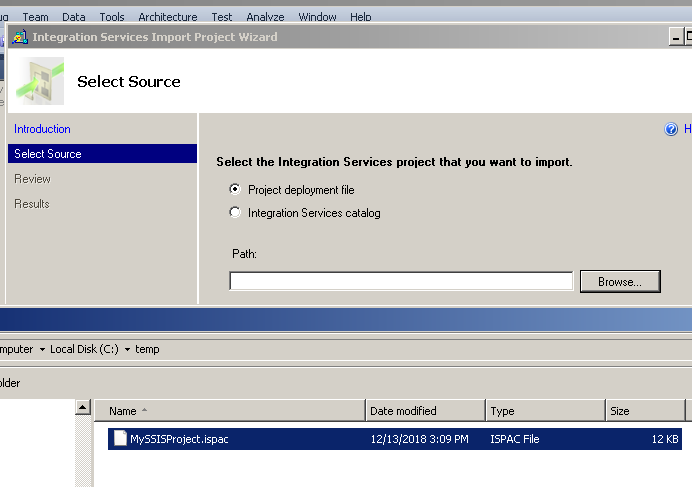
- Choose the file we exported in the previous step..
- Click Import to finish the wizard
- After the import process, make sure to change TargetServerVersion