Introduction
If you need to load Salesforce data into SQL Server for reporting, analytics, or backups, using SSIS is a practical and scalable solution. With the help of the ZappySys SSIS PowerPack, you can connect to the Salesforce API and easily extract, transform, and load (ETL) your data without writing complex code.
In this tutorial, you’ll learn how to import data from Salesforce into SQL Server using SSIS, the Salesforce Source, and the Upsert Destination component, both included in the ZappySys SSIS PowerPack.
Prerequisites
- Download and install the ZappySys ODBC PowerPack.
- A Salesforce account with valid credentials
- SQL Server and SQL Server Data Tools (SSDT)
Steps
Step 1: Configure the Salesforce Source
-
In the Control Flow, drag a Data Flow Task, then double-click to open the Data Flow.
-
Drag the Salesforce Source component from the SSIS Toolbox into the Data Flow canvas.
-
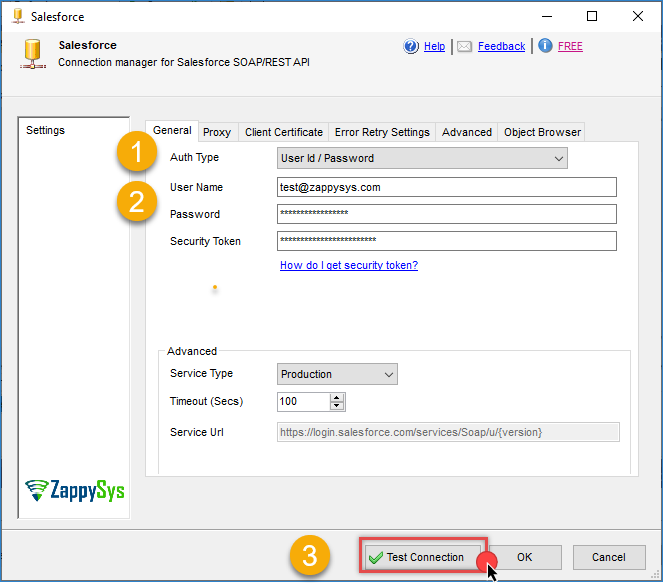
Double-click the Salesforce Source to create a new connection.
-
Enter your Username, Password, and Security Token. If you don’t have the token, follow this guide.
-
Alternatively, you can use OAuth 2.0 for authentication. Follow this article to obtain your client ID and secret.
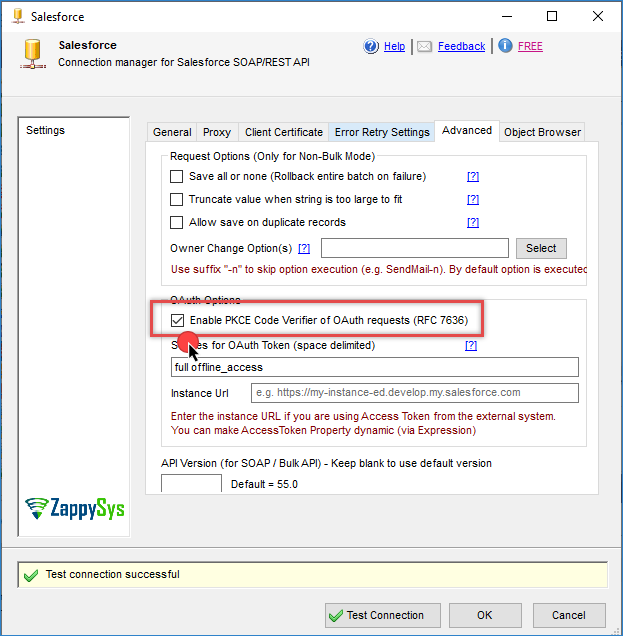
-
If you encounter an error related to the PKCE Code Verifier, enable the PKCE Code Verifier option under the Advanced tab.
-
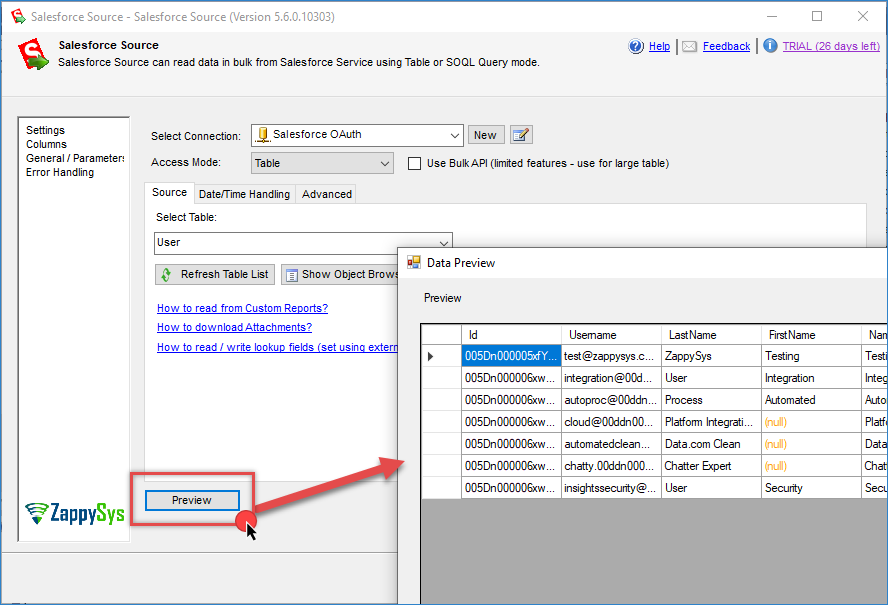
In the Salesforce Source, select the object (table) you want to extract, and click Preview to validate the data.
-
You can also write a custom query to filter, group, or limit your results.


Step 2: Configure the Destination Component
-
Drag and drop a destination component. In this example, we’ll use the Upsert Destination for both insert and update operations.
-
Connect the Salesforce Source to the Upsert Destination, then double-click it.
-
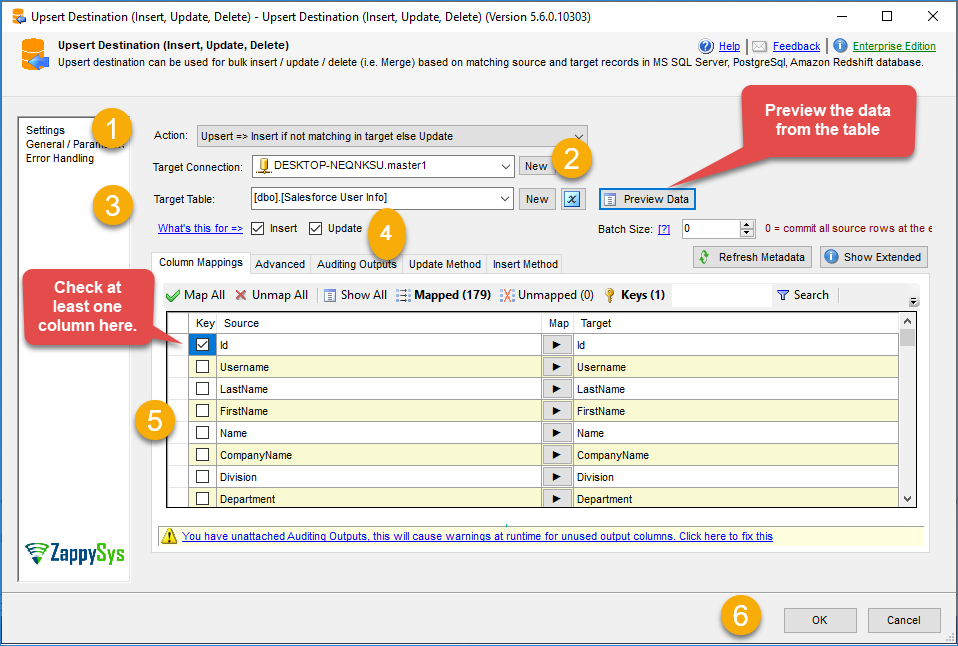
Choose the appropriate action.
-
Create or select a connection to SQL Server.
-
Check or uncheck the options insert and update
-
Select the target SQL Server table and optionally preview its data.
-
Ensure that the column mappings are correct (they will auto-map if the names match).
-
Define at least one key column for the update check.
-
In the Advanced tab, you can enable features like duplicate detection and more.
-
Click OK to save.
-
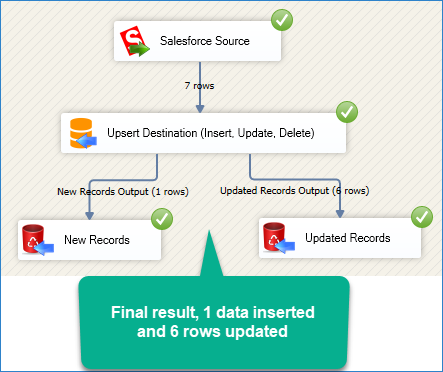
(Optional) Add extra destinations to log or analyze the number of inserted/updated records for monitoring purposes.
Step 3: Run the Package
-
Save the SSIS package.
-
Click Start or Debug to run the package.
-
The Salesforce data will be imported and/or updated into your SQL Server database.
Conclusion
With the ZappySys SSIS PowerPack, importing data from Salesforce into SQL Server is efficient and intuitive. Whether you’re building daily ETL pipelines or running a one-time migration, this solution offers flexibility, speed, and low-code simplicity.
Use this method to centralize your Salesforce data for reporting, integrate it with other systems, or back it up for compliance and disaster recovery.
Visit our official page to explore more connectors, powerful automation features, and real-time data integration tools. Start building smarter, faster, and more scalable solutions today with ZappySys SSIS PowerPack.
References
- Salesforce Source
- Salesforce Source documentation
- Upsert Destination
- Upsert Destination documentation
- Blog articles
- SSIS PowerPack
Contact us
If you encounter any issues or have specific questions, reach out to our support team via live chat or support ticket using our email support@zappysys.com.