Introduction
In this tutorial, you will learn how to copy data from Azure Table Storage to Excel using ZappySys SSIS PowerPack components. This process is useful for exporting structured data from Azure cloud storage into Excel spreadsheets for reporting, analysis, or archiving purposes.
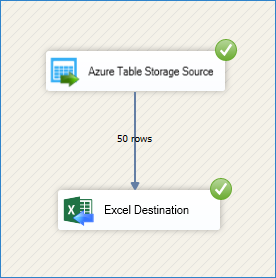
We will use the Azure Table Storage Source to read data and the Excel Destination to write data into an Excel file.
Prerequisites
- Download and install the ZappySys SSIS PowerPack
- Microsoft Azure account
- Microsoft Excel installed
Steps
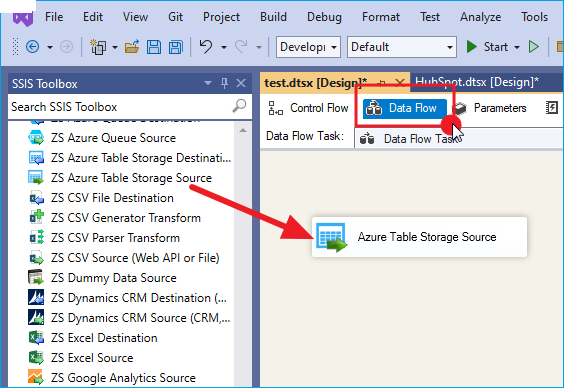
Step 1: Add the Azure Table Storage Source
-
Add a Data Flow Task to your control flow and double-click it to enter the Data Flow tab.
-
Drag and drop the ZS Azure Table Storage Source component onto the Data Flow Task.
-
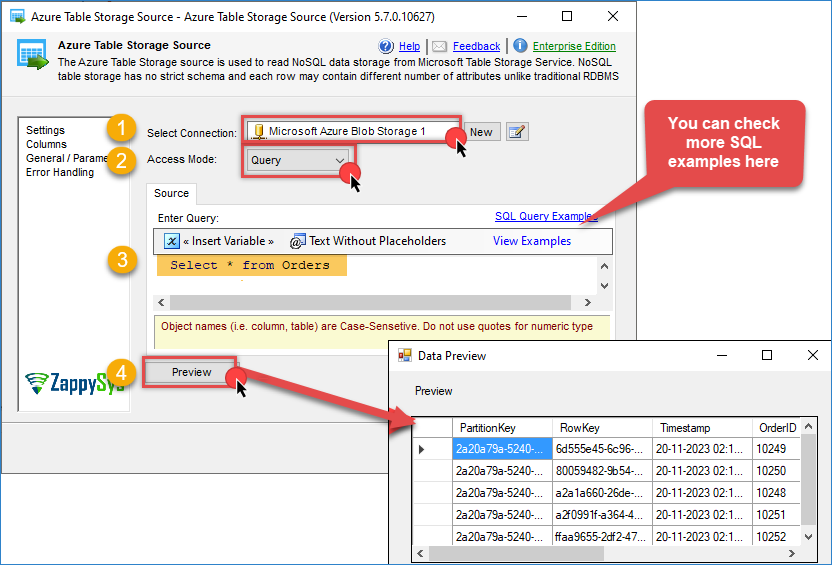
Double-click the component to configure it.
-
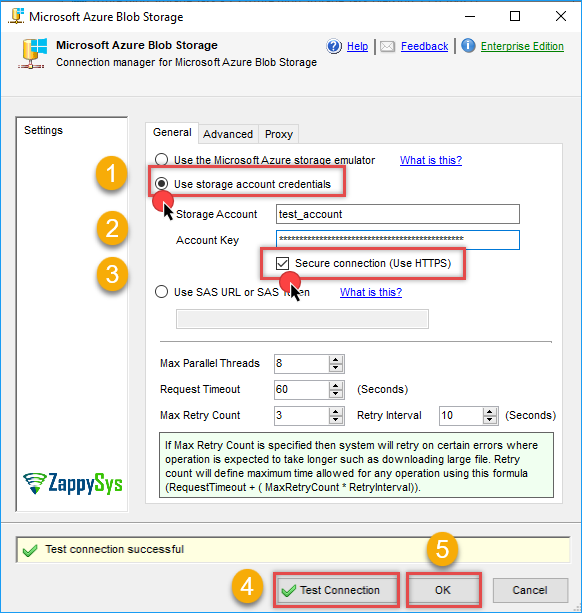
You can choose to use the Microsoft Azure Storage Emulator option.
-
Alternatively, use the SAS URL or SAS Token.
-
In this example, we will use the Storage Account Credentials option. Enter your Storage Account and Account Key.
-
Configure additional settings as needed under the Advanced and Proxy tabs.
-
Click Test Connection and then OK to save the configuration.
-
Enter the table name or use a query to extract the data. Click Preview to verify that the data loads correctly.
Step 2: Add the Excel Destination
-
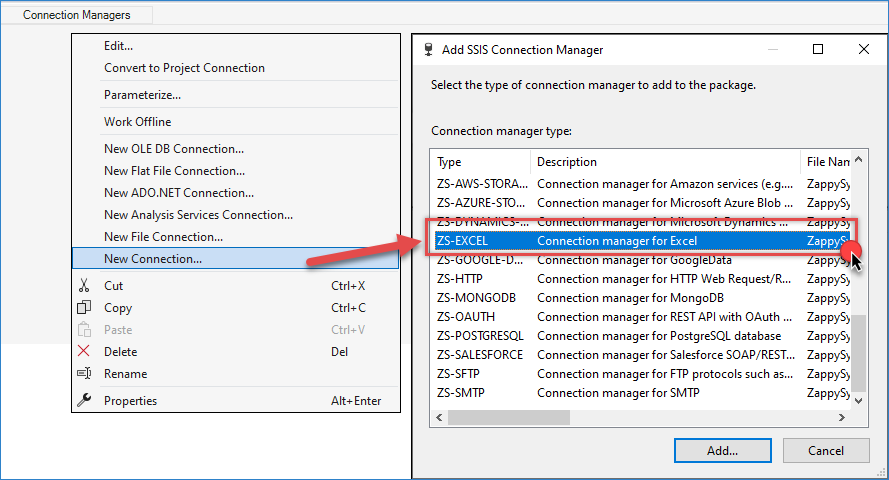
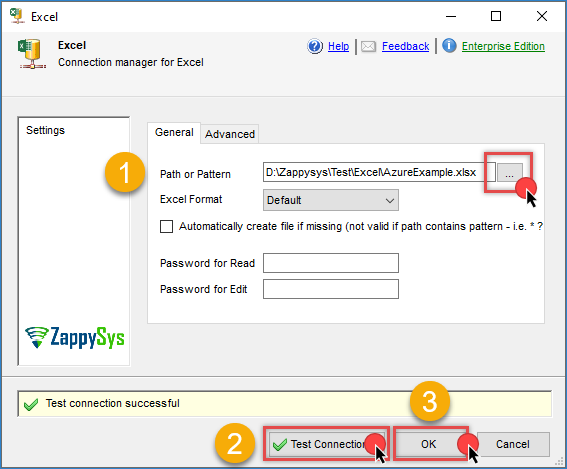
In the Connection Managers panel, right-click and select New Connection, then choose ZS-EXCEL.
-
Configure the Excel connection by entering the file path and any required settings. Test the connection and click OK to save.
-
In the SSIS Toolbox, drag the Excel Destination component into the Data Flow and connect the Azure Table Storage Source output to it.
-
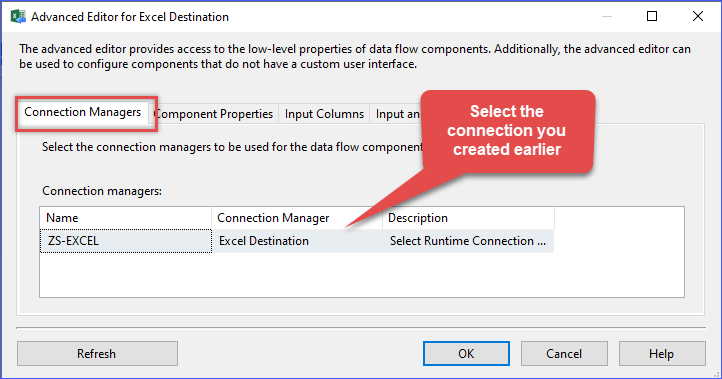
Double-click the Excel Destination and select the connection you just created.
-
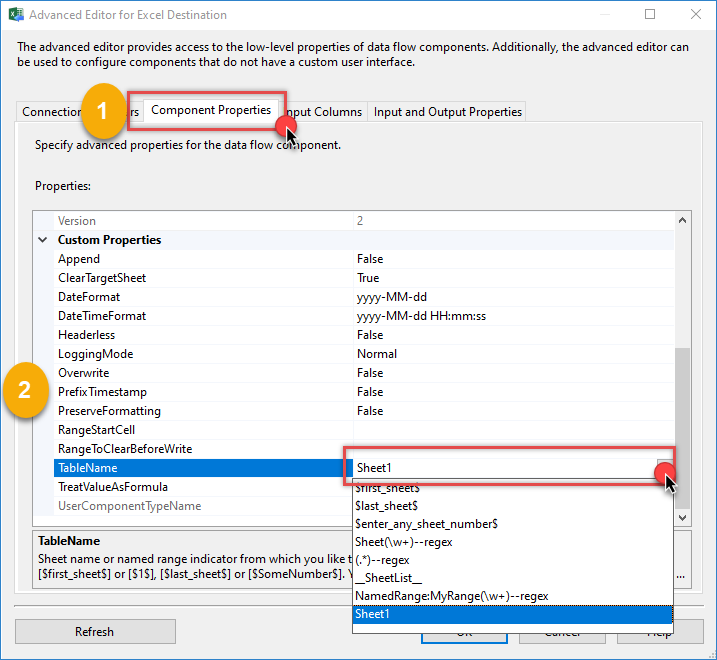
In Component Properties, choose the sheet name and set additional options such as overwrite behavior or range configuration.
-
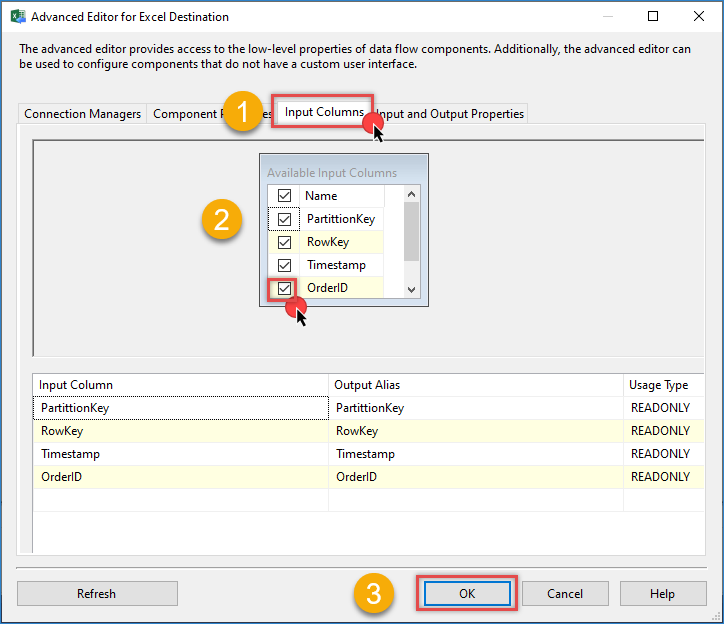
Go to the Input Columns tab and select the fields you want to include in the export.
-
Click OK to finalize the configuration.
Step 4: Run and Verify
-
Run the SSIS package.
-
Open the resulting Excel file and verify that the data has been exported successfully.
Conclusion
Copying data from Azure Table Storage to Excel becomes a streamlined and user-friendly process. The visual components eliminate the need for complex scripting and reduce setup time. While traditional scripting offers flexibility, the ZappySys approach enables faster development and easier maintenance, making it the recommended solution for most use cases.
Visit our official page to explore more SSIS components, automation features, and real-time data integration tools included in ZappySys SSIS PowerPack.
References
- Azure Table Storage Source
- Azure Table Storage Source documentation
- Excel Destination
- Excel Destination documentation
- Blog articles
- SSIS PowerPack
Contact us
If you encounter any issues or have specific requirements, feel free to reach out to our support team via chat or support ticket.