Introduction
In this guide, we will walk through the process of converting an Excel file into a PDF using Adobe APIs within an SSIS package. This involves setting up an OAuth connection, uploading the file, converting it to PDF, and retrieving the converted document.
Prerequisites
SSIS PowerPack: Download and install the ZappySys SSIS PowerPack
Get Credentials for Authentication of Adobe PDF Services, follow Adobe PDF Services API documentation
Step-by-Step Guide
Let’s jump right in, step by step, as we learn how to create a PDF file from an Excel Sheet using Adobe APIs in SSIS.
-
Firstly, You need to Download and Install SSIS ZappySys PowerPack.
-
Once you have finished the first step, Open Visual Studio and Create a New SSIS Package Project.
-
Now, follow the steps below to achieve our requirement.
Step 1: Create OAuth Connection
To authenticate with Adobe APIs, we need to establish an OAuth connection using the client credentials.
-
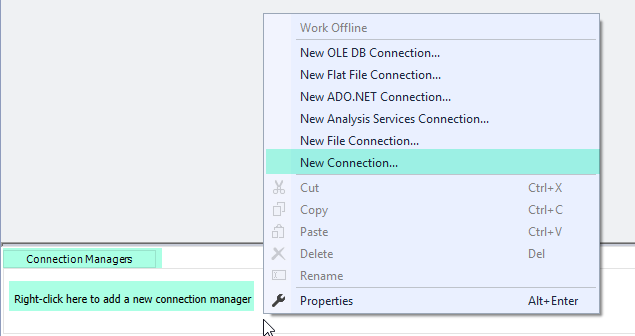
Right click in the Connection Manager panel and click on New Connection
-
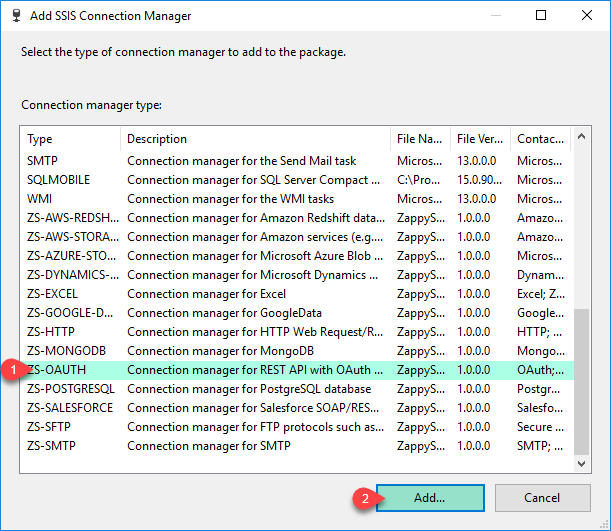
Select ZS-OAUTH Connection Manager from the Connection Managers list and Click on Add Button.
-
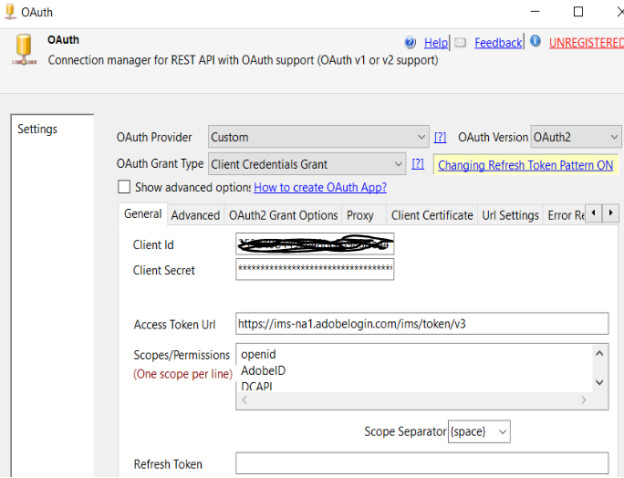
Configure new OAuth Connection for Adobe PDF Services as below, Set OAuth Provider to
Customand OAuth Version toOAuth2. -
Select Client Credentials Grant as the OAuth Grant Type.
-
Enter the Client ID and Client Secret.
-
Set the Access Token URL to
https://pdf-services.adobe.io/token. I’m usinghttps://ims-na1.adobelogin.com/ims/token/v3. -
Add the required Scopes/Permissions (e.g.,
openid,AdobeID,DCAPI). -
Save and test the connection.
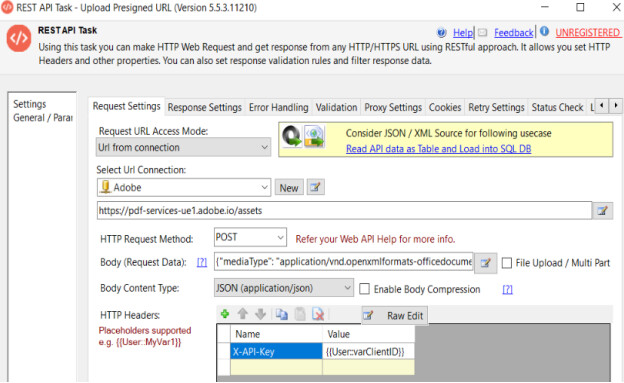
Step 2: Upload Pre-Signed URL
Before uploading the Excel file, obtain a pre-signed URL from Adobe APIs.
-
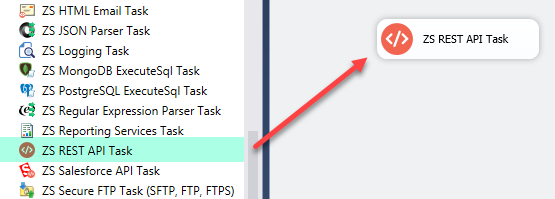
From the SSIS Toolbox look for items starting with “ZS”. Drag and Drop [ZS Rest API Task] to Designer Surface.
-
Configure the Request Settings tab Request URL Access Mode to
URL from connection. -
Select the Adobe OAuth connection created earlier.
-
Set the Request Method to
POST. -
In the Body (Request Data) section, specify the media type:
{"mediaType": "application/vnd.openxmlformats-officedocument.spreadsheetml.sheet"}
-
In the Headers section, add
X-API-Keywith your Adobe API key.
-
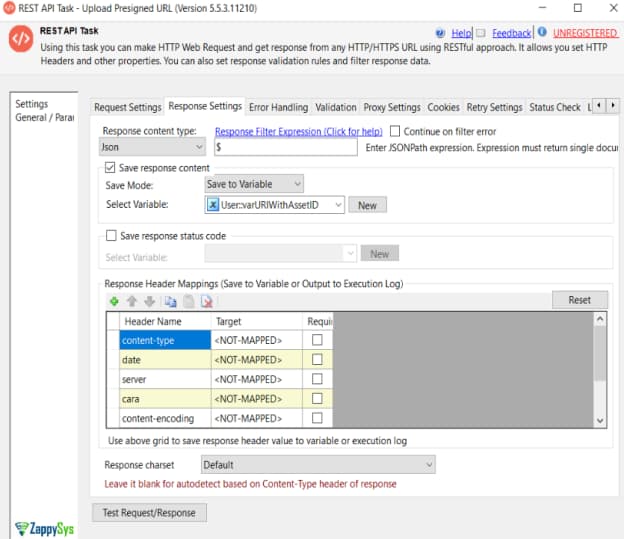
Now, Configure the Response Settings tab to capture important information from the API response.
 Key Configuration Settings:
- Response content type:
Json - Response Filter Expression:
$
(This retrieves the entire JSON response) - Continue on filter error: unchecked
- Save Mode:
Save to Variable - Select Variable:
User::varURIWithAssetID
(This captures the URL with the Asset ID returned by the API)
- Response content type:
-
Execute the task to get the pre-signed URL.
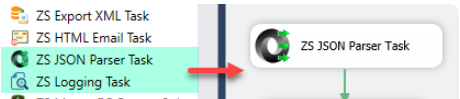
Step 3: Configure JSON Parser Task to parse Response
-
Drag and drop the ZS JSON Parser Task from the SSIS toolbox to the design panel.
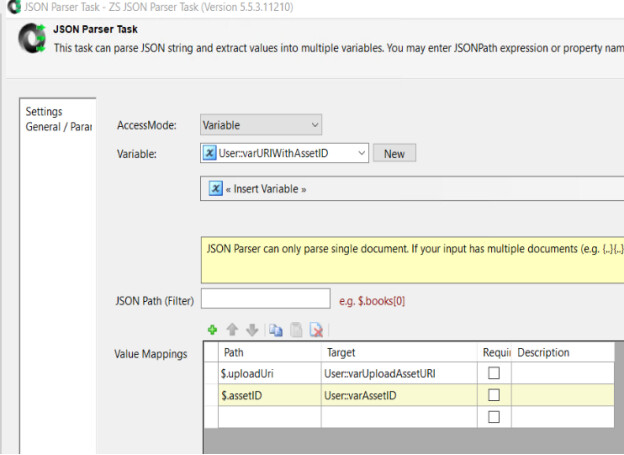
-
We need to configure the JSON Parser Task to parse the response JSON to fetch uploadUri & assetID from the Response. Parse the JSON Properties and set to SSIS Variables as like below sample screenshot.
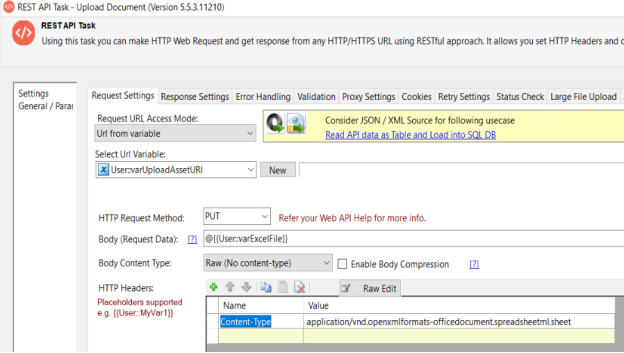
Step 4: Upload the Document
- Add another ZS REST API Task from the SSIS toolbox to upload the Excel file.
- Configuring Request Settings tab
- Set the Request URL to the pre-signed URL obtained in Step 3.
- Change the HTTP Method to
PUT. - Enable File Upload/Multi-Part and specify the file path.
- Set
Content-Type: application/vnd.openxmlformats-officedocument.spreadsheetml.sheet
- Execute the task to upload the document.
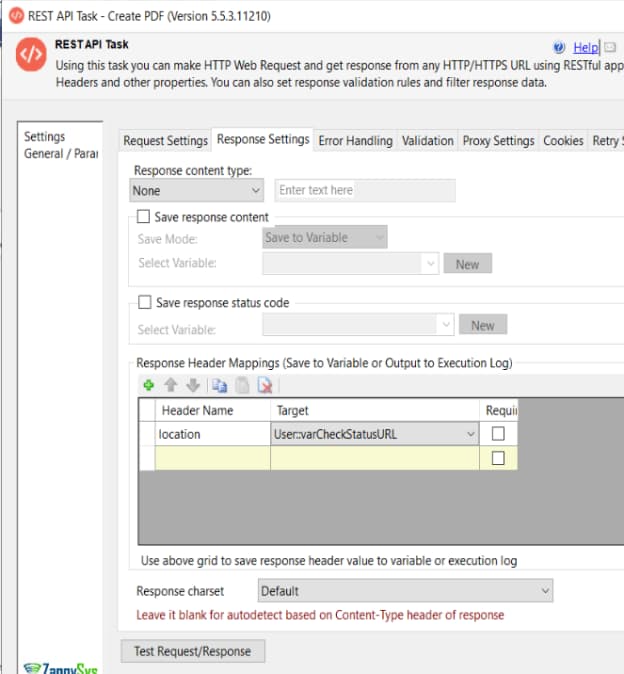
Step 4: Create PDF from the Uploaded File
- Add another ZS REST API Task to send a conversion request.
- Select URL Connection - Select your existing OAuth Connection Manager.
- Configuring Request Settings tab: set the Request Method to
POST. - Enter Request URL:
https://pdf-services.adobe.io/operation/createpdf - In the Body (Request Data), specify:
{"assetID": "{uploaded_asset_id}", "targetFormat": "pdf"}
-
Configure Request Headers:
x-api-key:{{User:varClientID}} -
Configure Response Tab: Configure Response Headers Mappings to save the location header to the SSIS variable.
-
Execute the task and store the response, which includes a job ID.
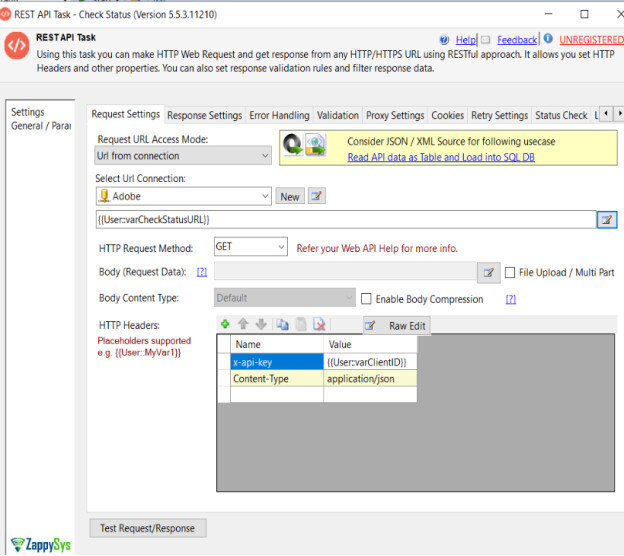
Step 5: Check Status of Conversion
-
Add another ZS REST API Task to check the conversion status.
-
Configure Request Settings tab
-
Select URL Connection - Select your existing OAuth Connection Manager
-
Set the Request Method to
GET. -
Use the job ID obtained in Step 4 in the request URL.
-
Configure Request Headers:
x-api-key:{{User:varClientID}}
-
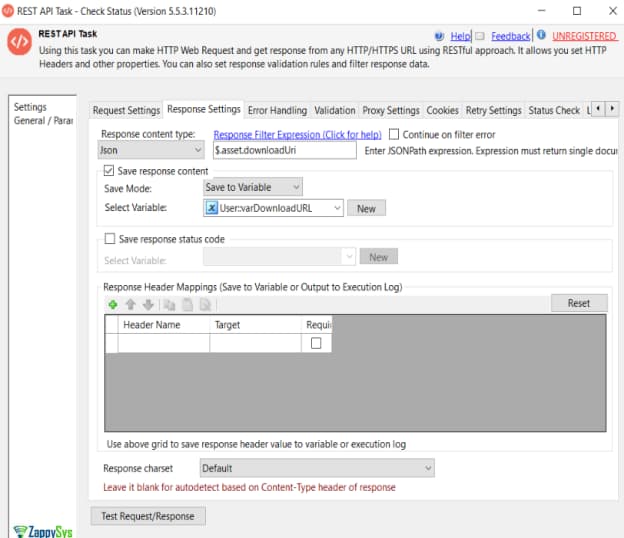
Configure Response Settings tab
Key Configuration Settings:- Response content type:
Json - Response Filter Expression:
$.asset.downloadUri
(This targets a specific property in the JSON to extract the download URL) - Save Mode:
Save to Variable - Select Variable:
User::varDownloadURL
(This stores the direct download URL returned by the API)
- Response content type:
-
Execute the task until the status indicates completion.
Step 6: Download the PDF
-
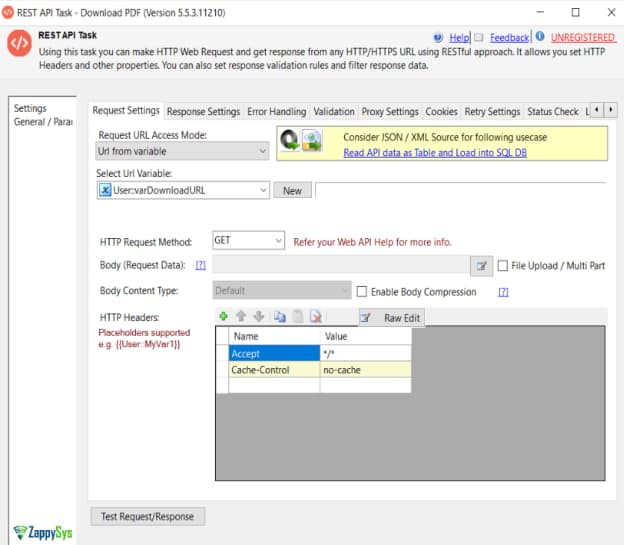
Add a final ZS REST API Task to download the converted PDF.
-
Configure Request Settings tab: Use the URL from the previous step and set the Request Method to
GET.
-
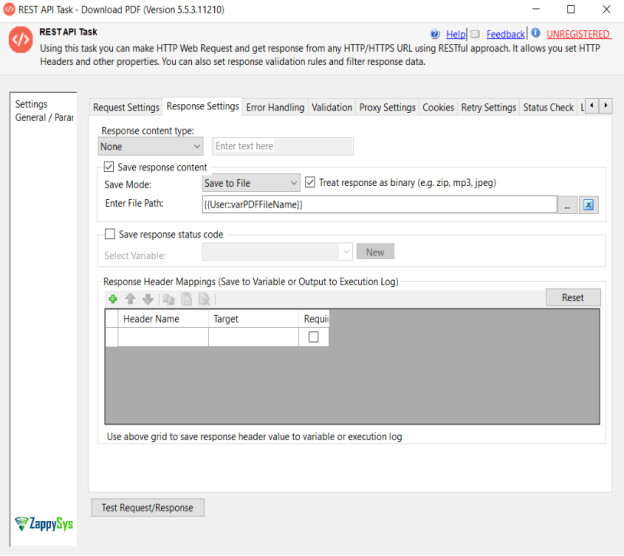
Configure Response Settings tab
Key Configuration Settings:- Response content type:
None - Save Mode:
Save to File - Select Treat response as binary checkbox
- Enter File Path:
User::varPDFFileName
(This stores the file returned by the API physically to the folder path)
- Response content type:
-
Save the response to a file location.
Conclusion
By following these steps, you can successfully convert an Excel sheet into a PDF using Adobe APIs in SSIS. This workflow ensures automation and seamless integration within your ETL processes.