Introduction
This guide walks you through how to schedule SSIS packages effectively, including those built with ZappySys components, using tools like SQL Server Agent. Automating your SSIS packages ensures consistent ETL processing, regular data refreshes, and eliminates the need for manual execution. You’ll also learn how to pass parameters in SQL Server Agent when executing ZappySys-powered packages.
Prerequisites
- A working SSIS package
- SQL Server Agent installed and running.
- Download and install the ZappySys SSIS PowerPack.
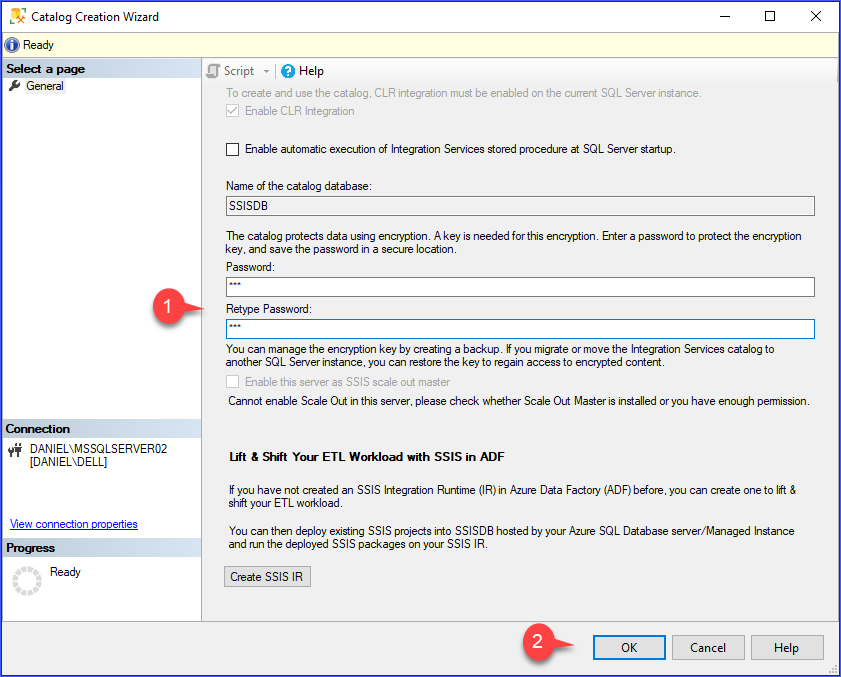
Step 1: Create an SSIS Catalog
- Open SQL Server Management Studio (SSMS).
- Right-click Integration Services Catalogs and select Create Catalog.
- Set an encryption password and click OK.
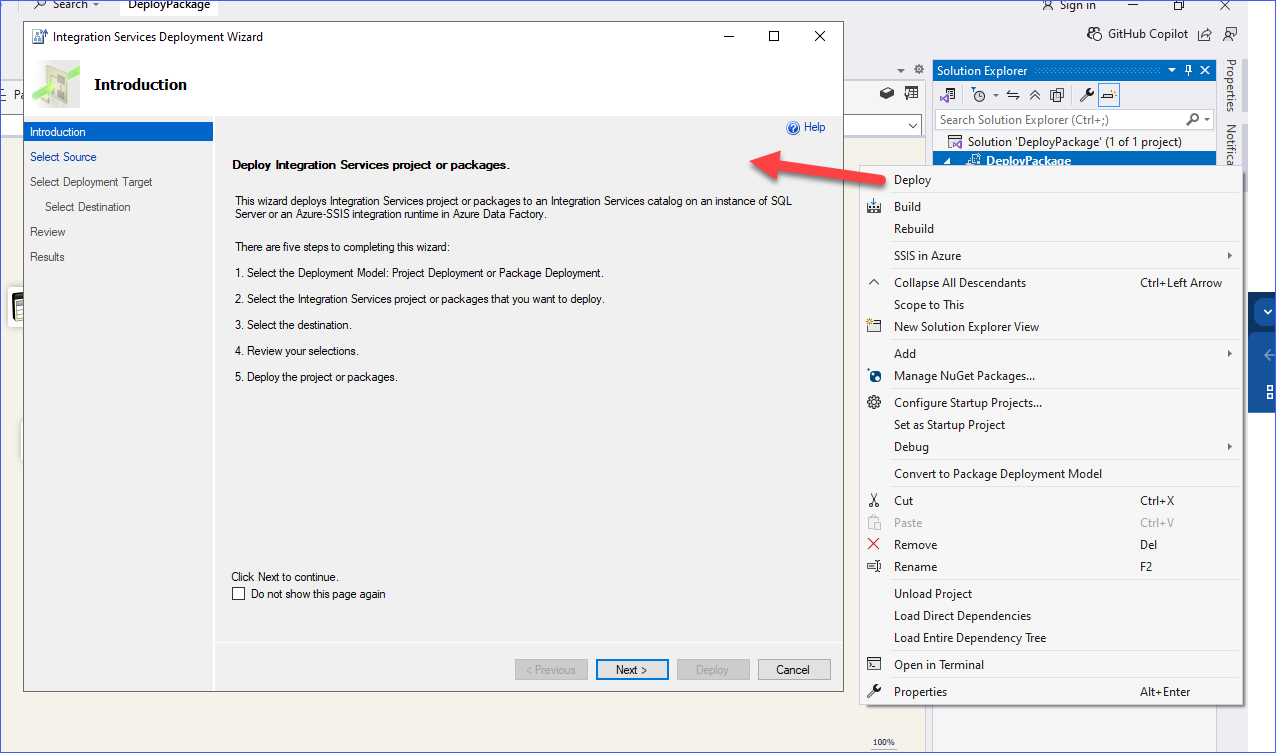
Step 2: Deploy Your Package to SSISDB (Project Deployment Model)
-
In Visual Studio, right-click your SSIS project in Solution Explorer and choose Deploy.
-
In the Deployment Wizard:
- Select SSIS in SQL Server then click Next.
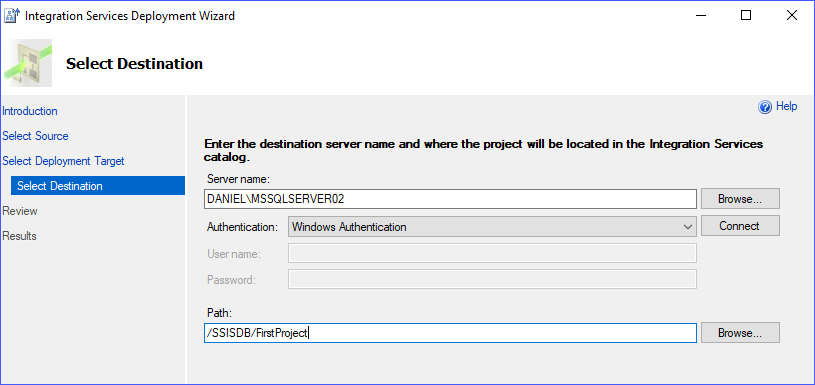
- Enter your server name (visible in SQL Server Management Studio under connection properties).
- Choose the folder within the SSIS Catalog created earlier.
- Click Next.
-
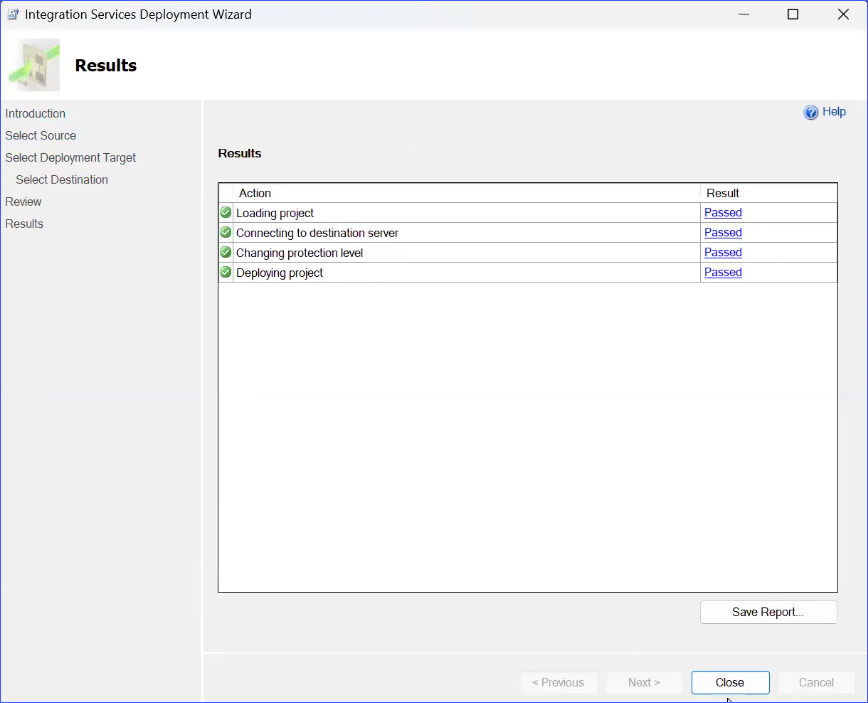
Review the deployment summary and click Deploy.
- Once complete, click Finish.
- Once complete, click Finish.
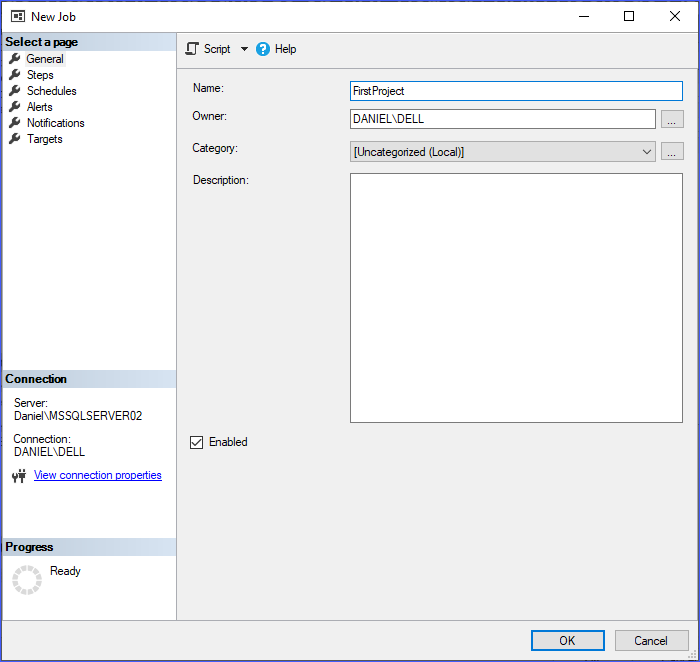
Step 3: Create a SQL Server Agent Job
-
In SSMS, expand SQL Server Agent (ensure it’s running).
-
Right-click Jobs and select New Job.
-
Under the General tab:
- Enter a name (e.g.,
FirstProjet).
- Enter a name (e.g.,
-
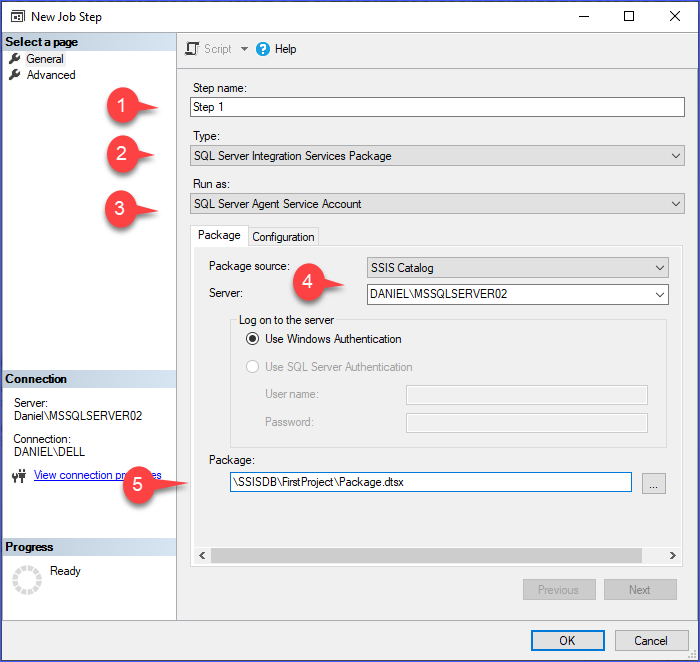
Go to the Steps tab and click New.
-
Configure the step:
- Step name: Enter a descriptive name.
- Type: Select SQL Server Integration Services Package.
- Run as: Choose SQL Server Agent Service Account.
- Package source:
- SSIS Catalog – for SSISDB deployments.
- File System – for
.dtsxfiles.
- Provide the server name and the package path.
- Click OK.
-
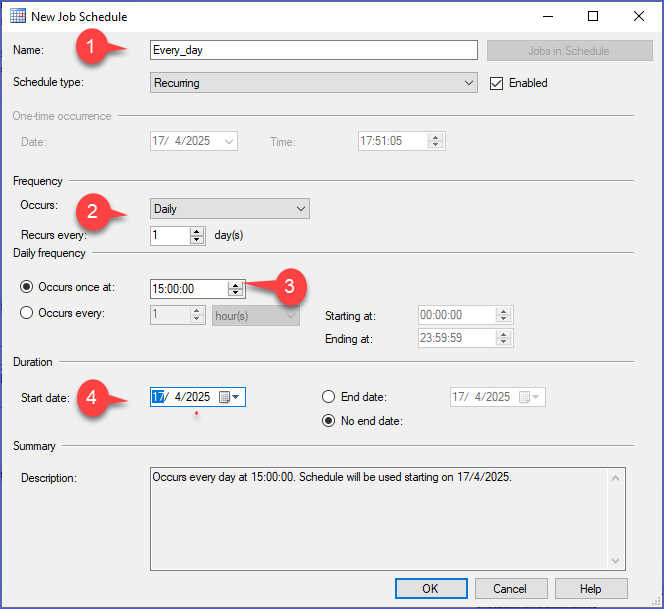
Go to the Schedules tab and click New.
-
Configure the schedule:
- Enter a schedule name.
- Choose the frequency (e.g., daily, weekly).
- Define the start time and recurrence options.
- Click OK to save it.
-
Click OK to save the job.
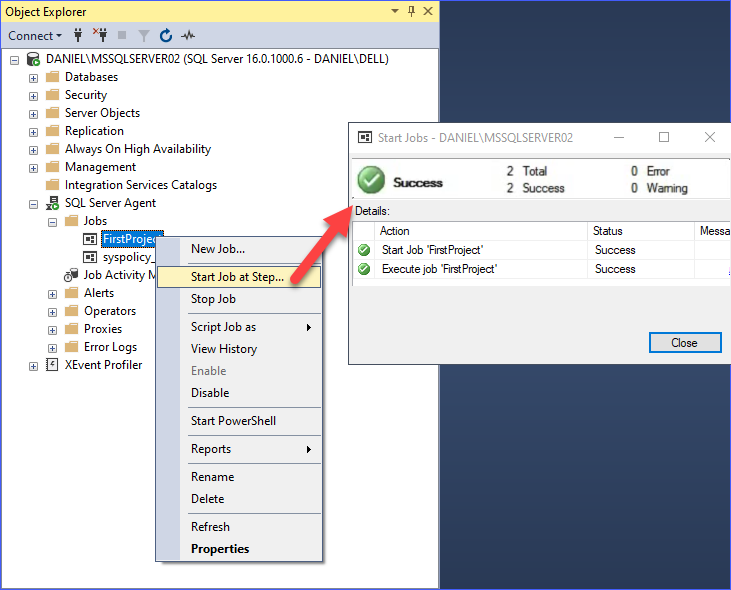
Step 4: Run and Monitor the Job
- In SSMS, under SQL Server Agent, then Jobs, right-click your job and select Start Job at Step.
- A dialog will appear showing progress. Ensure all steps are completed successfully.
Using Parameters with SQL Server Agent
-
In your SSIS package, define parameters in the Parameters tab.
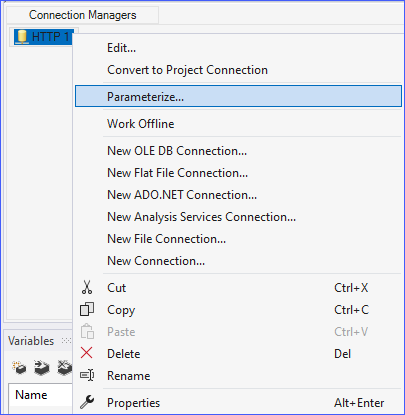
- Right-click a connection or task and choose Parameterize. In this example we are using our ZS-HTTP connection
- Right-click a connection or task and choose Parameterize. In this example we are using our ZS-HTTP connection
-
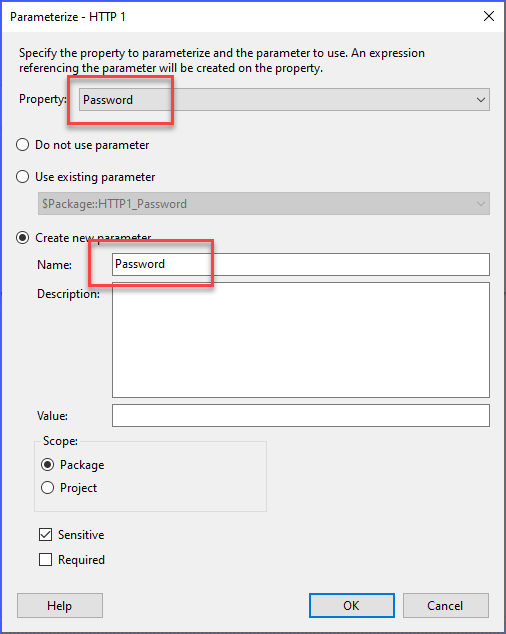
Choose the property to parameterize and assign a name.
-
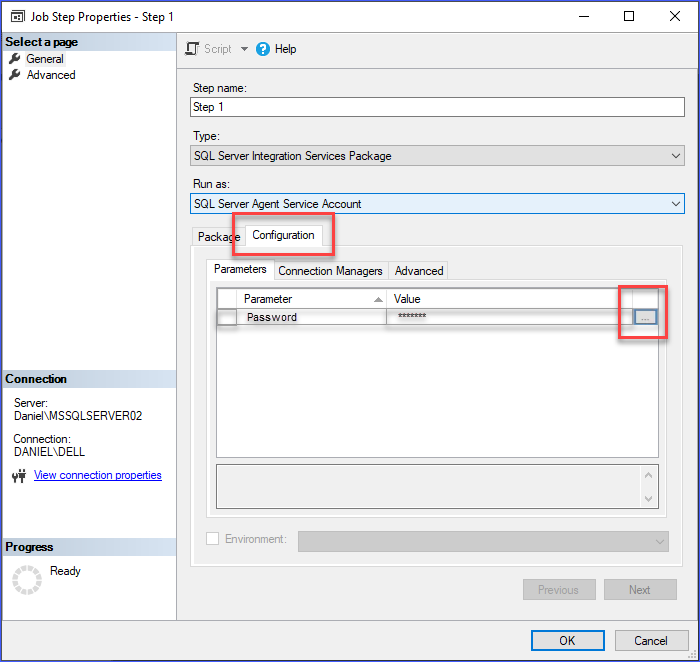
In your SQL Agent configuration, in Step, go to the Configuration tab.
- Click the […] button next to the parameter to assign a runtime value.
- Click the […] button next to the parameter to assign a runtime value.
Considerations
- SQL Server Agent must be running (verify the service in Windows Services).
- For SQL Server Express, use Windows Task Scheduler and
dtexecinstead. - Always test parameter values and schedules before applying in production.
Conclusion
Automating SSIS workflows using SQL Server Agent ensures reliable, repeatable ETL operations—whether your packages use native components or the ZappySys SSIS PowerPack. With job scheduling, parameter support, and monitoring, your data integration becomes more efficient and hands-free.
For more advanced SSIS file operations, explore the ZappySys SSIS PowerPack.
References
- How to design, debug, deploy, schedule SSIS Package (In SQL Agent and Catalog)
- How to parameterize properties in SSIS package and configure them in a SQL job
- ZappySys PowerPack
Contact Us
If you encounter any challenges or have specific use cases, please contact our support team via chat or ticket.