Introduction
If you’re managing email campaigns with Mailchimp and want to pull campaign or subscriber data directly into Excel, integrating ODBC with Excel VBA macros provides a powerful and automated solution. This method enables you to retrieve real-time data from Mailchimp’s API into your spreadsheet with a single click.
In this tutorial, you’ll learn how to connect to Mailchimp using the ZappySys ODBC API Driver and create an Excel macro to retrieve data automatically. This setup is perfect for marketers and analysts who want to generate campaign reports, monitor subscriber growth, or analyze open and click rates directly from Excel.
Prerequisites
- Download and install the ZappySys ODBC PowerPack
- A Mailchimp account with access to campaign and list data
- Microsoft Excel (Windows version with macro support)
- Basic familiarity with the VBA editor in Excel
Step-by-step guide
Step 1: Get Credentials from Mailchimp
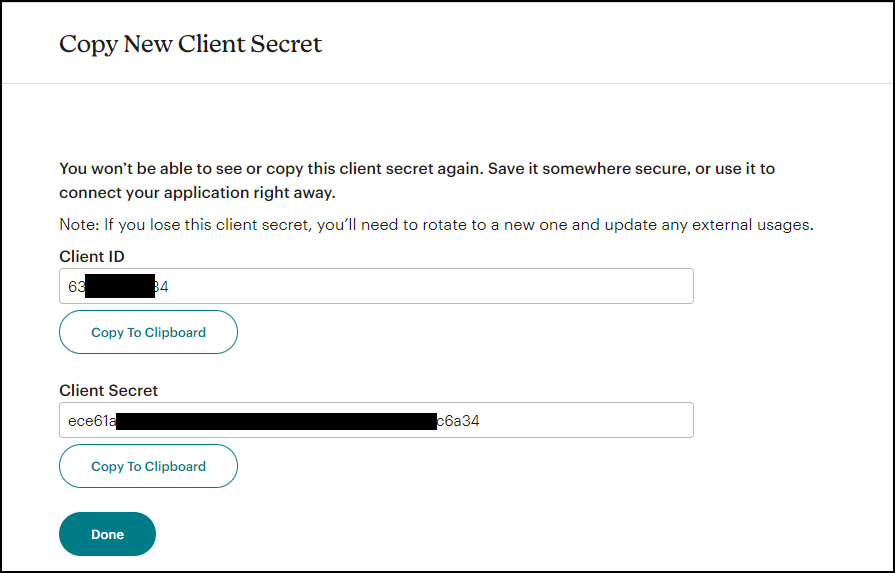
Method 1: OAuth Authentication
- To connect via OAuth, navigate to the Registered Apps page in your Mailchimp account and click Register An App.
- Complete the registration form. For the Redirect URL field, enter
https://zappysys.com/oauth2. - Save the provided Client ID and Client Secret for later use.
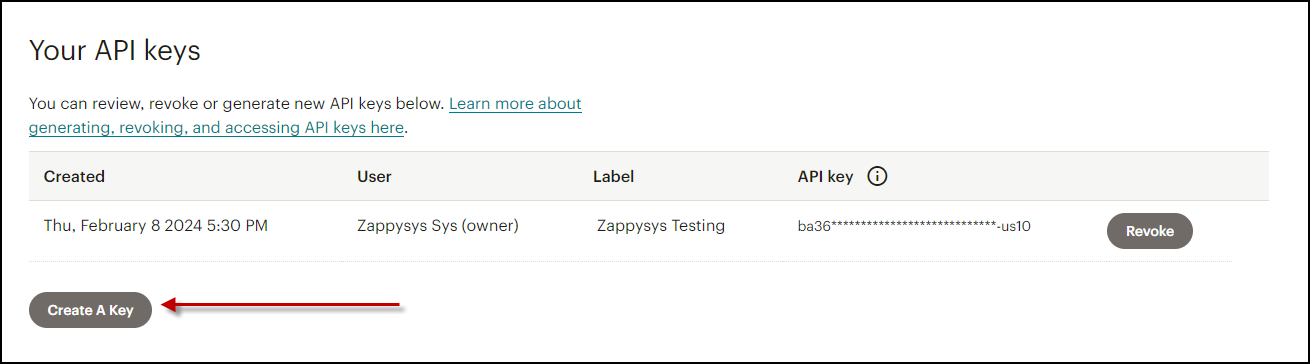
Method 2: API Key Authentication
- To connect via API Key, generate it in your Mailchimp account.
- Click Create a Key, name it, and copy the new key for later use. Refer to Mailchimp’s API documentation here.
Step 2: Create a New Driver
-
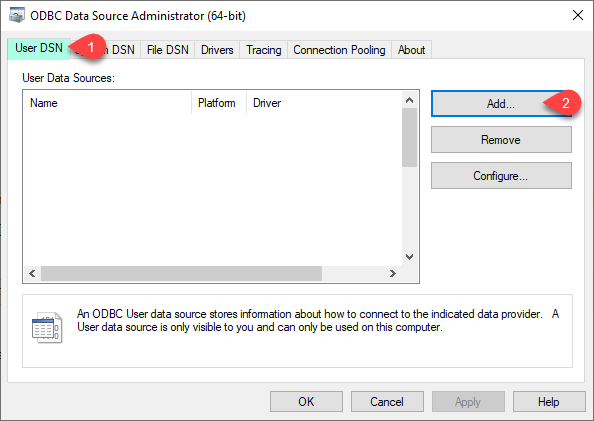
Open the ODBC Data Source by typing “ODBC” in the search box and launching the ODBC Data Source.
-
For individual or shared access, select User DSN or System DSN. Click Add under the System tab to add a new System DSN.
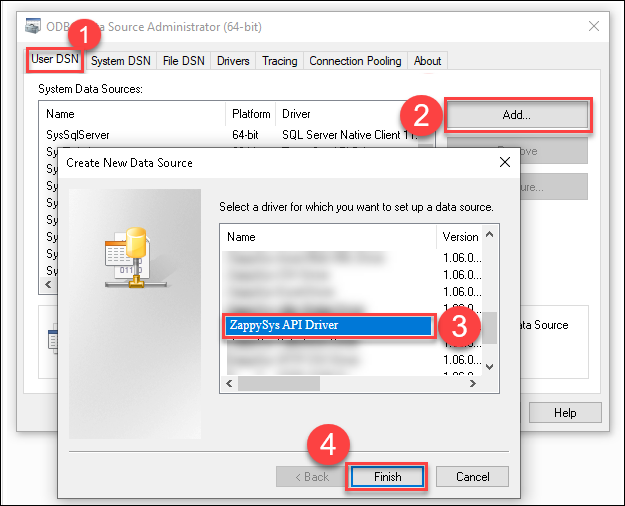
-
From the driver list, select ZappySys API Driver, choose Mailchimp from the connector list, and press Continue.

Step 3: Mailchimp Connector Configuration
-
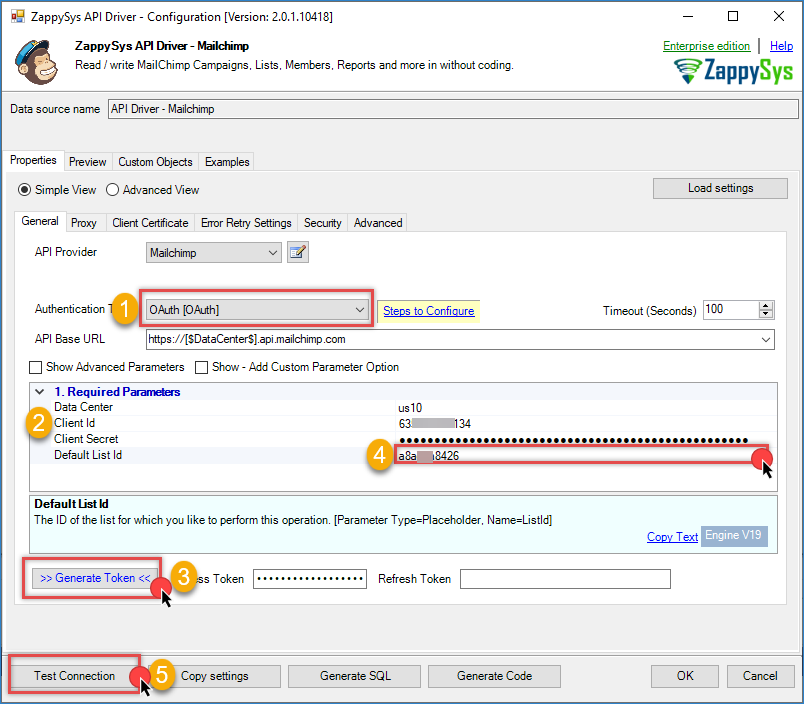
For OAuth Authentication, select OAuth as the authentication type, then enter your Client ID, Client Secret, Data Center, and Default List-ID. A dropdown menu allows selecting the Default List ID.
Note: Identify the Data Center (DC) from your Mailchimp URL. For instance,https://us1.admin.mailchimp.com/account/api/manageindicates us1 is the Data Center.
-
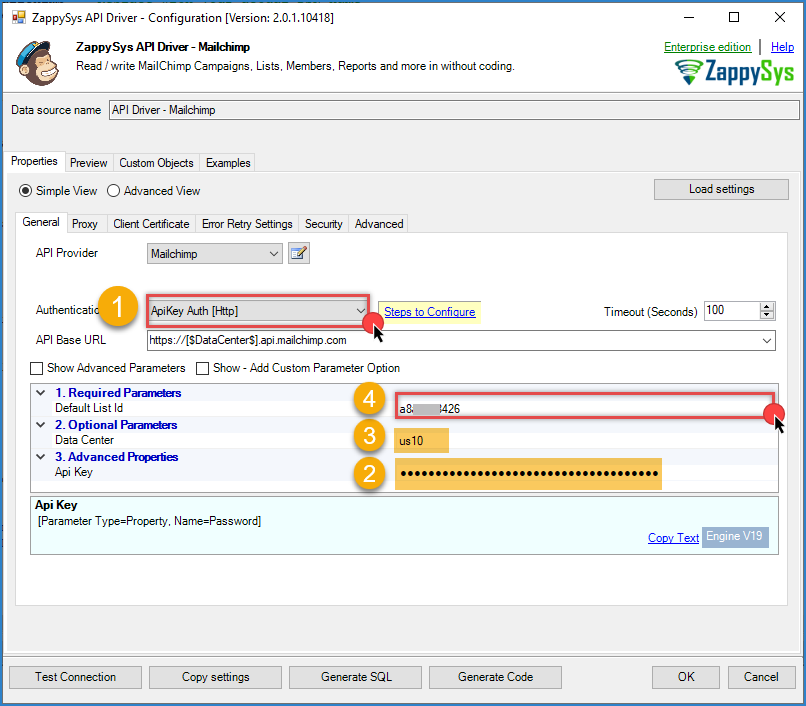
For API Key Authentication, enter the API Key, Data Center, and select theDefault List-ID, then test the connection.
-
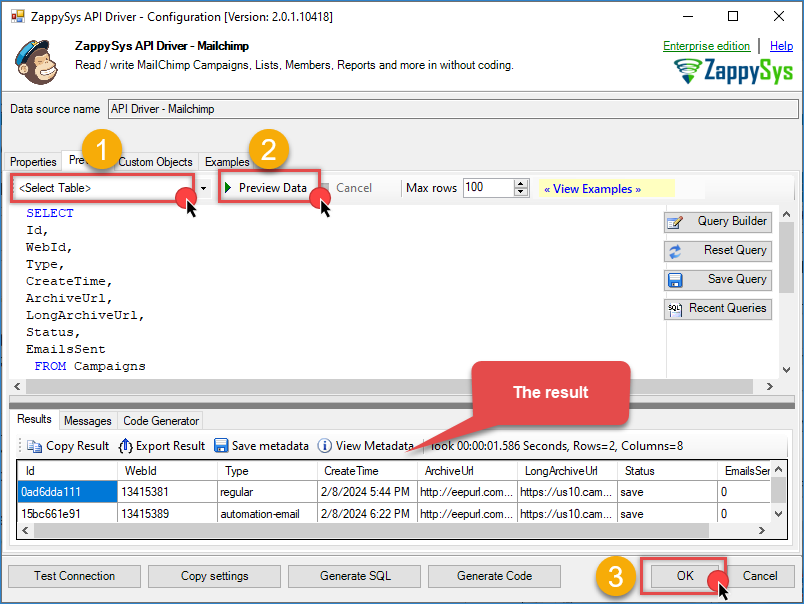
Go to the Preview Tab, select a table, and click Preview Data to view results. Click OK to save your configuration.
Step 4: Write the Excel VBA macro
-
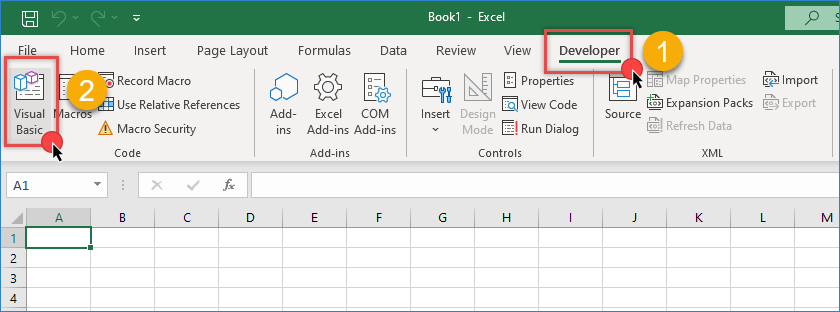
Open Excel and go to the Developer tab. Click Visual Basic or press
Alt + F11.
-
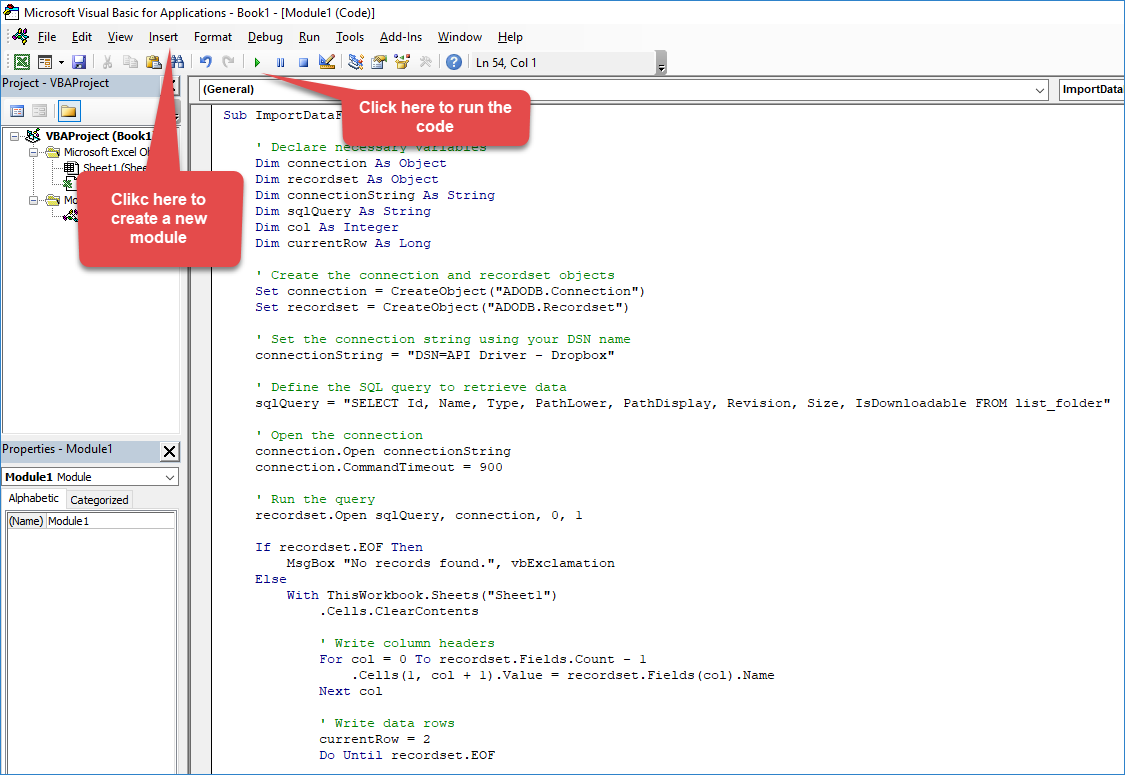
In the VBA editor, go to Insert and then Module.
-
Paste the following macro:
Sub ImportDataFromODBC_Mailchimp()

    Dim connection As Object
    Dim recordset As Object
    Dim connectionString As String
    Dim sqlQuery As String
    Dim col As Integer
    Dim currentRow As Long

    Set connection = CreateObject("ADODB.Connection")
    Set recordset = CreateObject("ADODB.Recordset")

    connectionString = "DSN=API Driver - Mailchimp" ' Replace with your actual DSN name
    sqlQuery = "SELECT id, name, stats.member_count, stats.unsubscribe_count FROM lists" ' Example for List data

    connection.Open connectionString
    connection.CommandTimeout = 900

    recordset.Open sqlQuery, connection, 0, 1

    If recordset.EOF Then
        MsgBox "No records found.", vbExclamation
    Else
        With ThisWorkbook.Sheets("Sheet1")
            .Cells.ClearContents

            For col = 0 To recordset.Fields.Count - 1
                .Cells(1, col + 1).Value = recordset.Fields(col).Name
            Next col

            currentRow = 2
            Do Until recordset.EOF
                For col = 0 To recordset.Fields.Count - 1
                    .Cells(currentRow, col + 1).Value = recordset.Fields(col).Value
                Next col
                currentRow = currentRow + 1
                recordset.MoveNext
            Loop

            .Columns.AutoFit
        End With

        MsgBox "Mailchimp data imported successfully!", vbInformation
    End If

    recordset.Close: Set recordset = Nothing
    connection.Close: Set connection = Nothing

End Sub
Step 5: Run the macro
- Close the VBA editor.
- Press
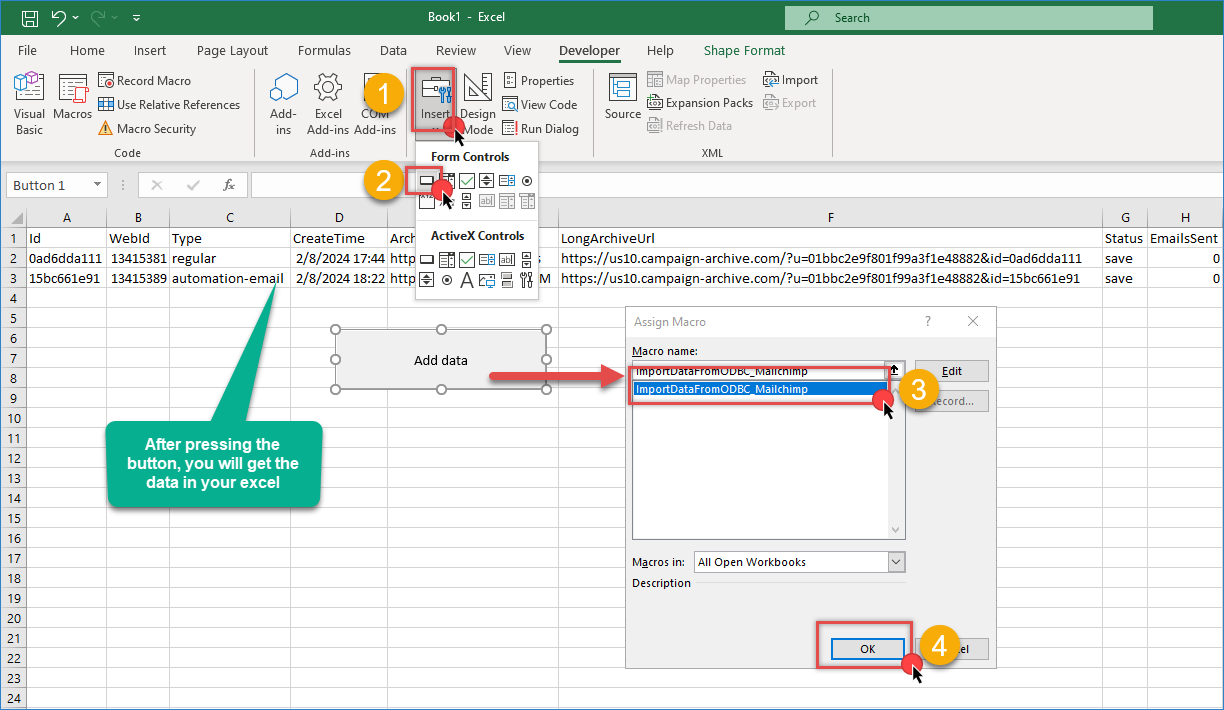
Alt + F8, selectImportDataFromODBC_Mailchimp, and click Run. - Your Excel sheet will populate with metadata from Mailchimp.
- Optionally, add a button in Excel and assign the macro for easier access.
Benefits of this integration
- Live access to Mailchimp data from Excel
- No exports or manual steps — just run the macro
- SQL support to filter or sort results
- Great for reporting on lists, subscribers, or campaigns
Troubleshooting tips
- Empty data? Check if your Mailchimp list has subscribers or campaigns.
- Connection errors? Double-check your API key and data center suffix.
- Excel doesn’t run the macro? Enable macros in the Trust Center Settings.
Conclusion
By combining Excel macros with ODBC integration, you can easily connect to Mailchimp and automate data reporting tasks. Whether you’re tracking campaign performance or analyzing subscriber lists, this method streamlines the process and gives you real-time control inside Excel.
Visit our official page to discover more connectors, powerful automation features, and real-time data integration options. Start building smarter, faster, and more scalable solutions today with ZappySys ODBC PowerPack.
References
- Mailchimp API Driver
- Mailchimp Connector documentation
- Mailchimp Connector | API Integration Hub
- Blog articles
- ODBC PowerPack
Contact us
If you encounter any issues or have specific questions, reach out to our support team via live chat or support ticket using our email support@zappysys.com.