In Azure Table Storage, effectively managing data within a table often involves tasks such as clearing, truncating, or deleting all existing records. such as the ‘Orders’ table. This guide provides a step-by-step approach to achieve these operations seamlessly.
Here’s a step-by-step guide:
-
Begin by adding a Data Flow Task.
-
Within the task, incorporate an Azure Table Storage Source.
-
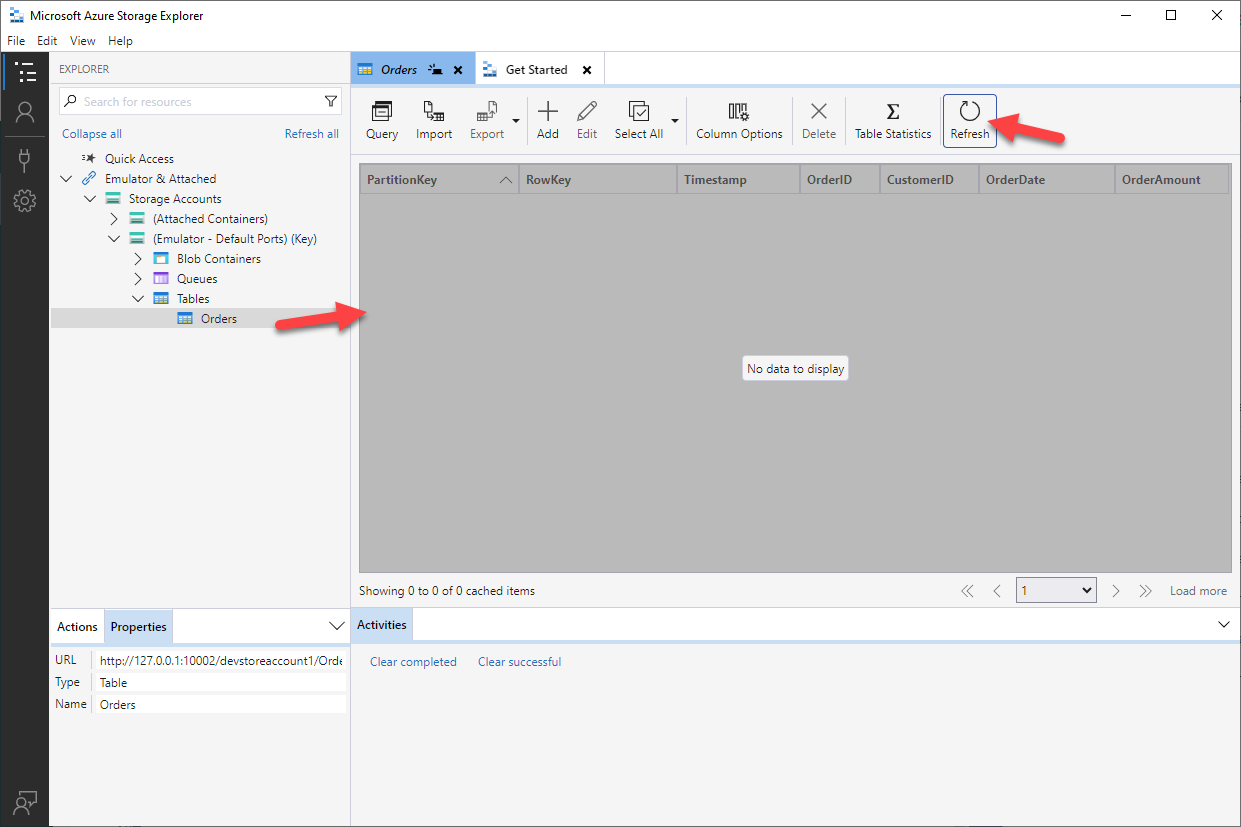
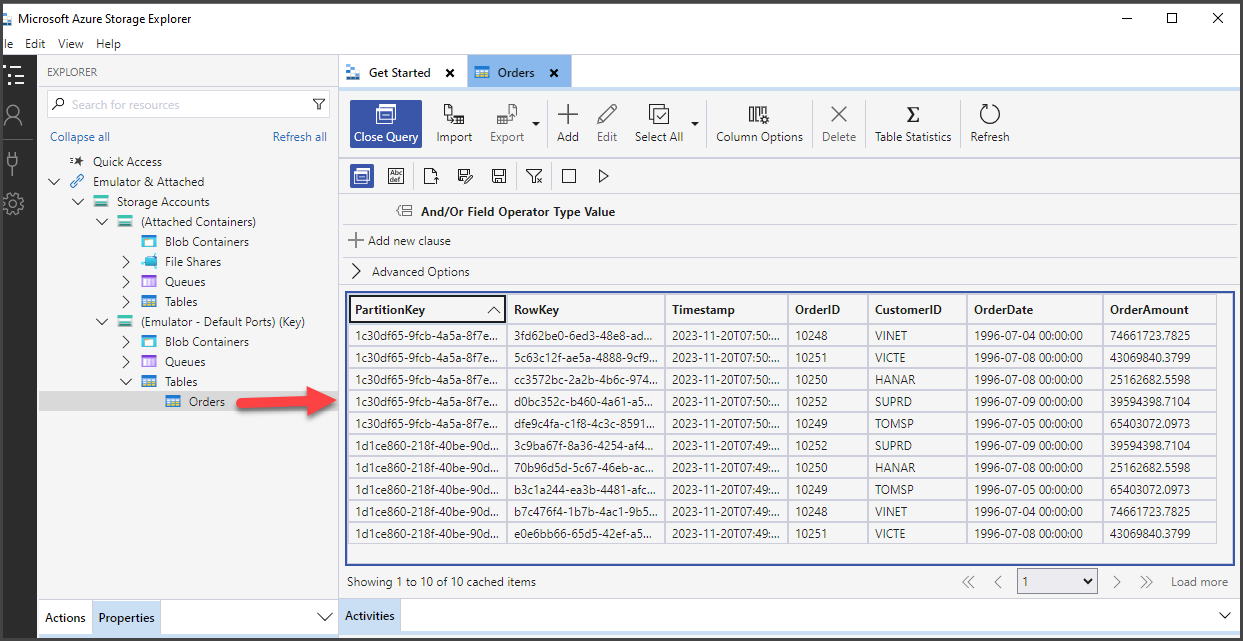
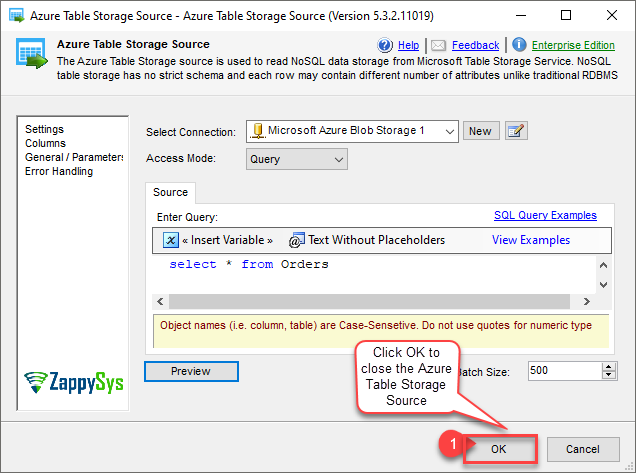
Configure the source in query mode to read data from the specific table you wish to truncate e.g., here we are using the ‘Orders’ table."
-
Click ‘OK’ to finalize and close the configuration, then proceed to set the column metadata in the Azure Table Storage Source.
-
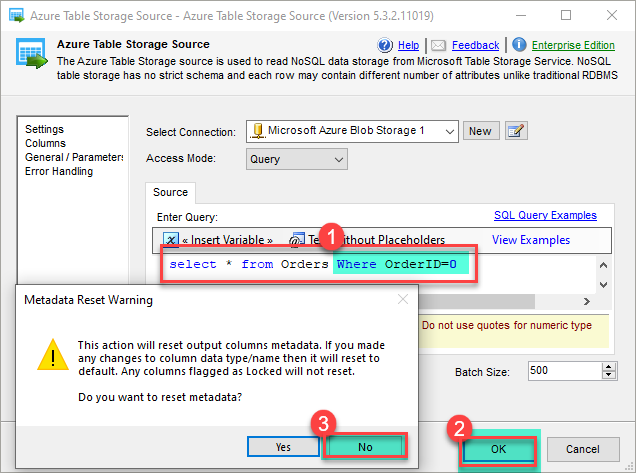
Now, double-click on the Azure Table Storage Source once more. Set the WHERE conditions to ensure that no data is retrieved from Azure Table Storage during this operation.
In this scenario, we are utilizing ‘WHERE OrderID = 0’ since there are no rows exist in the Azure table with the Order ID of 0 (Zero). Please customize the WHERE query according to your specific criteria to ensure no data is returned.
When clicking ‘OK,’ a popup may appear prompting you to reset the metadata. Ensure that you select ‘NO’ to prevent any potential errors.
-
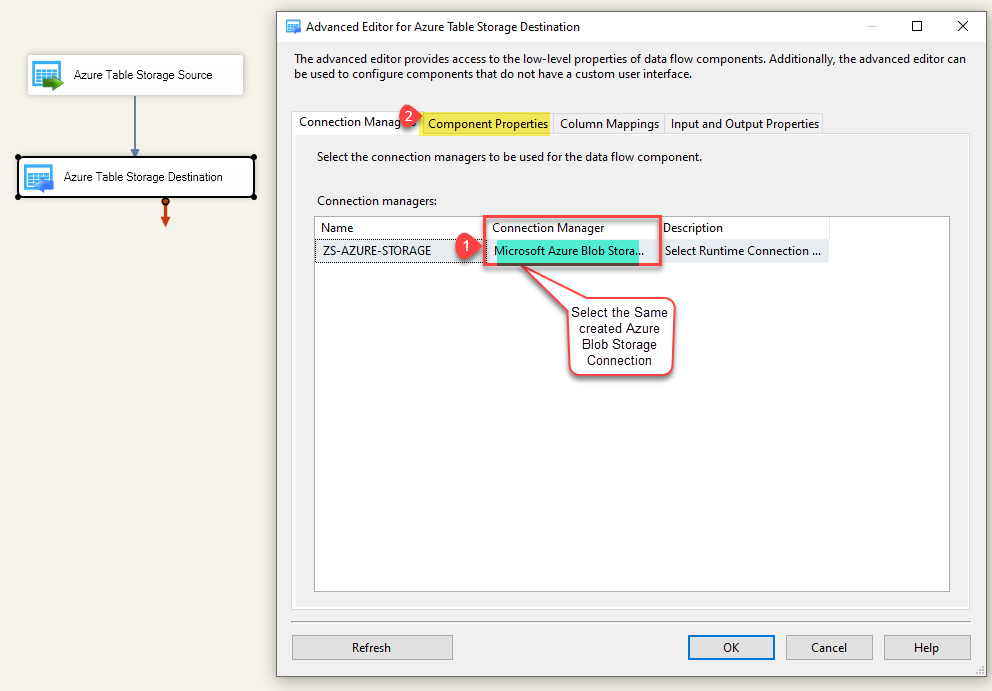
Next, beneath the Azure Table Storage Source, add the Azure Table Storage Destination. Double-click to access and edit its settings.
-
Choose the same connection established for the Azure Table Storage Source, and navigate to the ‘Component Properties’ tab.
-
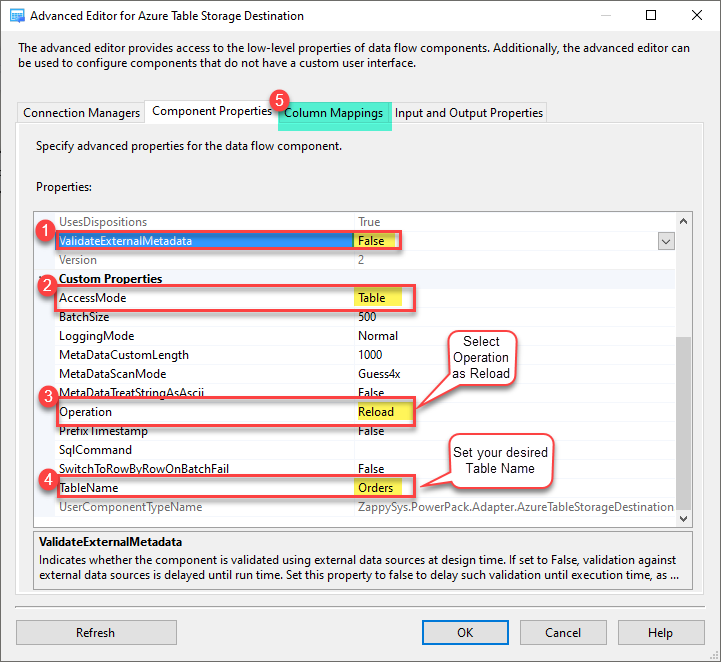
On the ‘Component Properties’ tab
8.1 Set Validate External Metadata as False
8.2 set Access Mode as Table
8.3 Operation as Reload
If you choose Reload option then target table is first truncated before inserting records so be careful with Reload option.
8.4 Specify the target table for truncating data; in this instance, set it to ‘Orders’ or your desired table name.
-
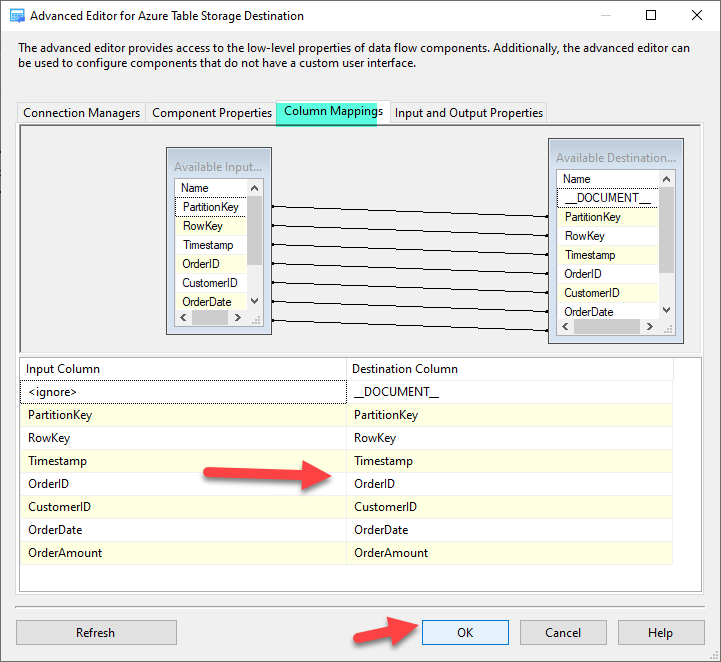
Navigate to the ‘Columns Mappings’ tab, map the key columns with the desired columns, and then click ‘OK’ to confirm the configuration.
-
Once you have configured the package, execute it, and it will effectively truncate all the data from the Azure Table Storage as specified.

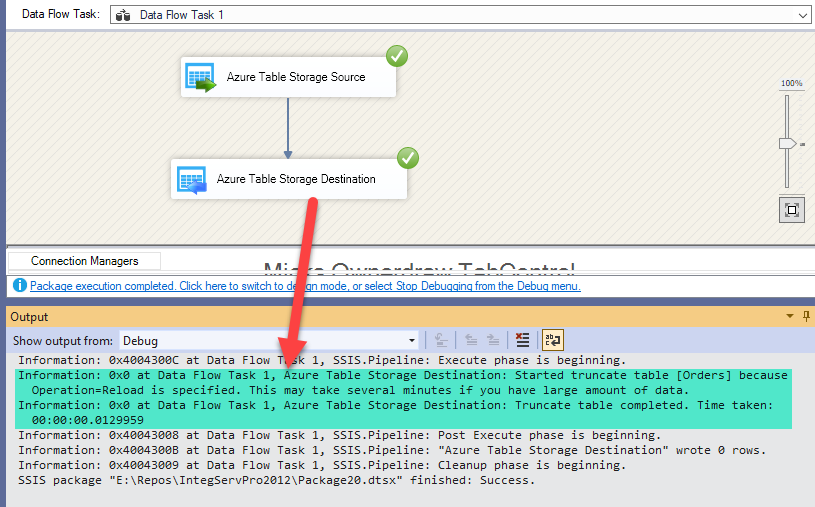
You can check the Azure Table Storage data to confirm that no records remain, validating the successful truncation operation.