Problem Statement
Sometimes, you might encounter a CSV or flat file lacking a header row at the top. Setting column names manually for each field can be tedious. No worries! We’ll demonstrate a simple method for inserting column headers into your CSV file without modifying the actual file, ensuring your data remains tidy and well-structured.
Examples
Let’s suppose you have a CSV file named _CSV.txt structured like this, but without any header columns:
John,Doe,30
Jane,Smith,25
When attempting to read the data using a CSV Source, you get output like this:
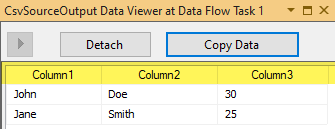
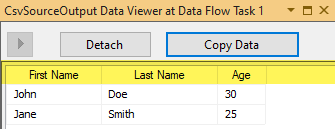
But we want to read a _CSV.txt file structured like this, where the header names typically default to “First Name,” “Last Name,” and “Age” based on the sequence of the data columns:
First Name,Last Name,Age
John,Doe,30
Jane,Smith,25
When you read a CSV file with this format, the output typically appears as follows:
Solution
Adding a header row to a CSV file without headers is straightforward using a RegEx search and replace operation directly within the CSV source. This allows us to insert the header row without the hassle of manual modifications. The trick is to create an expression that inserts a new line character after the first row on the fly, saving us from changing column names manually.
Steps
Let’s jump right in, step by step, as we learn how to add meaningful headers to our CSV file. This will make it easier for us to understand and analyze our data.
-
Firstly, You need to Download and Install SSIS ZappySys PowerPack.
-
Once you have finished the first step, Open Visual Studio and Create a New SSIS Package Project.
-
Now, Drag and Drop SSIS Data Flow Task from SSIS Toolbox. And double click on the DataFlow task to see DataFlow designer surface.
-
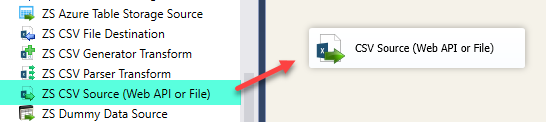
From the SSIS toolbox drag and drop CSV Source on the dataflow designer surface.
-
Double click CSV Source and configure the following pieces File Path/URL, go to Custom Replace Last Tab and configure it like this:
Enable Custom Text Replace (Before data is parsed)
Set Search for value as:^--regex
-
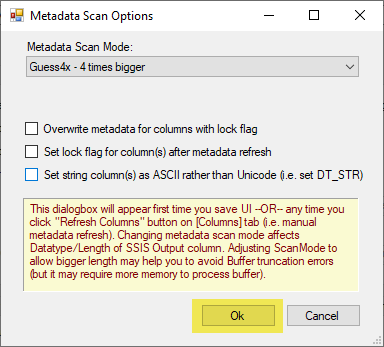
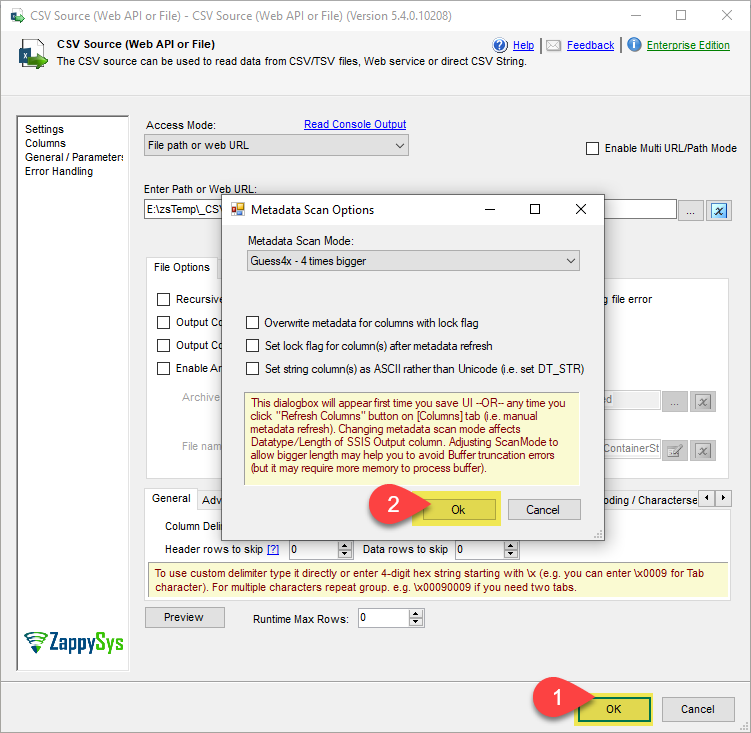
Click “OK” to save the changes made to the CSV source. You’ll then encounter another window prompting you to set the metadata. Simply click “Yes” to proceed.
-
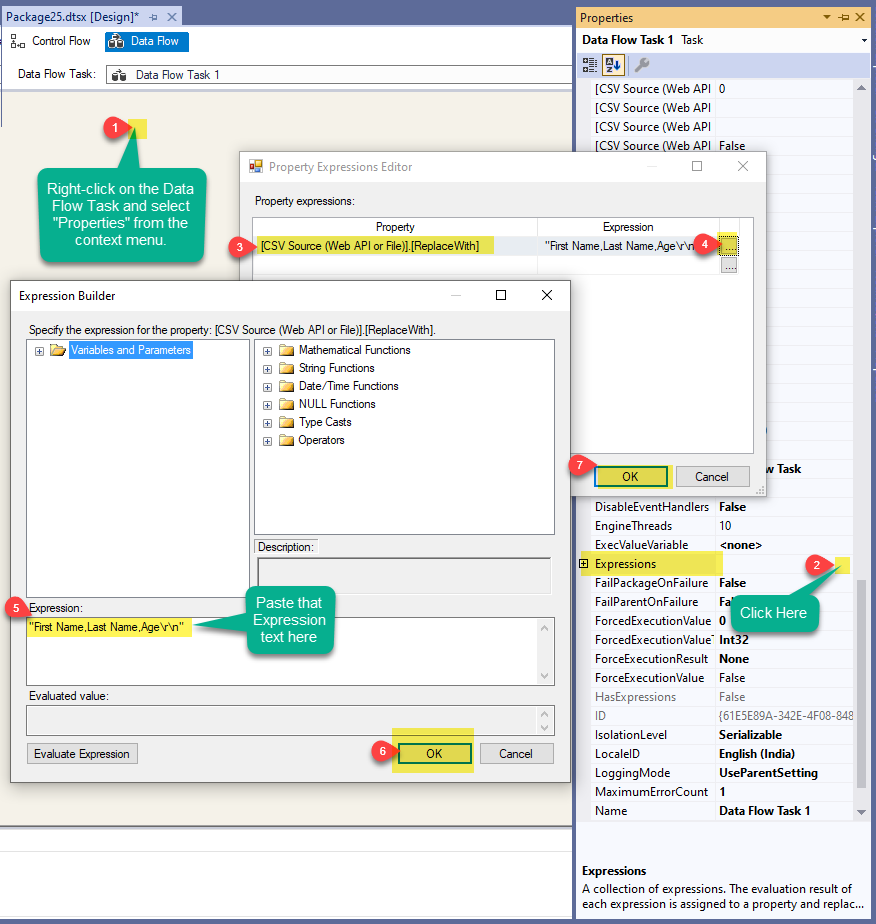
Now, right-click on the Data Flow component, navigate to “Expression,” and set the following in the [CSV Source].[Replace With] Expression. For more detailed instructions on setting SSIS Data Flow component properties using expressions, refer to the this article.
Expression:“First Name,Last Name,Age\r\n”
-
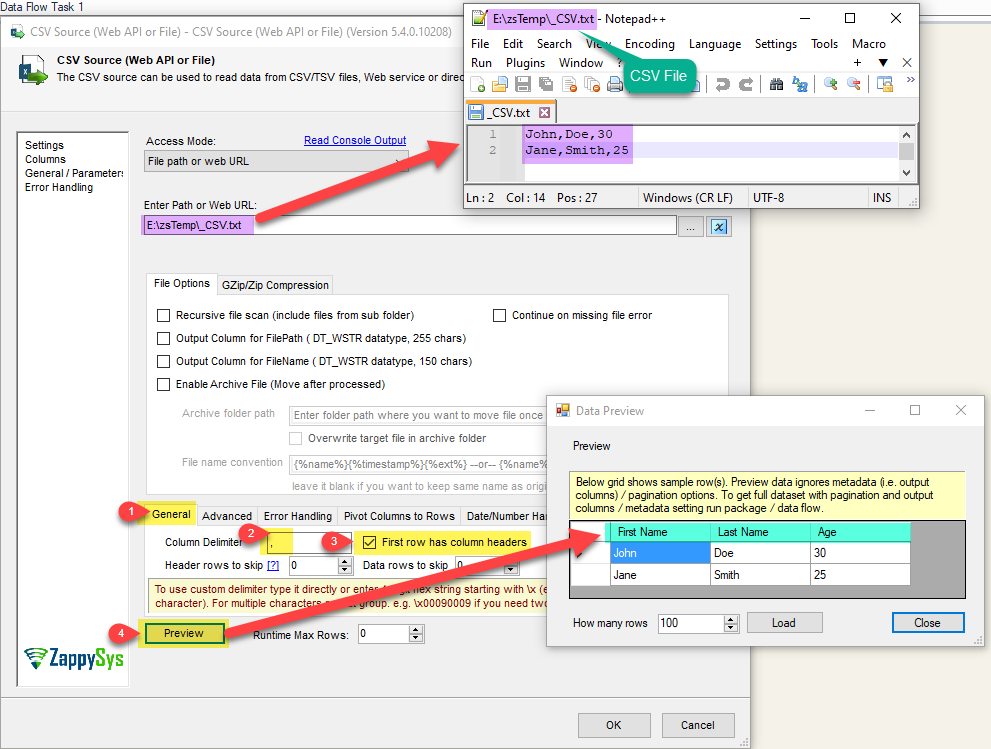
That’s it! Configure the CSV Source as described, select the desired column delimiter (in this case, comma
,), then hit “Preview,” and you’ll see the desired output with header column names.
The choice of column delimiter depends on the CSV file.
Therefore, we need to select the desired column delimiter (comma, tab, or other) based on the delimiter used in the file and apply the same delimiter to the header columns as well.
This file uses a comma (,) as the column delimiter, so you need to use a,as the delimiter. -
Click “OK,” and it will prompt you to refresh the metadata. Make sure to click “OK” again this time as well.


Video Tutorial
Here, you can find a video tutorial demonstrating how to read CSV file data using the CSV Source component.

Conclusion
In conclusion, by implementing these steps, we’ve effectively configured the CSV Source to read the _CSV.txt file without header columns. Through RegEx search and replace operations, we seamlessly inserted meaningful header names—like “First Name,” “Last Name,” and “Age”—based on the data column sequence. This simplifies data import, enhancing interpretation and analysis. With headers in place, navigating and processing CSV data becomes more efficient. If you encounter any challenges or have specific use cases, please contact our support team via chat or ticket.