Introduction
Reading multiple Excel files in SSIS can be a common requirement in many data integration scenarios. SSIS (SQL Server Integration Services) offers a robust framework for extracting, transforming, and loading data, but handling Excel files efficiently can be a challenge. However, with the ZappySys SSIS PowerPack, this task becomes streamlined and straightforward.
Prerequisites
Ensure you have the following installed:
- SQL Server Data Tools (SSDT): Install SQL Server Data Tools, the development tool for SSIS.
- ZappySys SSIS PowerPack: Download and install the ZappySys SSIS PowerPack.
You can use SSIS Excel Source Component to read multiple Excel files in SSIS, you can find the documentation of the component here.
SSIS Excel File Source Connector (Advanced Excel Source) can be used to read the Excel file without installing any Microsoft Office Driver. You can extract using Table mode or query mode (SQL Command). Support for flexible metadata detection mode so you can get accurate data types.
Steps to Read Multiple Excel Files in SSIS
- First, Download and Install SSIS ZappySys PowerPack. as mentioned in the Prerequisites.
- Once you finished the first step, Open Visual Studio and Create a New SSIS Package Project.
- Now, Drag and Drop the SSIS Data Flow Task from the SSIS Toolbox.
- Double-click on the Data Flow task to see the Data Flow designer surface.
- Here, In Visual Studio, drag and drop the ZS Excel Source in the design surface.
- Now, We need an Excel File Connection. So let’s create an Excel File Connection.
- Right-click on the Connection Managers Panel to Create a New ZS-Excel Connection and a Context Menu will appear, Select New Connection from the Context Menu.
- Select ZS-EXCEL Connection Manager from the Connection Managers list and Click on Add Button
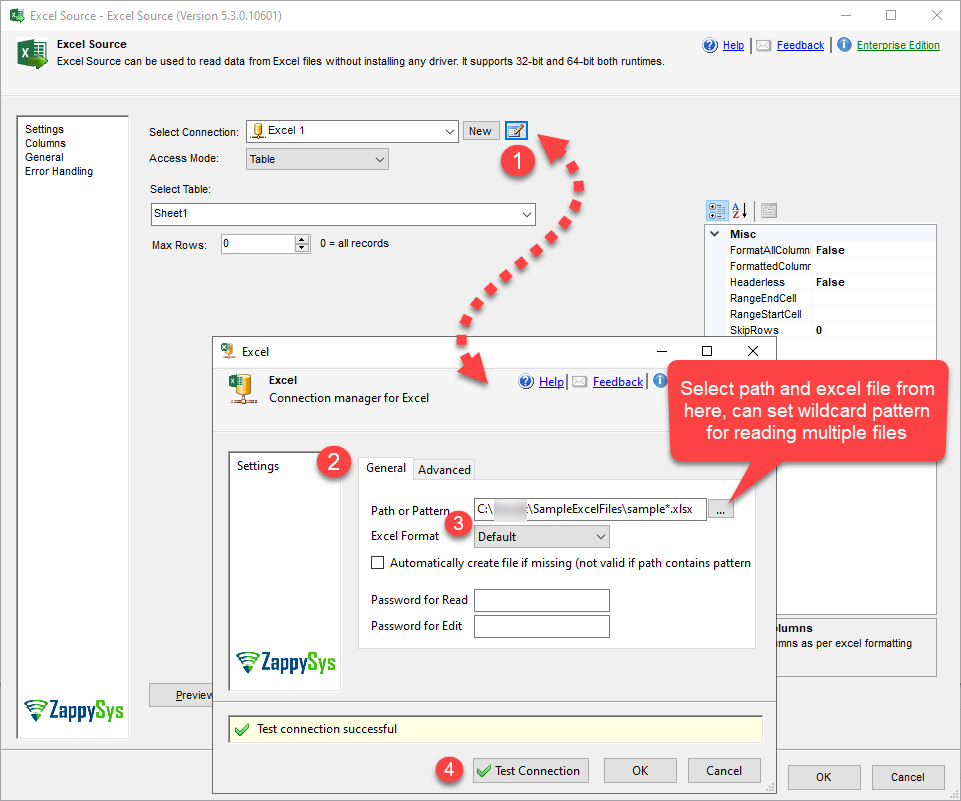
- Now in the opened Excel connection manager window set Source Path with the file name and suitable extension. Also, Pattern is only applicable for Excel Source. If you use Excel destination, it must use a single file.


Note: If you want to operate with multiple files then use the wildcard pattern as below (when you use the wildcard pattern in the source path then the system will treat the source path as a folder regardless you end with a slash).
Examples:
c:\SSIS\Excel\file123.xlsx (single file).
c:\SSIS\Excel\file*.xlsx (all files starting with name file).
c:\SSIS\Excel\subfolder\*.xlsx (all files with .xlsx Extension and located under folder subfolder).
- Click OK to save the Connection Manager setting UI and then again click on OK to save the Excel Source component UI configurations.
- Finally, We have configured the Excel Source component to read multiple Excel files, now you can load these contents to any destination like MS SQL OR MySQL database or any other destinations based on your desired requirement for the demo purpose, I’m using the Trash Destination component.
- From the SSIS toolbox drag and drop Trash Destination on the data flow designer surface.
- Now single-click on the Excel+ Source once you see a blue arrow from the source … connect it to Trash Destination.
- Double-click on ZS Trash Destination to Configure it.
- Click OK to save the configure setting UI.
- Right-click on the path and Add Data Viewer.
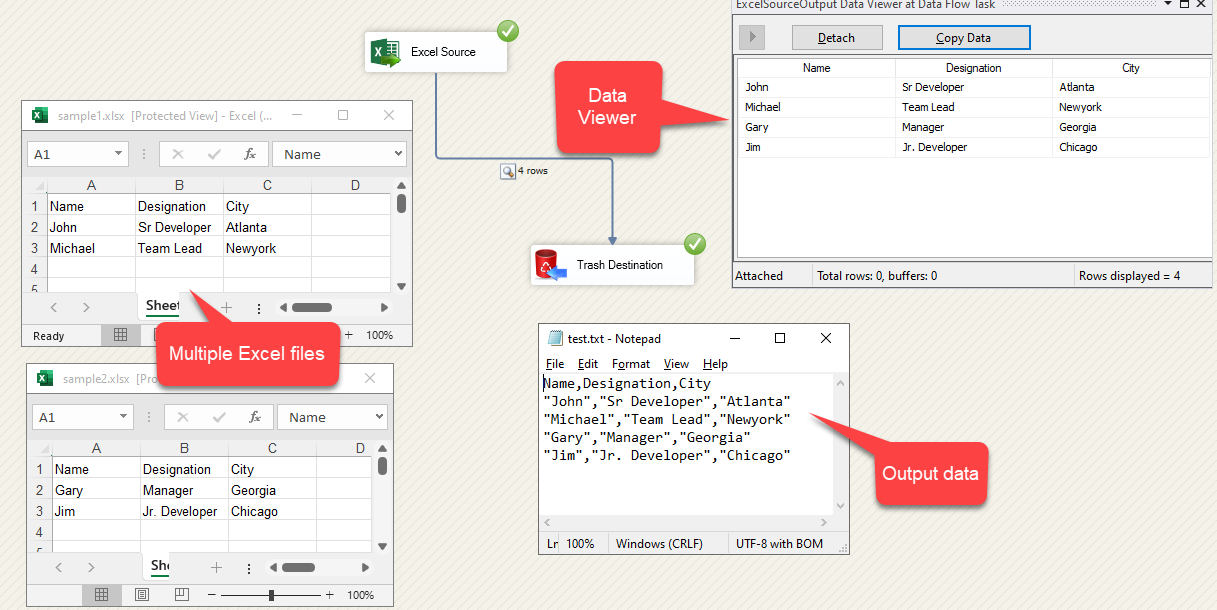
- Execute the package and verify source data in the data viewer, below is the sample screenshot.


Conclusion
In this short guide, we’ve outlined the basic steps to read multiple Excel files and load the data to the text file using SSIS. This process involves setting up connections, configuring components, and mapping columns appropriately. We’ve used Excel Source, Trash Destination & Excel Connection Manager.