In this article, we will see how to automate downloading Outlook Mail (Office 365) to the local disk as a standard file *.eml (RFC 822 / MIME), which can be opened in any standard Email client. The saved file will also contain all attachments.
Prerequisites
-
Download and install the ZappySys ODBC PowerPack
-
Follow these steps - Generate API Client ID for calling Outlook Mail API (Office 365 Graph API)
Here are detailed steps
Step 1: Create an Application in Microsoft Azure
-
Log into the Azure Portal and navigate to Azure Active Directory.
-
Click on App registrations in the left menu.
-
Select New registration and provide a name for your application.
-
Choose the supported account type and specify the Redirect URI as
https://login.microsoftonline.com/common/oauth2/nativeclient. -
Copy the Application (client) ID, Tenant ID, and Secret ID from your App configuration:
NOTE: Using Client Secret is optional but recommended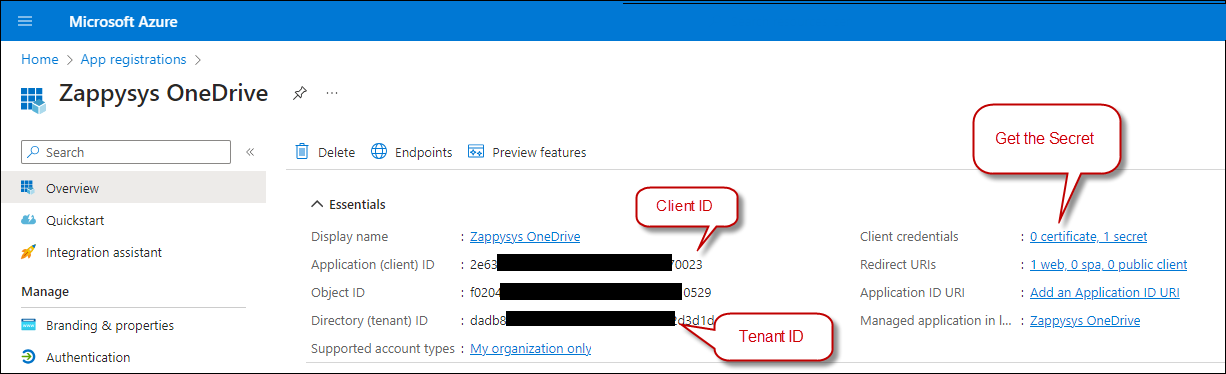
Step 2: Create an ODBC data source based on API Driver
-
Open the ODBC Data Source by typing “ODBC” in the search box and launching the ODBC Data Source.

-
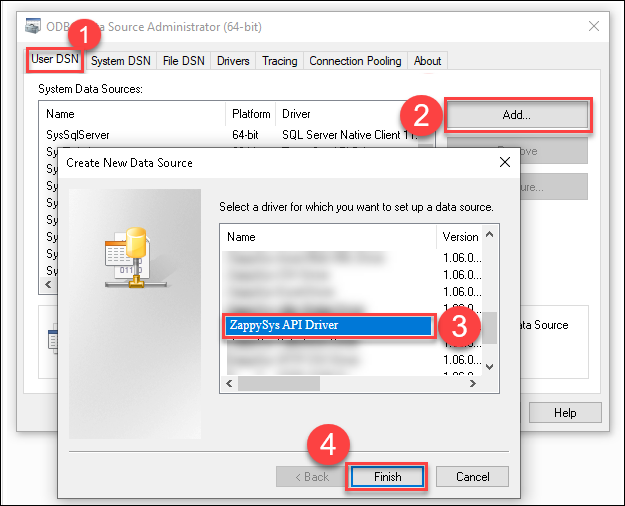
To gain access for yourself or other users, go to the User DSN or System DSN. Go to the System tab for SQL Server Integration and add a new System DSN. Click the “Add” button.

-
From the driver list, select ZappySys API Driver, then choose Outlook Mail (Office 365) from the connector list and press Continue.
Step 3: Configure Outlook Mail (Office 365) Connector
-
Fill in the connector fields with the Client ID, Client Secret, the necessary scopes, and the appropriate Authorization and Token URLs. Then generate the token:
-
Authorization URL:
https://login.microsoftonline.com/daed1250-xxxx-xxxx-xxxx-ef0a982d3d1e/oauth2/v2.0/authorize -
Authorization URL (Without Tenant ID):
https://login.microsoftonline.com/common/oauth2/v2.0/authorize -
Token URL:
https://login.microsoftonline.com/daed1250-xxxx-xxxx-xxxx-ef0a982d3d1e/oauth2/v2.0/token -
Token URL (Without Tenant ID):
https://login.microsoftonline.com/common/oauth2/v2.0/token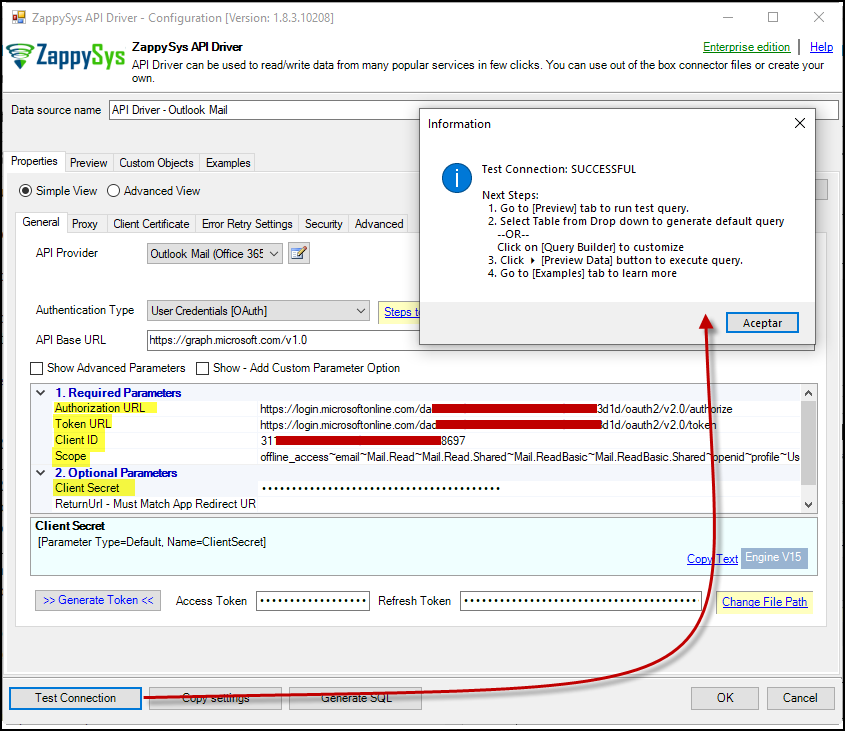
-
-
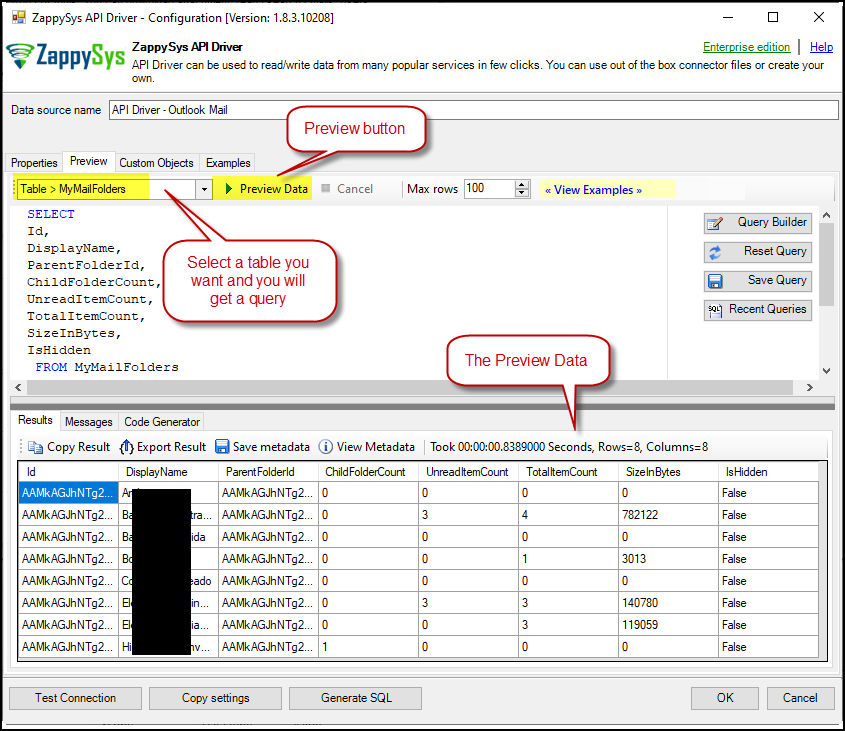
Go to the Preview Tab, select a table, and click Preview Data to view the results. Click OK to save the configuration.
Download Outlook Mail to a file (Using Search) - Export Outlook emails to EML
Once, let’s look at how to call the Download Messages Endpoint. This sample searches for emails based on various conditions and the saves to local disk as *.eml file.
-
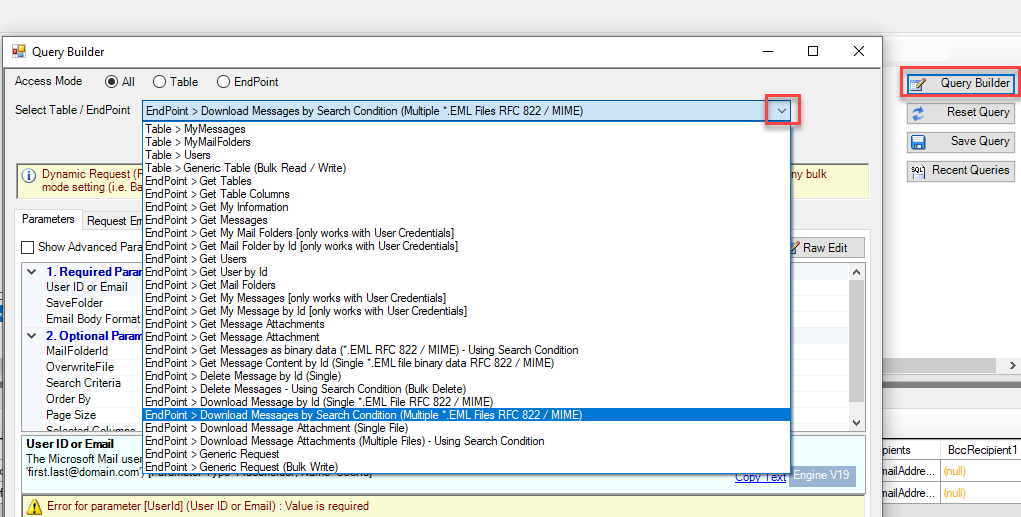
Click on the Query Builder, select Download Messages by Search Condition endpoint as shown below from the list.
-
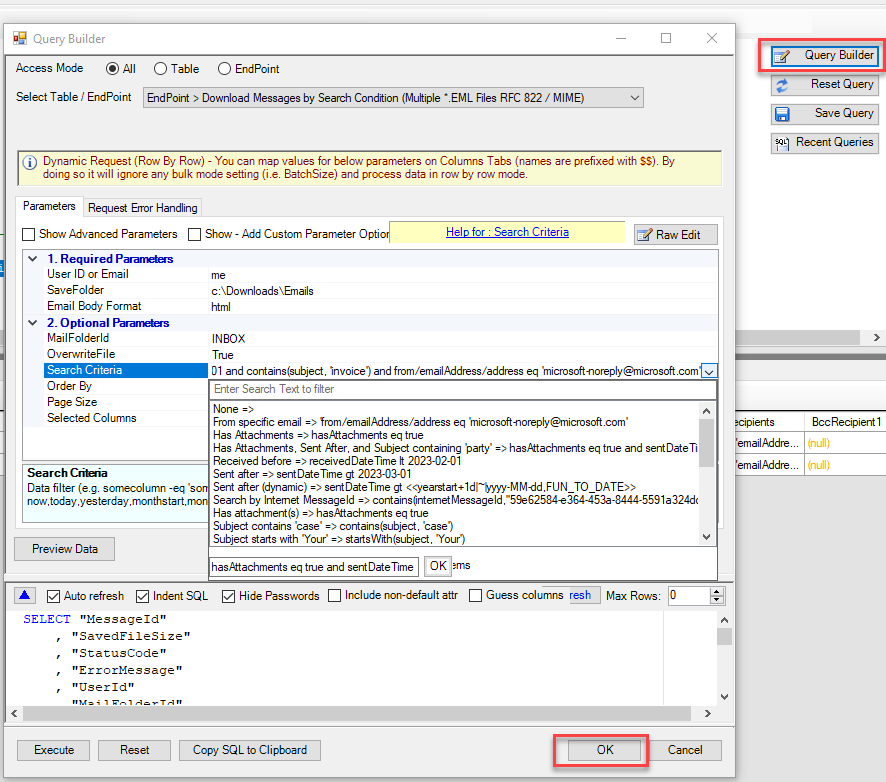
Configure parameters as per your needs. Here are sample values
-
Click OK to close. Now click the Preview button to execute.
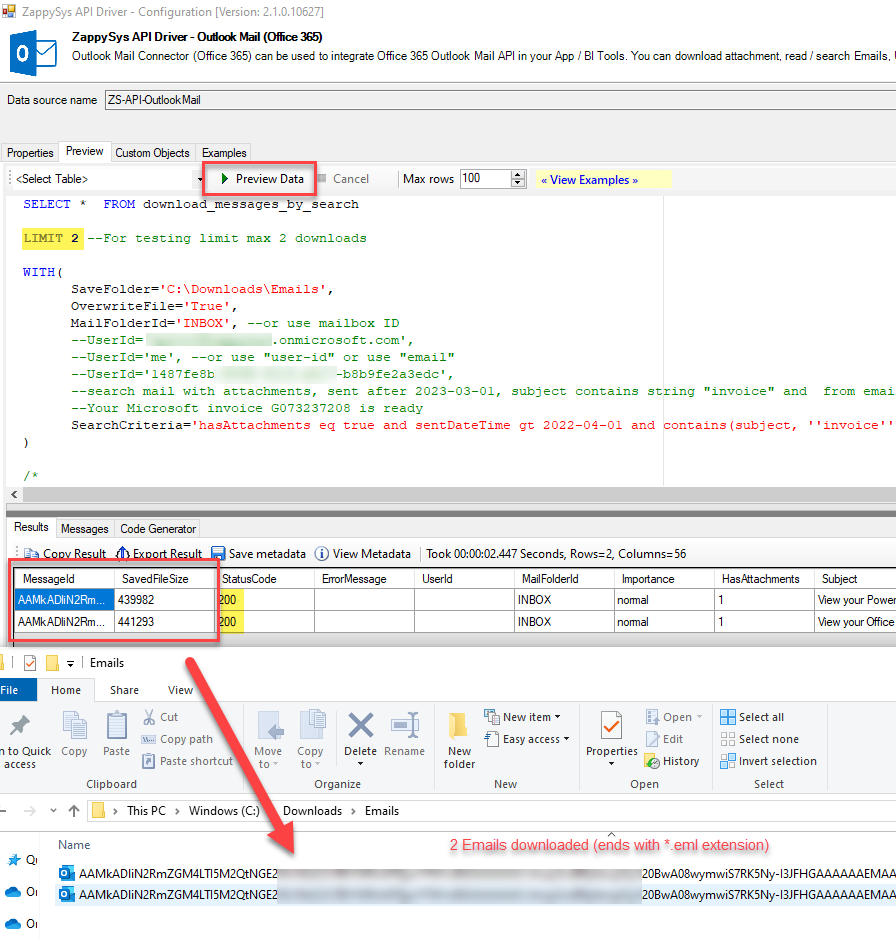
Here is the SQL you can use in any ODBC Compliant Tool which can call this driver.
SELECT *  FROM download_messages_by_search

LIMIT 2 --For testing limit max 2 downloads

WITH(
	  SaveFolder='C:\Downloads\Emails',
	  OverwriteFile='True',
 	  MailFolderId='INBOX', --or use mailbox ID
	  UserId='me',
	  --UserId='someone@mycomeny.com',
	  --UserId='1487fe8b-xxxx-xxxx-xxxx-b8b9fe2a3edc',
	  --search mail with attachments, sent after 2023-03-01, subject contains string "invoice" and  from email is microsoft-noreply@microsoft.com
	  SearchCriteria='hasAttachments eq true and sentDateTime gt 2022-04-01 and contains(subject, ''invoice'') and from/emailAddress/address eq ''microsoft-noreply@microsoft.com''  '
)
Download Outlook Mail to a file (Using Message ID)
If you know the exact Message ID you like to download, then you can execute the query below instead
SELECT *  FROM download_message
WITH(
	  MessageId='AAMkADliN........HGAAf2n2J-AAA=',
	  SaveFolder='C:\Downloads\Emails',
	  OverwriteFile='True',
 	  MailFolderId='INBOX', --or use mailbox ID
	  UserId='me'
	  --UserId='someone@mycomeny.com',
	  --UserId='1487fe8b-xxxx-xxxx-xxxx-b8b9fe2a3edc',
	  )
Automate / Schedule Office 365 Mail downloads in ODBC / ETL / BI Apps
Now you can use the above query and call it from your favourite BI / ETL / Reporting tools. Click here for instructions.
Conclusion
Integrating ODBC Apps with Office 365 / Outlook Mail provides a powerful way to manage emails, attachments, and more efficiently. Following this guide, you learned how to set up the connection, troubleshoot potential issues, and enhance automation workflows.
To put this into reality, download and install the ZappySys ODBC PowerPack to enable ODBC connectivity and get started.