In this article, we will see how to automate downloading Outlook Mail (Office 365) to the local disk using SSIS (Save as *.eml RFC 822 / MIME file), which can be opened in any standard Email client. The saved file will also contain all attachments.
Prerequisites
-
Download and install the ZappySys SSIS PowerPack
-
Follow these steps - Generate API Client ID for calling Outlook Mail API (Office 365 Graph API)
Step 1: Create an Application in Microsoft Azure
-
Log into the Azure Portal and navigate to Azure Active Directory.
-
Click on App registrations in the left menu.
-
Select New registration and provide a name for your application.
-
Choose the supported account type and specify the Redirect URI as
https://login.microsoftonline.com/common/oauth2/nativeclient. -
Copy the Application (client) ID, Tenant ID, and Secret ID from your App configuration:
NOTE: Using Client Secret is optional but recommended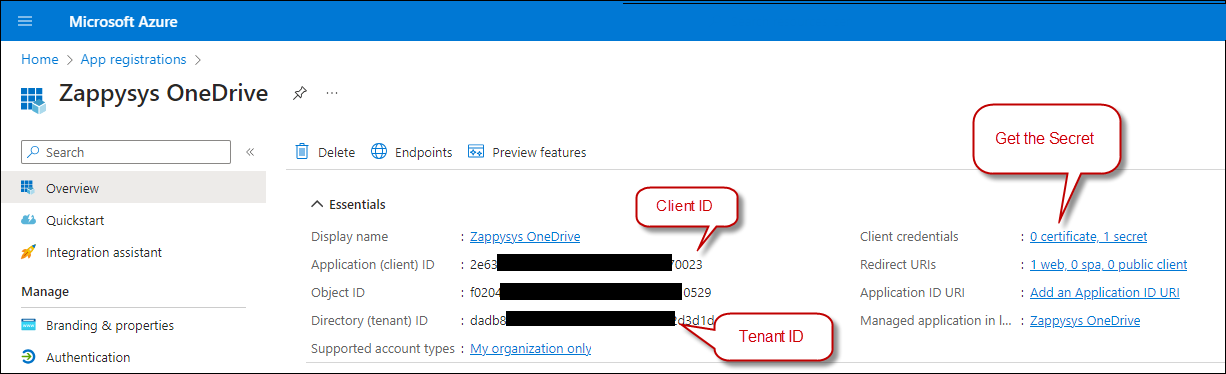
Step 2: Configure Outlook Mail (Office 365) Connection
-
Open SSIS Package in the Visual Studio designer
-
Now, Drag and Drop SSIS Data Flow Task from SSIS Toolbox.
-
Double click on the Data Flow task to see Data Flow designer surface.
-
Here, In Visual Studio, drag and drop the ZS API Source in the design surface.
-
Double click API Source to edit. On UI Click [New] Connection.
-
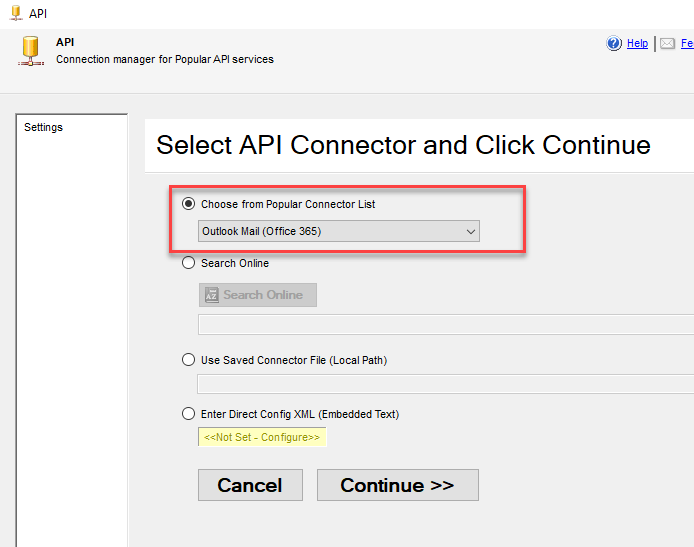
Select Outlook Mail on the wizard and click Continue
-
On the next screen, fill out the following information and click Generate Token. Once everything is successful, you will see the Refresh Token populated. Click Test connection to confirm.
Fill in the connector fields with the Client ID (Required), Client Secret (Optional), the necessary scopes, and the appropriate Authorization and Token URLs. Then generate the token:
-
Authorization URL:
https://login.microsoftonline.com/daed1250-xxxx-xxxx-xxxx-ef0a982d3d1e/oauth2/v2.0/authorize--OR-- -
Authorization URL (Without Tenant ID):
https://login.microsoftonline.com/common/oauth2/v2.0/authorize -
Token URL:
https://login.microsoftonline.com/daed1250-xxxx-xxxx-xxxx-ef0a982d3d1e/oauth2/v2.0/token--OR-- -
Token URL (Without Tenant ID):
https://login.microsoftonline.com/common/oauth2/v2.0/token
-
-
Click OK to save the connection and go back to the API Source


Step 3: Read Message IDs - Using API Source or other Database Source
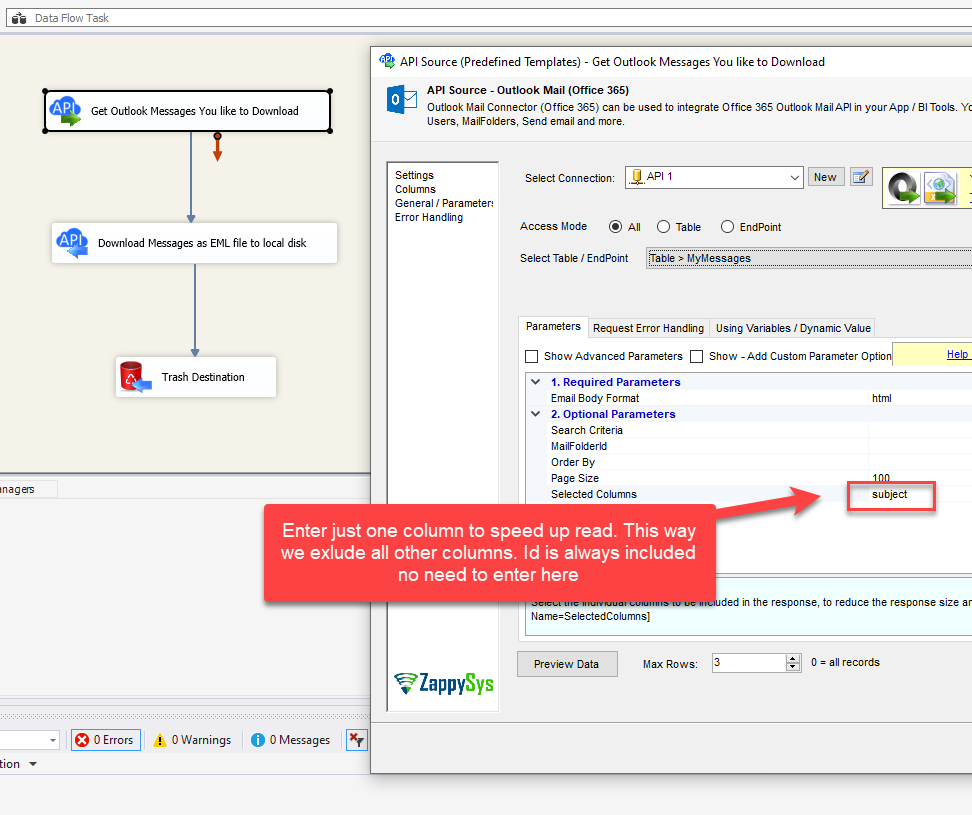
Once the connection is working, let’s configure the Source to get a list of Message IDs we’d like to download. For now, we can use the Outlook Mail source to read the Messages we like to download. You can use any source that contains a list of Message IDs.
For now, we only care about the Message ID column. So you exclude all other properties like below (just enter one property name). If you don’t supply Output columns, then all columns are returned, which may slow down the read operation.
Step 4: Export / Download Outlook Email to EML file
Now, let’s map Message ID to the next step, which will invoke the Outlook Mail download operation.
-
Drag and drop the ZS API Destination in the design surface.
-
Connect Source with Target as per the previous section.
-
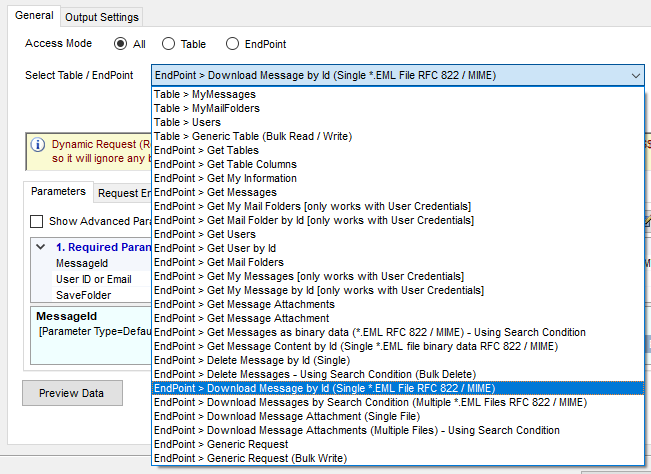
Double-click the API Destination and select Download Messages by Id Action.
-
Configure other properties as below
-
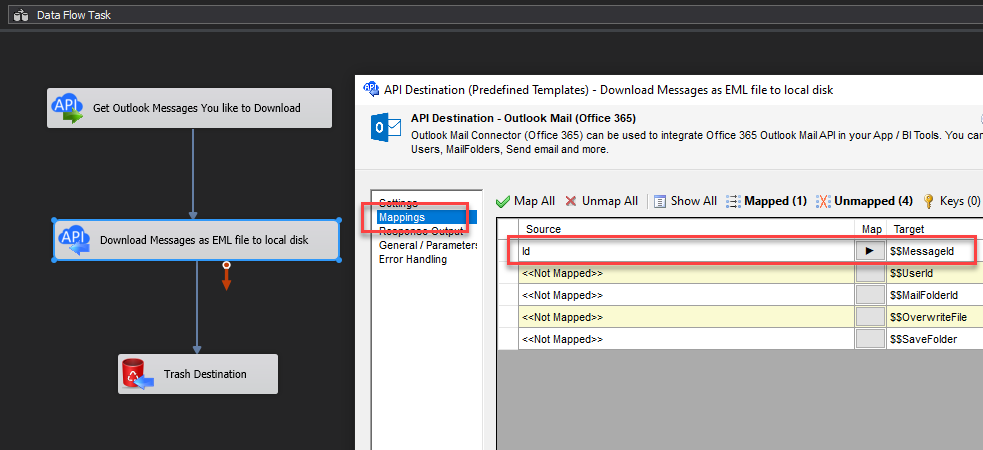
Now go to Mappings Tab and Map Id column to $$MessageId parameter.
-
Click OK to save
-
Now connect the API Destination to the Trash Destination or any Dummy Destination (Not needed in v5.8 or newer)
-
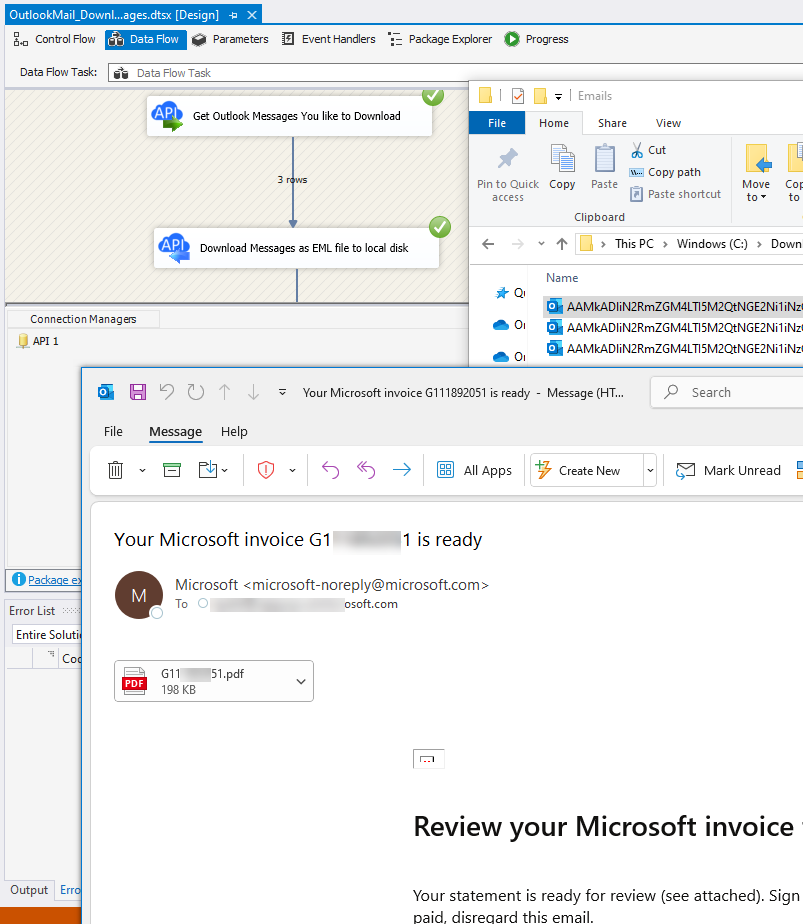
Run the data flow, and you will see the Message files downloaded.
-
Double-click on one of those files, and it will display the attachments as well.


Automate / Schedule Office 365 Mail downloads in other ODBC / ETL / BI Apps
If you’d like to know how to use Outlook Mail integration in many other BI / ETL / Reporting tools. Click here for instructions.
Conclusion
Integrating SSIS with Outlook Mail / Office 365 provides a powerful way to manage emails, attachments, and more efficiently. Following this guide, you learned how to set up the connection, troubleshoot potential issues, and enhance automation workflows.
To put this into reality, download and install the ZappySys SSIS PowerPack to enable SSIS connectivity and get started.