Introduction
Converting data between different formats is common in data integration, especially when dealing with diverse systems and applications. One frequent requirement is to convert Excel files into XML format for better data exchange and interoperability between systems.
This article will demonstrate how to use SSIS (SQL Server Integration Services) and the powerful ZappySys SSIS PowerPack to convert Excel data into XML easily. This step-by-step guide will walk you through setting up the necessary components in SSIS to convert Excel data into XML format effortlessly.
Prerequisites
- SSIS PowerPack: Download and install the ZappySys SSIS PowerPack from here.
- A local Excel file
Steps
-
Drag and drop a Data Flow task into your SSIS package.
-
Inside the Data Flow, add an Excel source component.
-
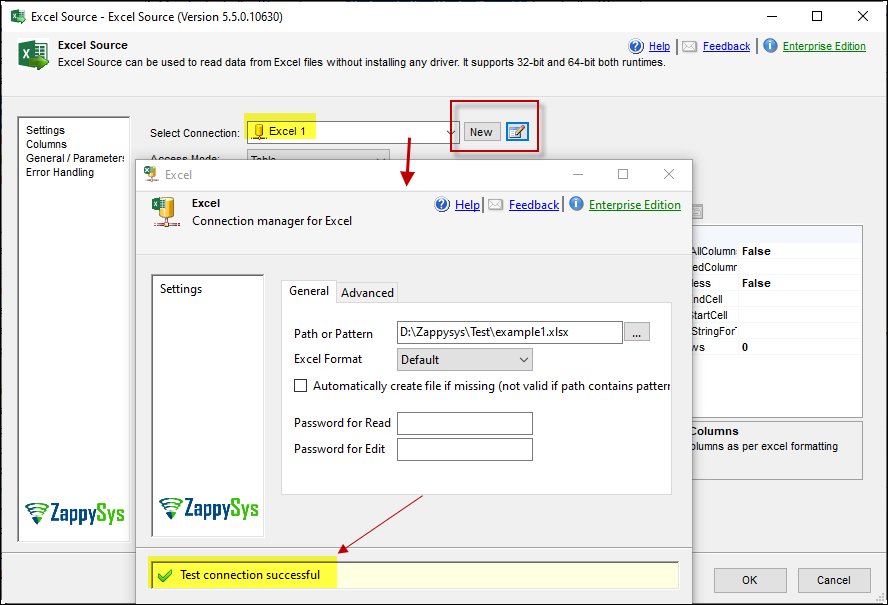
Press New to create a new Excel connection, or select an existing valid connection from the dropdown. Then, test the connection.
-
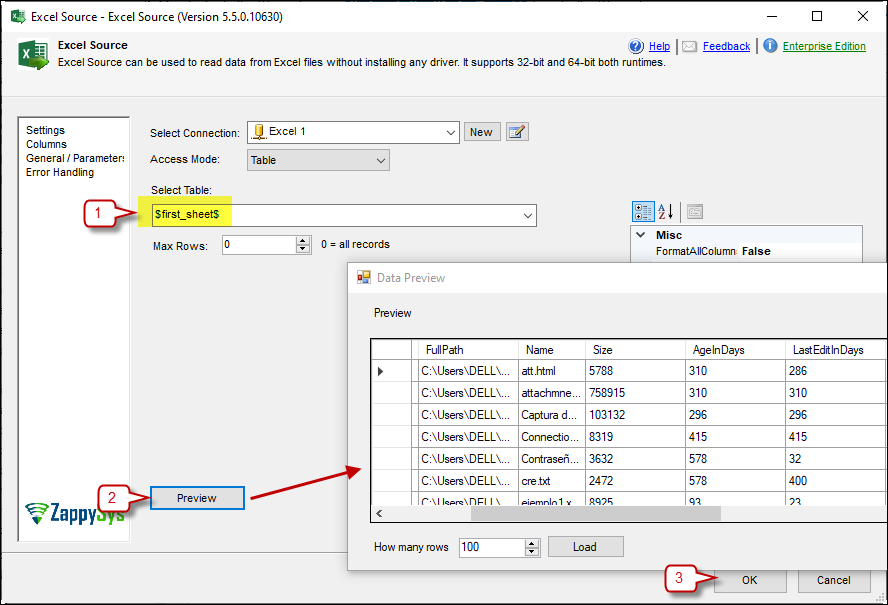
Select the sheet you want to use and preview the data. Press OK to save it.
-
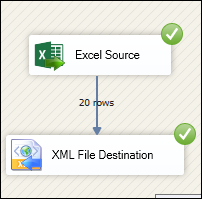
Add an XML destination component, drag and drop it, and connect it.
-
Enter the XML destination component and create a new connection (a flat file with an XML extension).
-
Select an output option.
-
Right-click on Mappings to add elements or attributes to your new XML file. The following is an example:
-
Press OK to save your settings.
-
Run the package to export the XML data.

Video Tutorial
 - Read Excel (*.XLSX) file and Import into SQL Server")
Conclusion
Following these steps, you can easily convert an Excel file to an XML file using SSIS, leveraging the ZappySys tools for efficient data retrieval and integration. If you encounter any issues or need further assistance, please get in touch with our support team via chat on our website.