Introduction
This guide will walk you through connecting Power BI to the OneDrive connector using the ZappySys ODBC API Driver for seamless data retrieval. The ZappySys OneDrive driver provides a powerful solution for integrating OneDrive into Power BI, enabling efficient data management and in-depth analysis.
Prerequisites
Before starting, ensure you have the following:
- ZappySys ODBC PowerPack: Download and install it here.
- Microsoft account: Ensure you have a Microsoft account
Steps
Step 1: Create an Application on the OneDrive Side
-
Go to Azure Portal and log in.
-
Navigate to Azure Active Directory.
-
On the left side, click the App registrations menu item.
-
Click New registration.
-
Enter a name for your application.
-
Select Accounts in this organizational directory only as the supported account type.
-
In the Redirect URI section, leave the option selected at Web.
-
In the textbox, enter
https://login.microsoftonline.com/common/oauth2/nativeclientas the Redirect URI or any other valid redirect URL, e.g.,https://zappysys.com/oauth. -
Use this Redirect URI in the Redirect URL grid row.
-
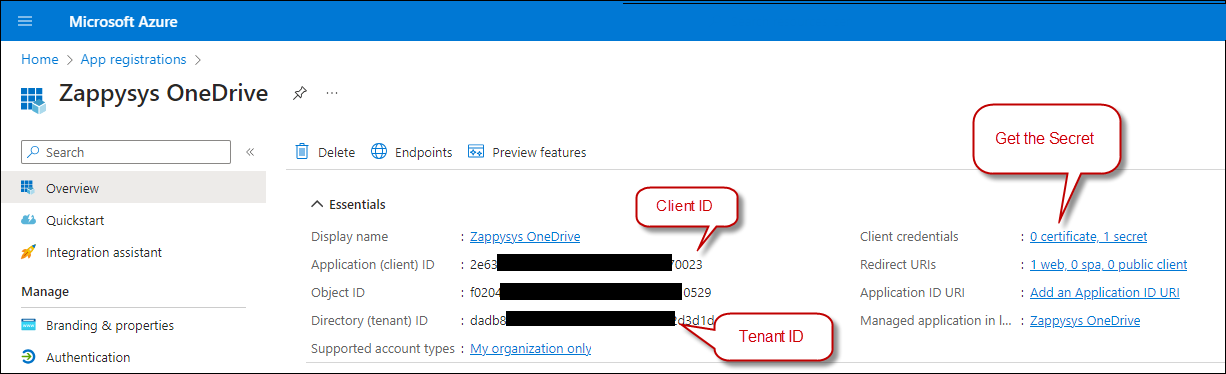
Copy Application (client) ID, TenantID, and Secret ID from your app configuration.
Step 2: Create a New Driver
-
Open the ODBC Data Source by typing “ODBC” in the search box and launching the ODBC Data Source.
-
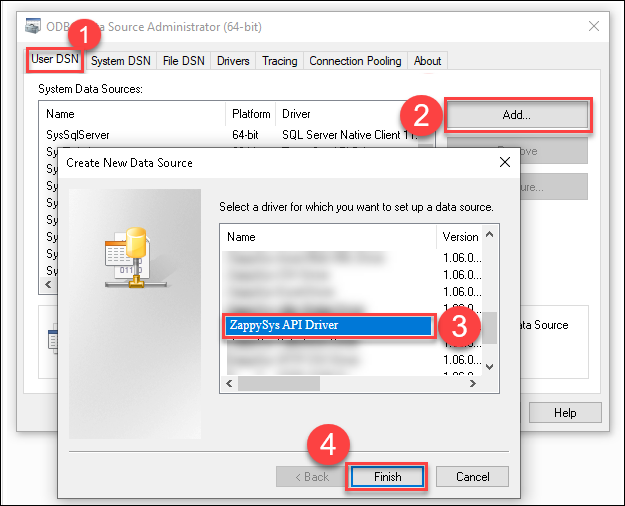
To gain access for yourself or other users, go to the User DSN or System DSN. Go to the System tab for SQL Server Integration and add a new System DSN. Click the “Add” button.
-
From the driver list, select ZappySys API Driver, then select OneDrive in the connector list and press Continue.


Step 3: OneDrive connector configuration
- Fill in the Client ID and Client Secret connector fields, and use the needed Scopes. For the Authorization URL and Token URL, you can use these URLs:
  * https://login.microsoftonline.com/daed1250-xxxx-xxxx-xxxx-ef0a982d3d1e/oauth2/v2.0/authorize
  * https://login.microsoftonline.com/daed1250-xxxx-xxxx-xxxx-ef0a982d3d1e/oauth2/v2.0/token
  * https://login.microsoftonline.com/common/oauth2/v2.0/authorize
  * https://login.microsoftonline.com/common/oauth2/v2.0/token
-
Generate the token and test the connection.
-
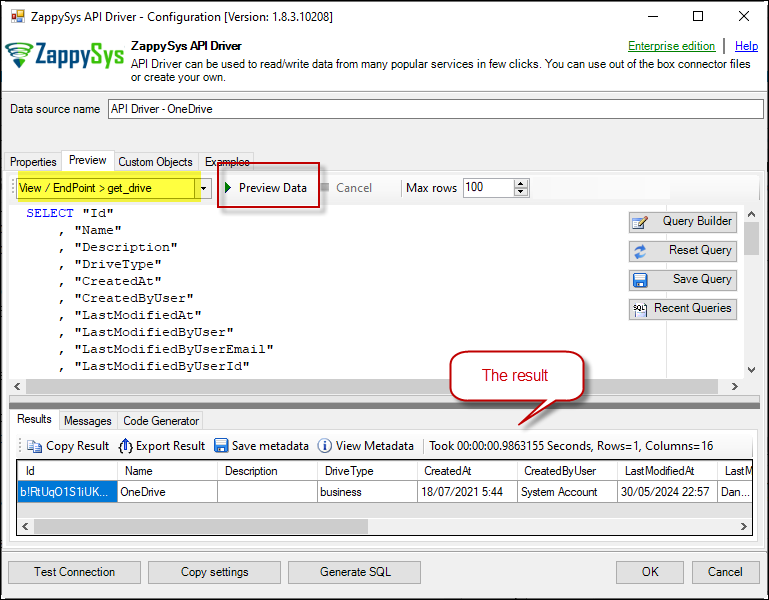
Go to the Preview Tab, select any table, and preview the result.

Step 4: Load OneDrive in Power BI Using ODBC
-
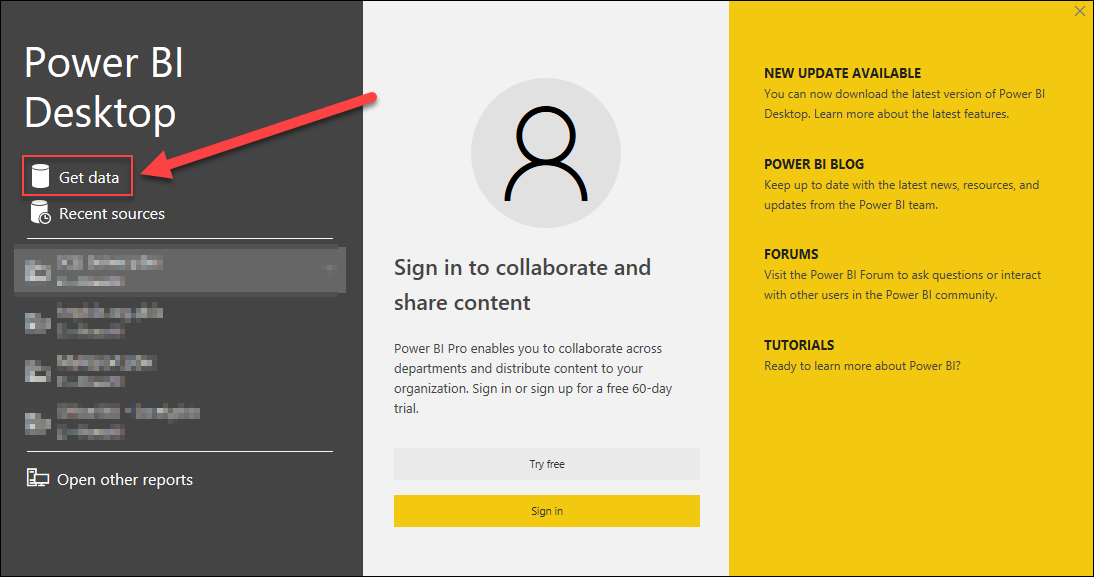
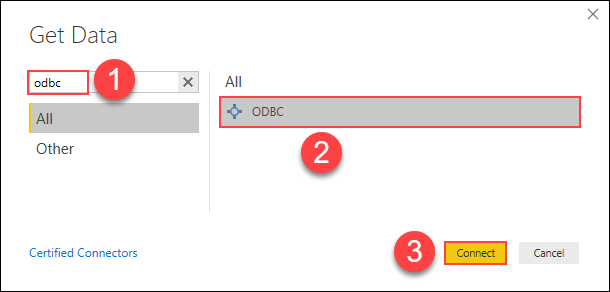
Open Power BI Desktop and click Get Data.
-
In the Get Data window, search for ODBC, select it, and click Connect.
-
Choose the ODBC Data Source Name (DSN) you created earlier (e.g., API Driver - OneDrive) and click OK.
-
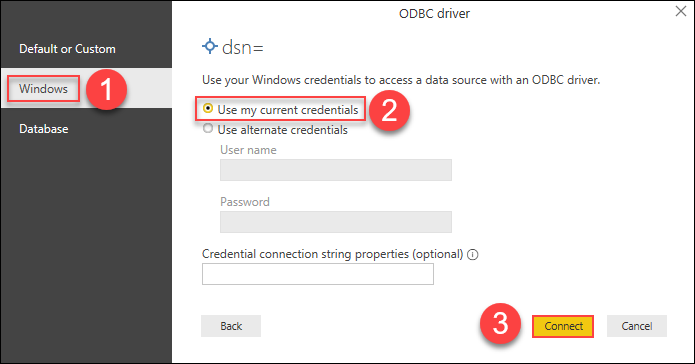
If prompted, authenticate using Windows Authentication or the required credentials, then click Connect.
-
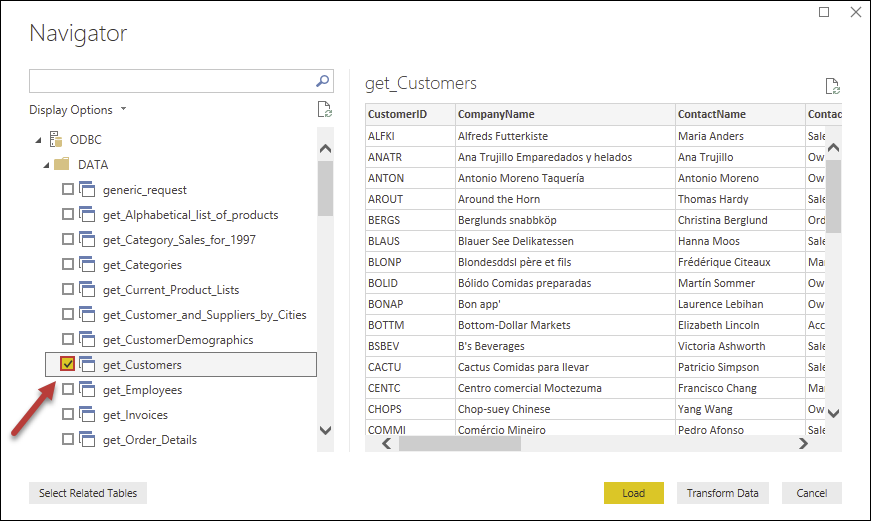
Select the OneDrive table or view you want to load, then click Load to import the data into Power BI.
-
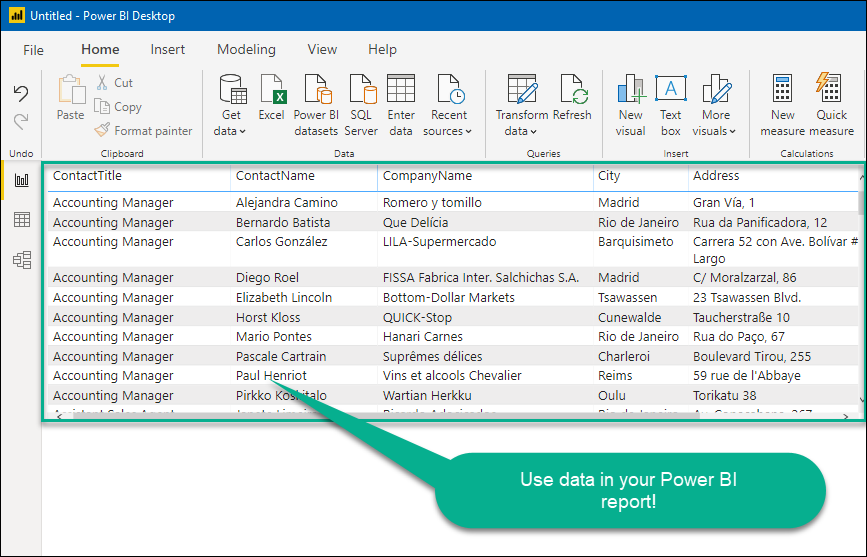
Once imported, use the data to create Power BI reports and visualizations.

Step 4: Import OneDrive Data Using SQL Queries
If you prefer to retrieve OneDrive data using SQL queries instead of selecting tables, follow these steps:
-
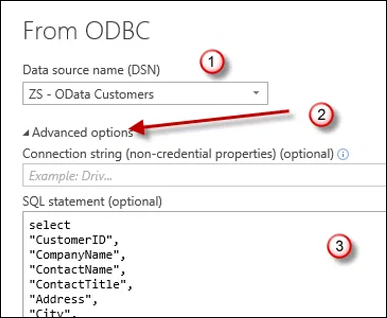
After selecting the DSN in the Get Data window, click Advanced Options to open the SQL Query editor.
-
Write an SQL query to retrieve the desired OneDrive data.
-
Execute the query, and the results will be loaded into Power BI for further analysis.
Considerations
- Save authentication details to avoid re-entering them each time you connect.
Video Tutorial

Conclusion
Following these steps, you can efficiently connect Power BI to OneDrive using the ZappySys ODBC API Driver, enabling seamless data integration for reporting and analysis. By leveraging this connection, you can directly access, transform, and visualize OneDrive data in Power BI, ensuring up-to-date insights for informed decision-making.
With the flexibility of ODBC queries, you can customize data retrieval, apply advanced filtering, and optimize performance for large datasets. Integrating OneDrive with Power BI also allows for automated data refreshes, eliminating manual updates and improving workflow efficiency.
References
Contact Us
If you encounter any challenges or have specific use cases, please contact our support team via chat or ticket.