Introduction
This article guides you through connecting to the ServiceNow API in SSIS. The ZappySys ServiceNow connector facilitates seamless integration and management of ServiceNow data.
Prerequisites
-
SSIS PowerPack: Download and install the ZappySys SSIS PowerPack from the Customer Download Area or get the trial version.
-
ServiceNow Account: Ensure you have a ServiceNow account to access ServiceNow data.
Steps
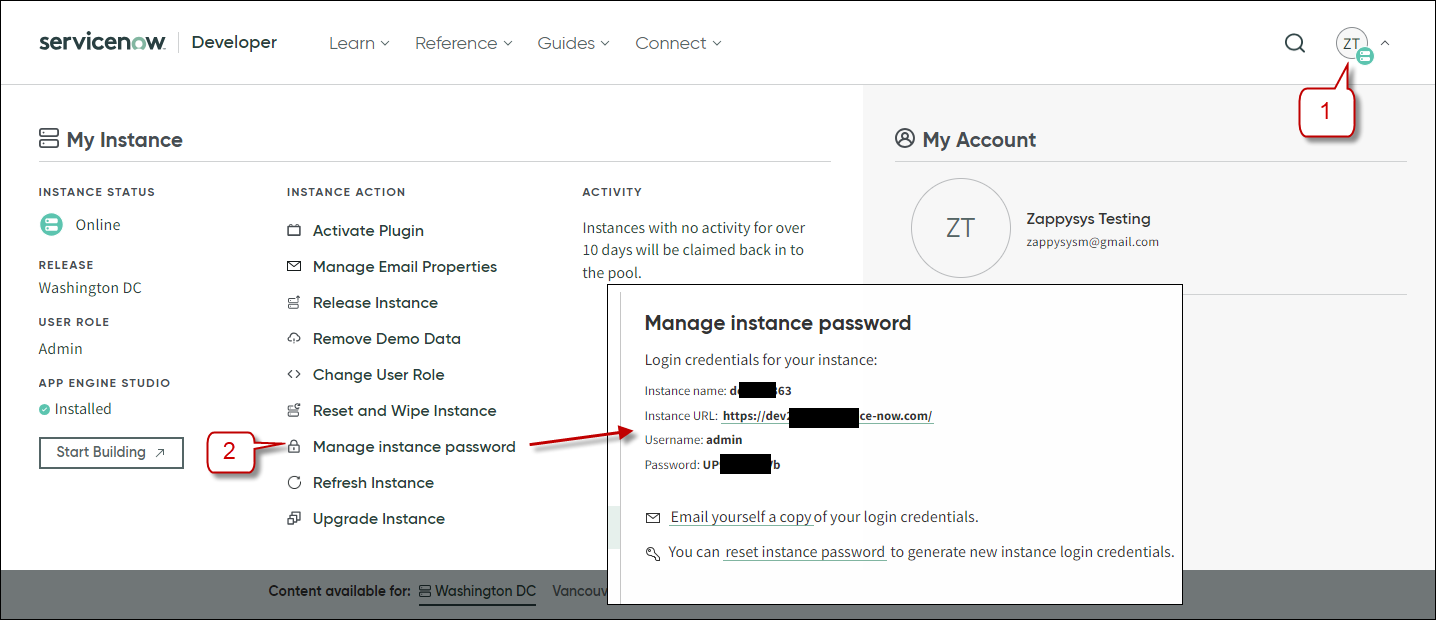
Steps to get ServiceNow Credentials: To get your Instance name, Username and Password:
- Log in to your ServiceNow and go to ServiceNow Developers.
- Click on your profile icon.
- Select your instance.
- Click on “Manage instance password” or similar link.
- On the opened page, you should see the Instance name, Username, and Password.
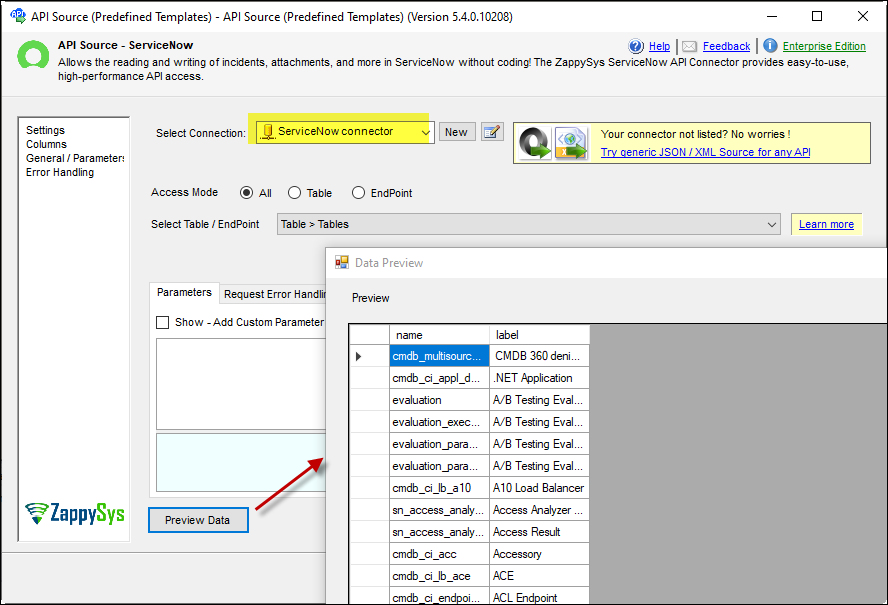
Connect with ServiceNow Connector in SSIS:
-
Add a Data Flow task to your SSIS package.
-
Inside the Data Flow, add an API Source component.
-
Configure a new connection within the API Source by selecting the ServiceNow connector and proceeding to the next step.
-
Enter your instance name, user name, and Password, and test the connection.
-
Save the configuration by clicking OK.
-
Choose a table/endpoint and preview the data.

Considerations
Save your credentials securely for future use.
Conclusion
Following these steps, you can seamlessly connect to ServiceNow within SSIS, leveraging the ZappySys tool for efficient data retrieval and integration. For assistance or inquiries, contact our support team via chat on our website or through email at support@zappysys.com.
Reference
For more detailed information, refer to our ServiceNow connector article.