Introduction
This guide explains how to connect Python with the Outlook Mail (Office 365) driver via our API Driver. Integrating Outlook with Python lets you streamline email-related tasks directly within your Python code, including list management, campaign automation, and engagement analysis.
Prerequisites
- ODBC PowerPack: Download the ZappySys ODBC PowerPack from the Customer Download Area or the trial version.
- Outlook account
pyodbc: A Python module for accessing ODBC databases.
Steps
Install pyodbc in Python
-
Confirm that Python is installed on your system.
-
Open your terminal or command prompt.
-
Run the following command to install
pyodbc:python -m pip install pyodbc
Benefits of pyodbc
- Error Prevention: Prevents
ModuleNotFoundErrorby ensuringpyodbcis available. - Database Connectivity: Connects Python to ODBC databases like Microsoft SQL Server, PostgreSQL, and MySQL.
- Data Operations: Enables SQL queries, data retrieval, and database management.
- Cross-Platform Support: Works across Windows, macOS, and Linux.
- Efficiency: Provides a user-friendly interface for managing database connections.
Create an Application in Microsoft Azure
- Log into the Azure Portal and navigate to Azure Active Directory.
- Click App registrations in the left menu and select New registration.
- Enter an application name, choose the account type, and set the Redirect URI to
https://login.microsoftonline.com/common/oauth2/nativeclient. - Note down the Application (client) ID, Tenant ID, and Secret ID from the app configuration.
Create a New Driver
-
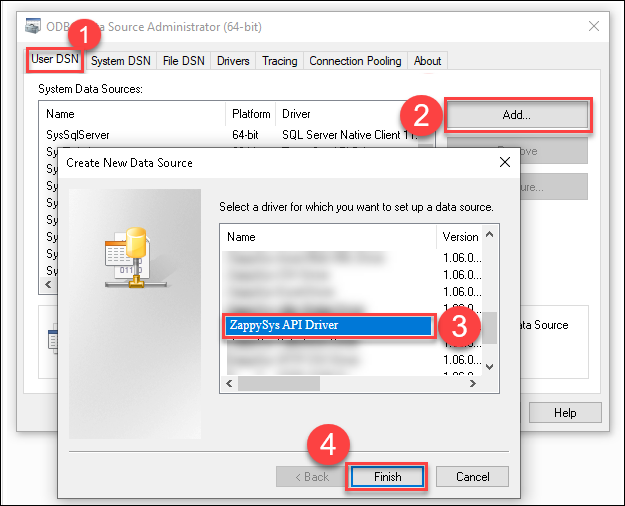
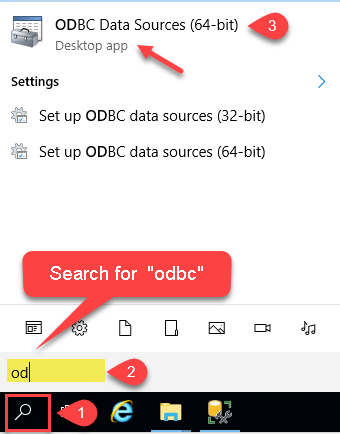
Open ODBC Data Source by typing “ODBC” in the search box.
-
Go to User DSN or System DSN, select Add, and choose ZappySys API Driver from the list. Select Outlook Mail (Office 365) as the connector.
Configure Outlook Mail (Office 365) Connector
-
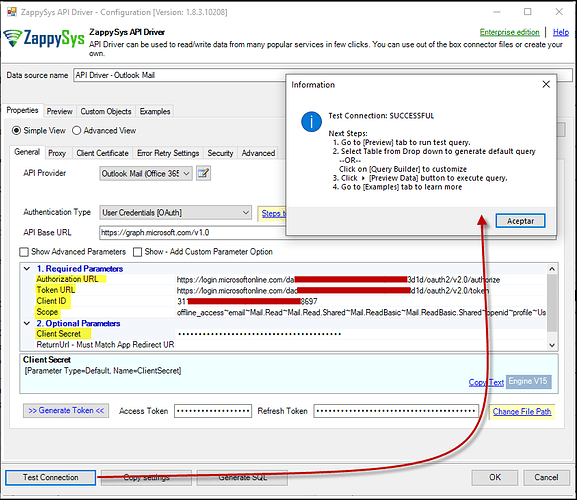
In the connector configuration, enter Client ID, Client Secret, and other details, including the Authorization and Token URLs. Generate a token using these settings:
- Authorization URL:
https://login.microsoftonline.com/{TenantID}/oauth2/v2.0/authorize - Token URL:
https://login.microsoftonline.com/{TenantID}/oauth2/v2.0/token
- Authorization URL:
-
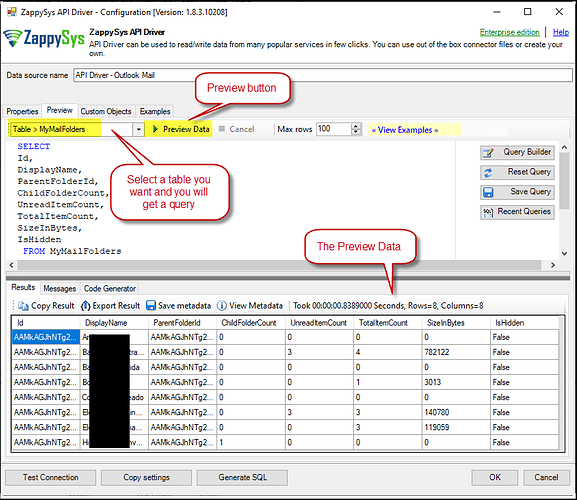
Go to the Preview Tab, select a table, and click Preview Data to test the connection. Click OK to save.
Access Data in Python Using ODBC DSN
-
Create a Python file (e.g.,
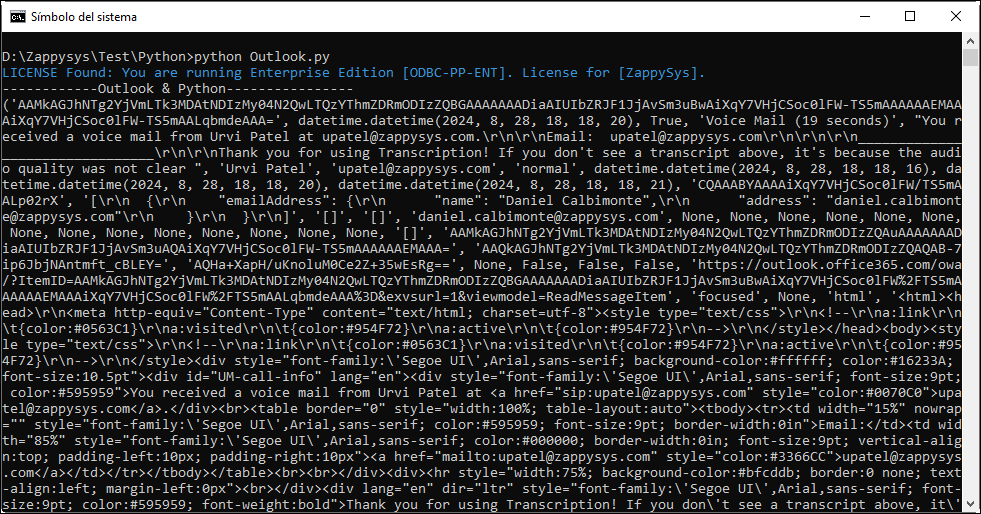
OutlookExample.py):import pyodbc conn = pyodbc.connect('DSN=API Driver - Outlook') cursor = conn.cursor() cursor.execute("SELECT * FROM Lists") print("------------Outlook & Python----------------") row = cursor.fetchone() while row: print(row) row = cursor.fetchone() -
Running this code initiates an API call and retrieves data.
Use a Full ODBC Connection String
To avoid creating multiple DSNs:
-
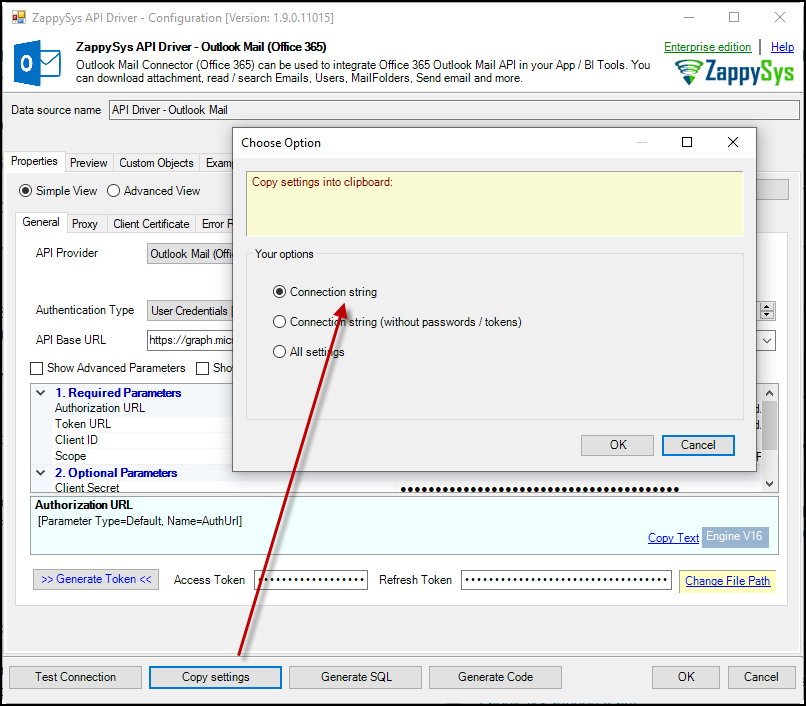
In ODBC Data Source, click Copy Settings to retrieve the connection string.
-
Paste the connection string in Python as follows:
conn = pyodbc.connect('DRIVER={ZappySys API Driver};ServiceUrl=https://yourservice.provider.com/api/xxxx....;AuthName=Http;')
Conclusion
This guide covered connecting Python with Outlook using the API Driver, enabling list management, campaign automation, and data analysis directly from Python. For more information, contact the ZappySys support team.

