Introduction
This guide will walk you through connecting Python with Mailchimp using the Mailchimp API. Integrating Mailchimp with Python enables you to automate tasks like managing subscriber lists, sending campaigns, and analyzing engagement directly from your Python code, streamlining email marketing workflows.
Prerequisites
- ODBC PowerPack: Download and install the ZappySys ODBC PowerPack from the Customer Download Area or use the trial version.
- Mailchimp account
pyodbc: An open-source Python module for accessing ODBC databases.
Steps
Install pyodbc in Python
To connect to ODBC-supported databases, install pyodbc in Python, simplifying querying and managing data.
-
Ensure Python is installed on your system. Download it if needed.
-
Open your terminal or command prompt.
-
Install
pyodbcusing pip:python -m pip install pyodbc
Reasons to Install
- Error Prevention: Without
pyodbc, your Python script will produceModuleNotFoundError: No module named 'pyodbc'. - Database Connectivity: This feature enables Python to connect to ODBC databases, such as Microsoft SQL Server, PostgreSQL, and MySQL.
- Data Operations: Facilitates SQL queries, data retrieval, and other database interactions.
- Cross-Platform Support: Compatible with Windows, macOS, and Linux.
- Efficiency: Provides an intuitive interface for managing database connections.
Installing pyodbc lets you integrate Python applications with various ODBC-supported databases for effective data management and analysis.
OAuth Authentication
-
To connect via OAuth, navigate to the Registered Apps page in your Mailchimp account and click Register An App.
-
Complete the registration form. For the Redirect URL field, enter
https://zappysys.com/oauth2. -
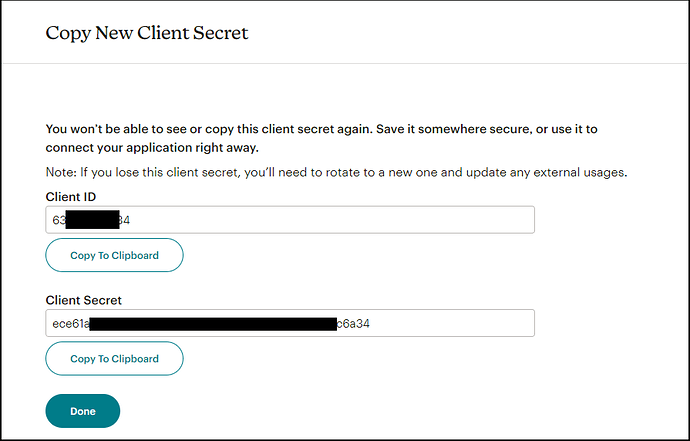
Save the provided Client ID and Client Secret for later use.
API Key Authentication
-
To connect via API Key, generate it in your Mailchimp account.
-
Click Create a Key, name it, and copy the new key for later use. Refer to Mailchimp’s API documentation here.
Create a New Driver
-
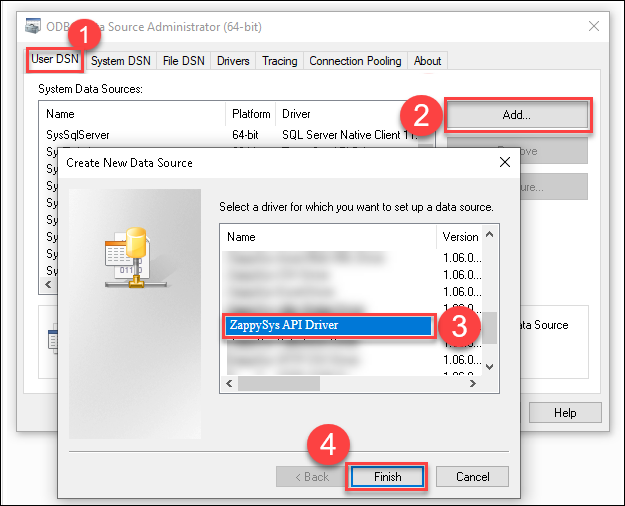
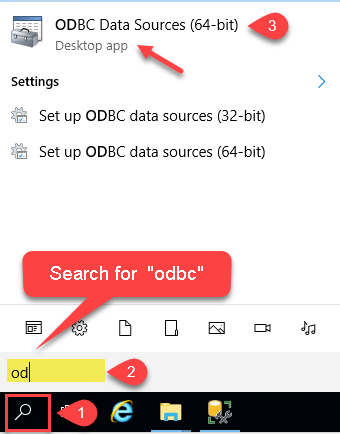
Open the ODBC Data Source by typing “ODBC” in the search box and launching the ODBC Data Source.
-
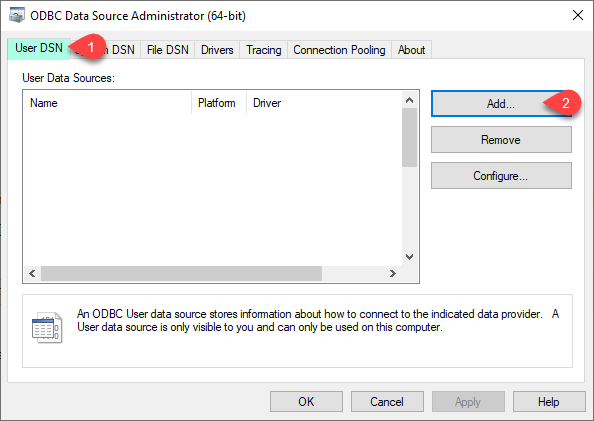
For individual or shared access, select User DSN or System DSN. Click Add under the System tab to add a new System DSN.
-
From the driver list, select ZappySys API Driver, choose Mailchimp from the connector list, and press Continue.
Mailchimp Connector Configuration
-
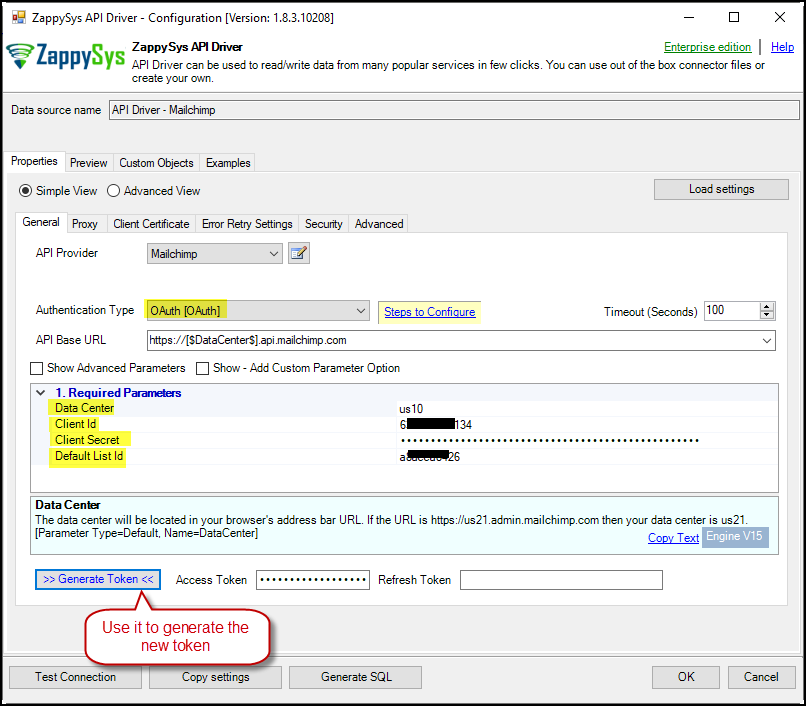
For OAuth Authentication, select OAuth as the authentication type, then enter your Client ID, Client Secret, Data Center, and Default List-ID. A dropdown menu allows selecting the Default List ID.
- Note: Identify the Data Center (DC) from your Mailchimp URL. For instance,
https://us1.admin.mailchimp.com/account/api/manageindicates us1 is the Data Center.
- Note: Identify the Data Center (DC) from your Mailchimp URL. For instance,
-
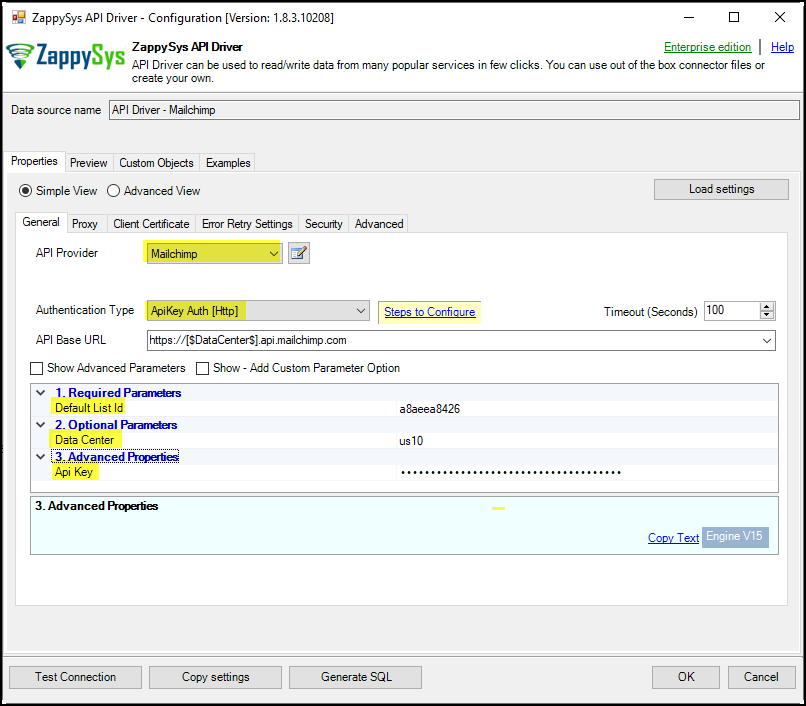
For API Key Authentication, enter the API Key, Data Center, and Default List-ID, then test the connection.
-
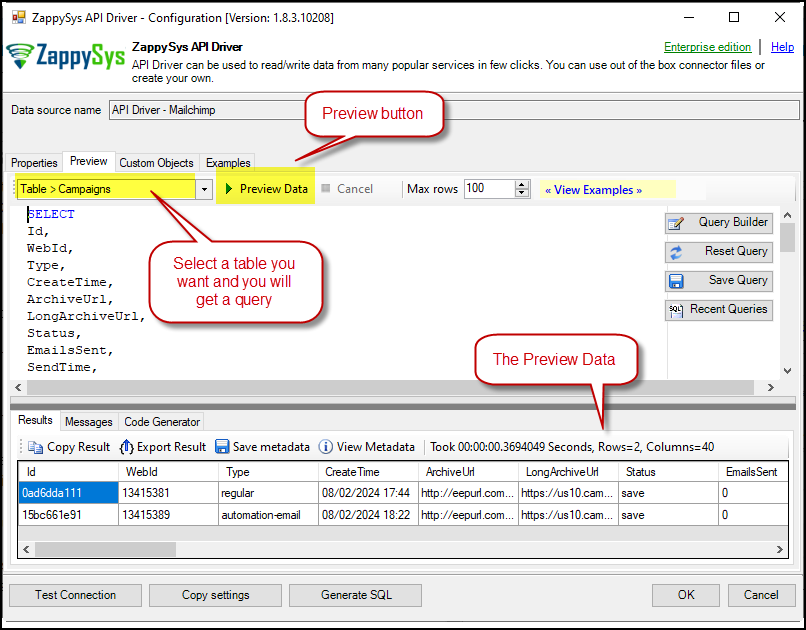
Go to the Preview Tab, select a table, and click Preview Data to view results. Click OK to save your configuration.
Reading Data in Python Using ODBC DSN
-
Create a Python file, e.g.,
MailchimpExample.py:import pyodbc conn = pyodbc.connect('DSN=API Driver - Mailchimp') cursor = conn.cursor() # Execute query to fetch data cursor.execute("SELECT * FROM Lists") print("------------Mailchimp & Python----------------") row = cursor.fetchone() while row: print(row) row = cursor.fetchone() -
Running the code initiates an API call and retrieves data.
Using a Full ODBC Connection String
To avoid creating multiple DSNs for each platform, copy the connection string directly:
-
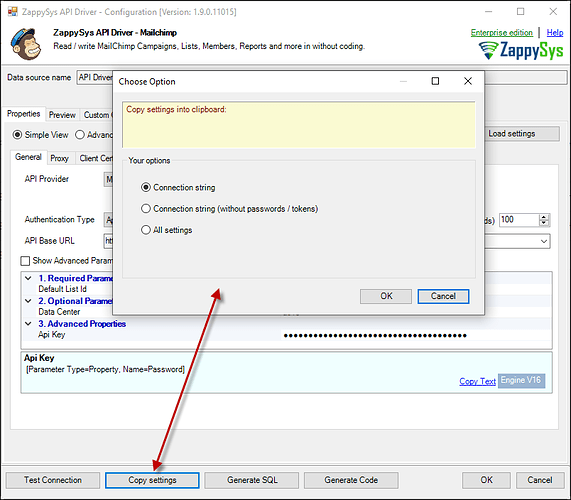
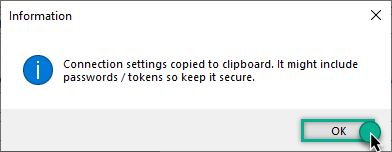
In ODBC Data Source, click Copy Settings.
-
A confirmation window will appear.
-
In Python, use the connection string with
pyodbc.connect():
conn = pyodbc.connect('DRIVER={ZappySys API Driver};ServiceUrl=https://yourservice.provider.com/api/xxxx....;AuthName=Http;')
Conclusion
Following this guide, you’ve successfully connected Python with Mailchimp using the Mailchimp API. This integration facilitates tasks like managing lists, sending campaigns, and analyzing engagement directly from Python scripts. For assistance, contact the ZappySys support team.
