Introduction
This guide will walk you through connecting Power BI to the OData connector using the ZappySys ODBC API Driver for seamless data retrieval. The ZappySys OData driver provides a powerful solution for integrating OData into Power BI, enabling efficient data management and in-depth analysis.
OData (Open Data Protocol) is a standardized protocol for creating and consuming data APIs. It simplifies the development of RESTful APIs by handling request and response headers, status codes, HTTP methods, URL conventions, media types, and query options in a structured manner.
Prerequisites
Before starting, ensure you have the following:
- ZappySys ODBC PowerPack: Download and install it here.
Steps
Step 1: Create a New ODBC Driver
-
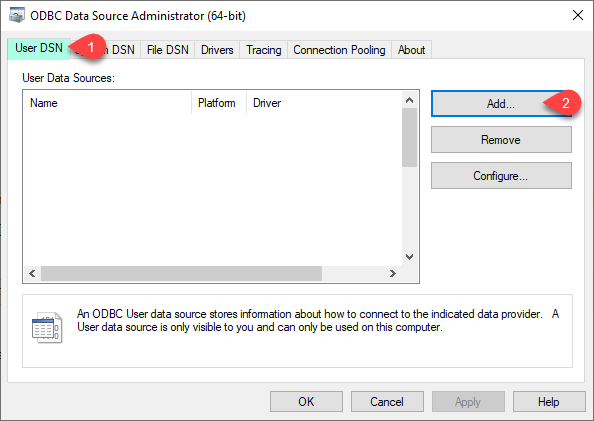
Open the ODBC Data Source Administrator by typing “ODBC” in the Windows search bar and selecting the application.
-
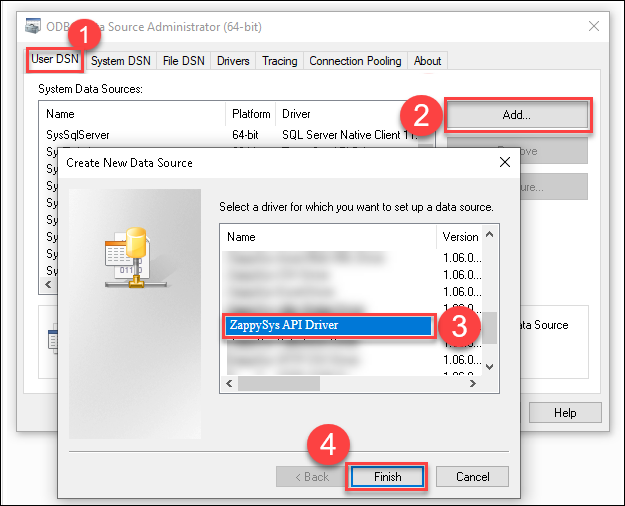
To create a data source for all users, navigate to the *System DSN tab and click Addto create a new system-wide ODBC connection.
-
From the list of drivers, select ZappySys API Driver, then choose OData from the connector list and click Continue.

Step 2: Configure the OData Connector
-
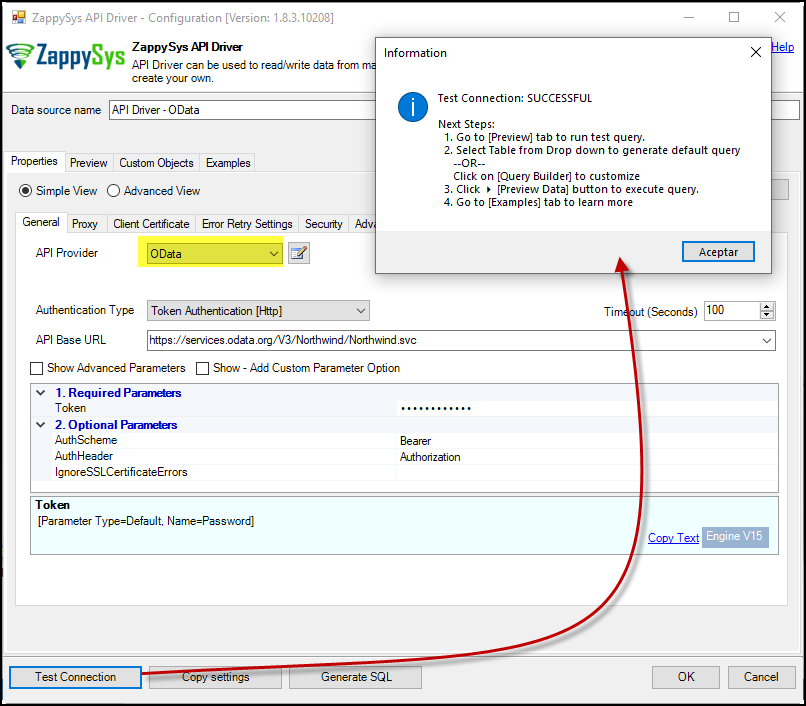
Select the appropriate Authentication Type (e.g., Token Authentication) and specify the API Base URL. The default value works for most cases. For more details, refer to the Authentication Guide.
-
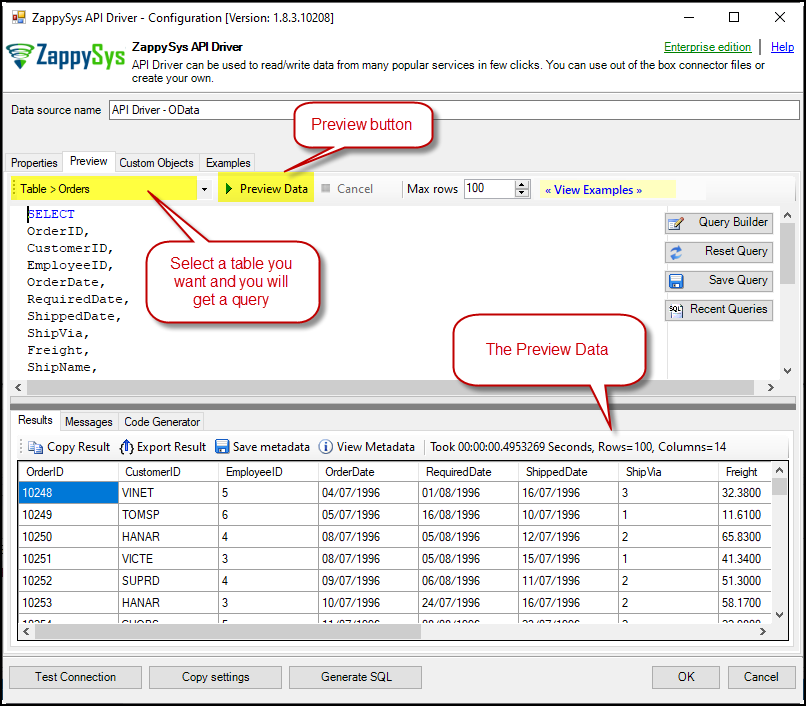
Go to the Preview Tab, select any table, and preview the results. Click OK to save the configuration.
Step 3: Load OData in Power BI Using ODBC
-
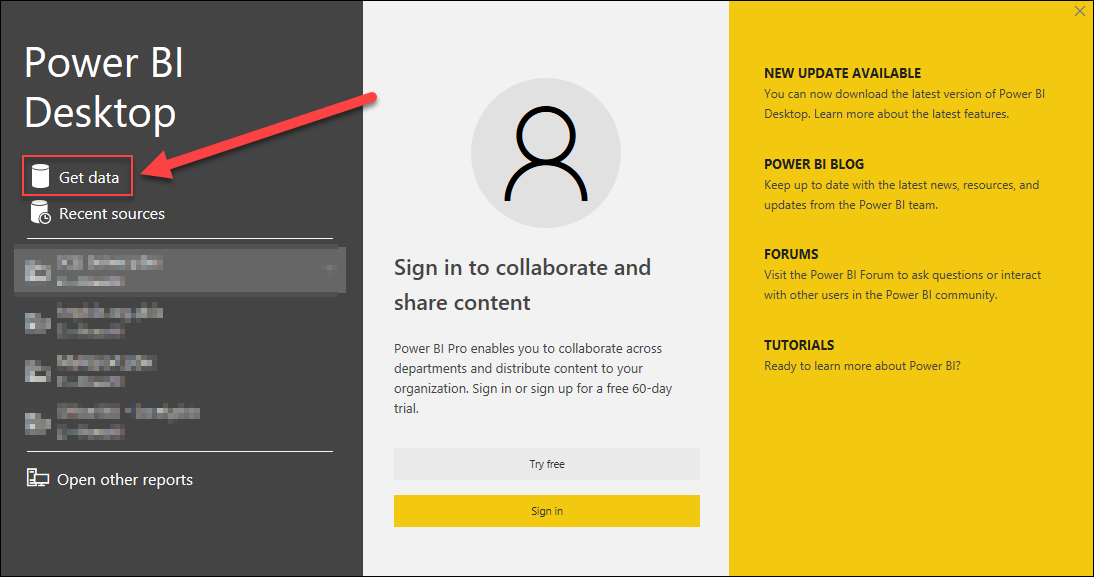
Open Power BI Desktop and click Get Data.
-
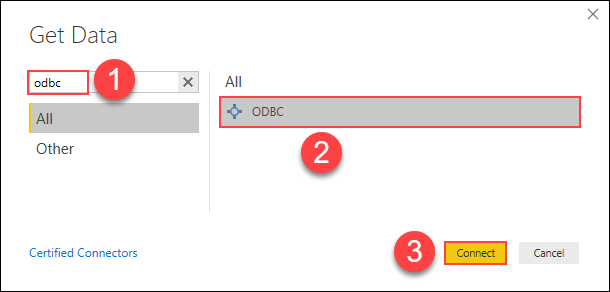
In the Get Data window, search for ODBC, select it, and click Connect.
-
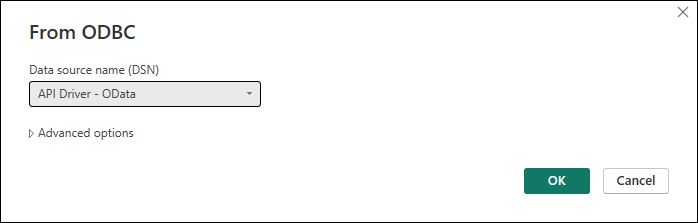
Choose the ODBC Data Source Name (DSN) you created earlier (e.g., API Driver - OData) and click OK.
-
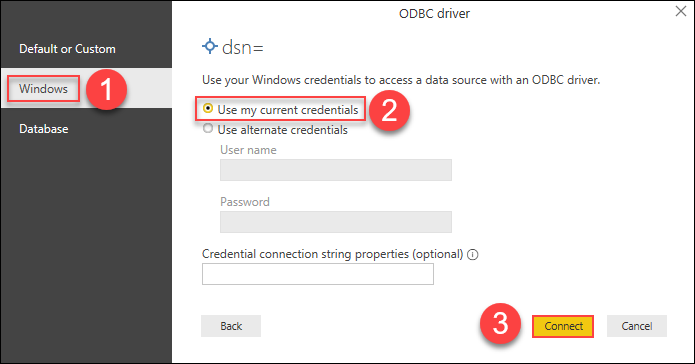
If prompted, authenticate using Windows Authentication or the required credentials, then click Connect.
-
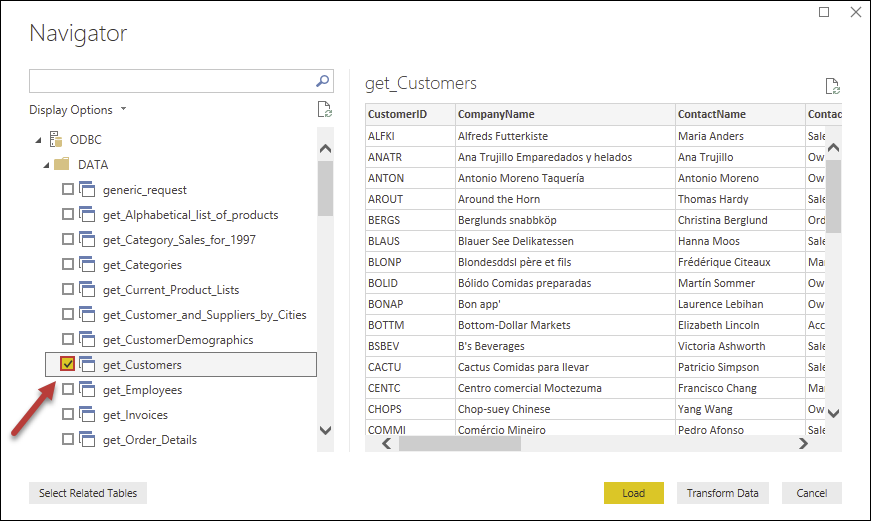
Select the OData table or view you want to load, then click Load to import the data into Power BI.
-
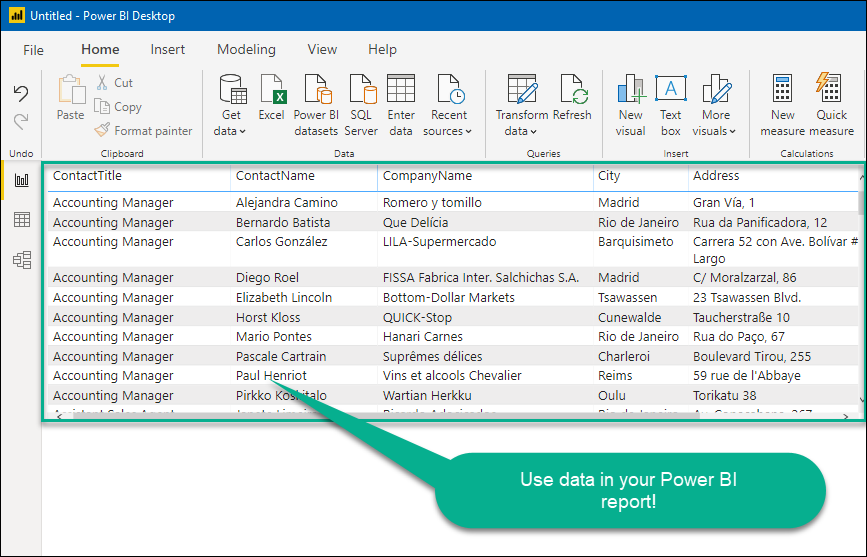
Once imported, use the data to create Power BI reports and visualizations.
Step 4: Import OData Data Using SQL Queries
If you prefer to retrieve OData data using SQL queries instead of selecting tables, follow these steps:
-
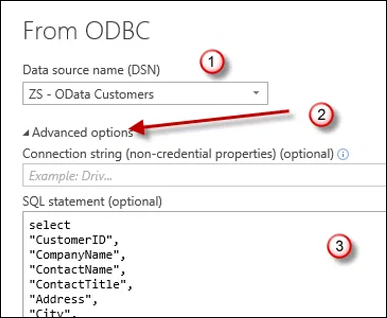
After selecting the DSN in the Get Data window, click Advanced Options to open the SQL Query editor.
-
Write an SQL query to retrieve the desired OData data.
-
Execute the query, and the results will be loaded into Power BI for further analysis.
Considerations
- Save authentication details to avoid re-entering them each time you connect.
- Ensure your OData API supports ODBC connections and proper authentication.
Video Tutorial

Conclusion
Following these steps, you can efficiently connect Power BI to OData using the ZappySys ODBC API Driver, enabling seamless data integration for reporting and analysis. If you encounter any issues or need assistance, rcontactthe ZappySys support team.
References
For more details, check out the OData Connector Documentation.