Introduction
This guide will walk you through connecting Microsoft Excel to the Mailchimp API using the ZappySys ODBC API Driver, enabling seamless data integration and retrieval. The ZappySys ODBC Mailchimp Connector provides a robust solution for integrating Mailchimp data into Excel for reporting and analysis.
Prerequisites
- ODBC PowerPack: Download and install the ZappySys ODBC PowerPack from the Customer Download Area or the trial version.
- Mailchimp account
Steps
Step 1: Get Credentials from Mailchimp
Method 1: OAuth Authentication
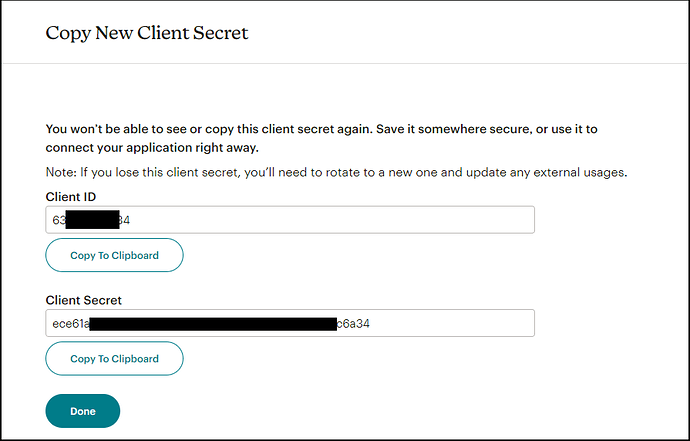
- To connect via OAuth, navigate to the Registered Apps page in your Mailchimp account and click Register An App.
- Complete the registration form. For the Redirect URL field, enter
https://zappysys.com/oauth2. - Save the provided Client ID and Client Secret for later use.
Method 2: API Key Authentication
- To connect via API Key, generate it in your Mailchimp account.
- Click Create a Key, name it, and copy the new key for later use. Refer to Mailchimp’s API documentation here.
Step 2: Create a New Driver
-
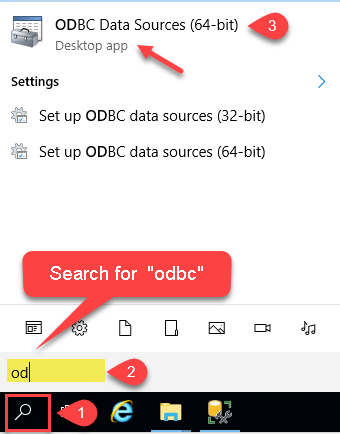
Open the ODBC Data Source by typing “ODBC” in the search box and launching the ODBC Data Source.
-
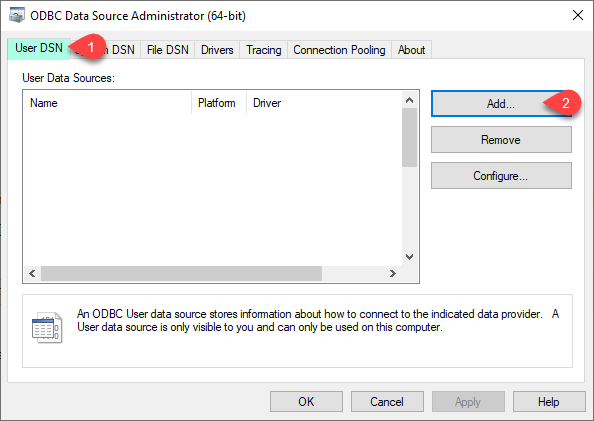
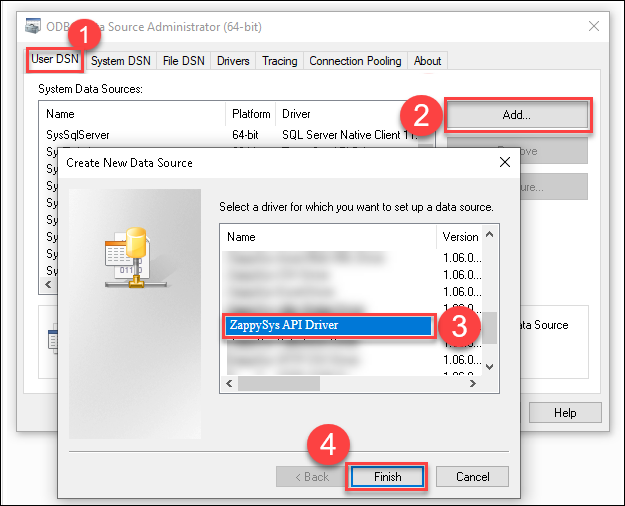
For individual or shared access, select User DSN or System DSN. Click Add under the System tab to add a new System DSN.
-
From the driver list, select ZappySys API Driver, choose Mailchimp from the connector list, and press Continue.
Step 3: Mailchimp Connector Configuration
-
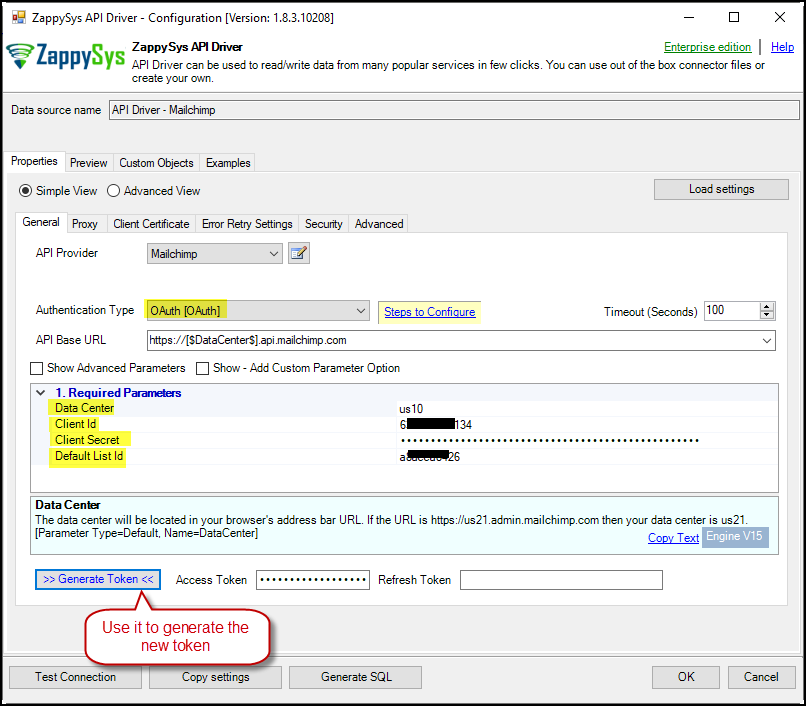
For OAuth Authentication, select OAuth as the authentication type, then enter your Client ID, Client Secret, Data Center, and Default List-ID. A dropdown menu allows selecting the Default List ID.
- Note: Identify the Data Center (DC) from your Mailchimp URL. For instance,
https://us1.admin.mailchimp.com/account/api/manageindicates us1 is the Data Center.
- Note: Identify the Data Center (DC) from your Mailchimp URL. For instance,
-
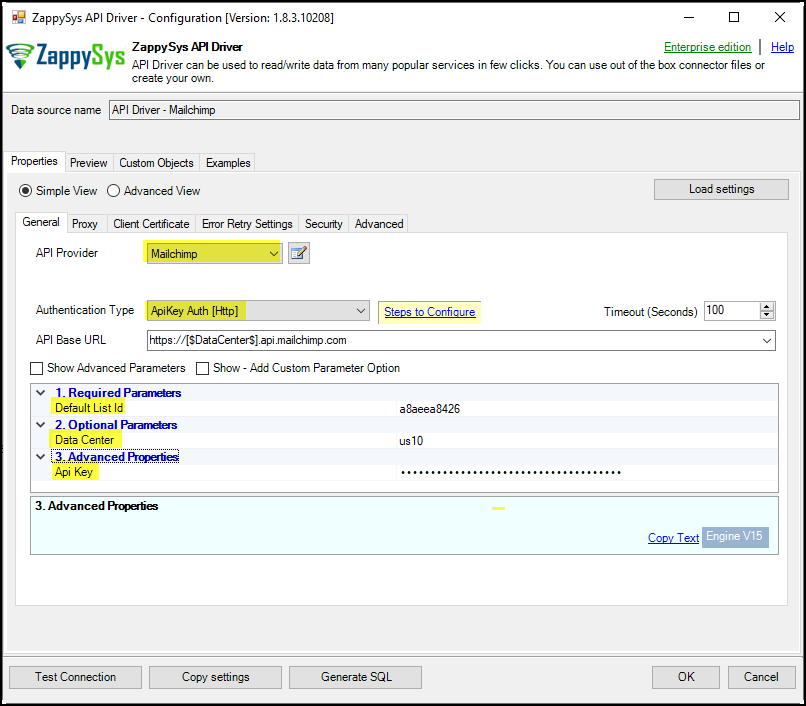
For API Key Authentication, enter the API Key, Data Center, and Default List-ID, then test the connection.
-
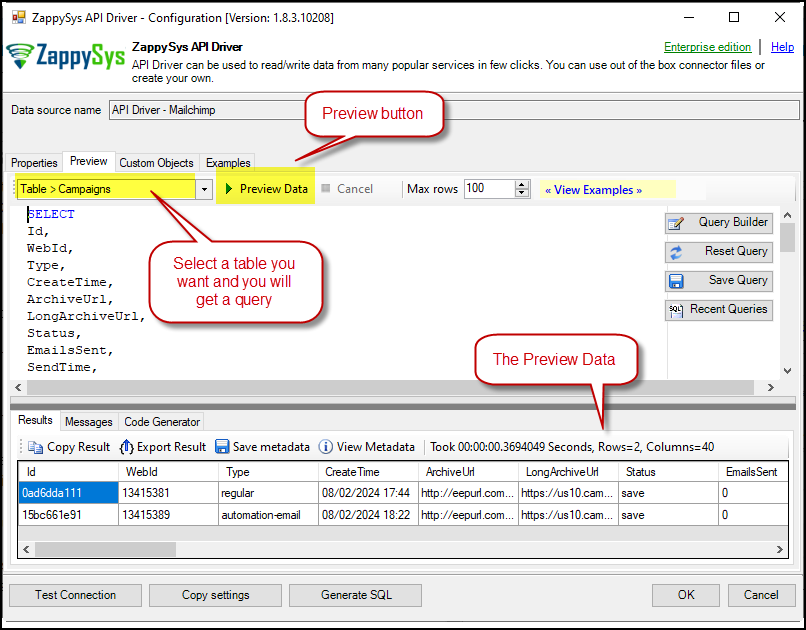
Go to the Preview Tab, select a table, and click Preview Data to view results. Click OK to save your configuration.
Step 4: Read data in Excel from the DSN
-
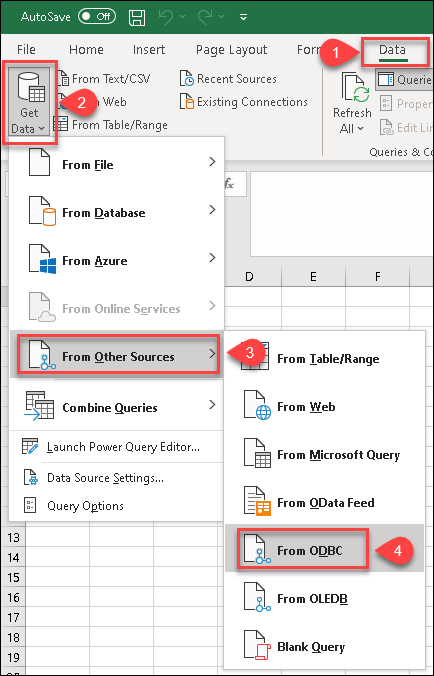
In Excel click Data, then select Get Data, proceed with From Other Sources and choose From ODBC item. This will get data from the ODBC data source we created:
-
A small window opens, then select the data source you created in previous steps:
-
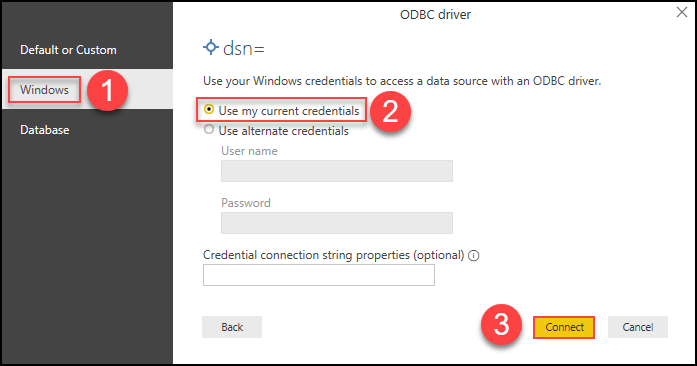
You will most likely be asked to authenticate to a newly created DSN. Just select the Windows authentication option together with the Use my current credentials option:
-
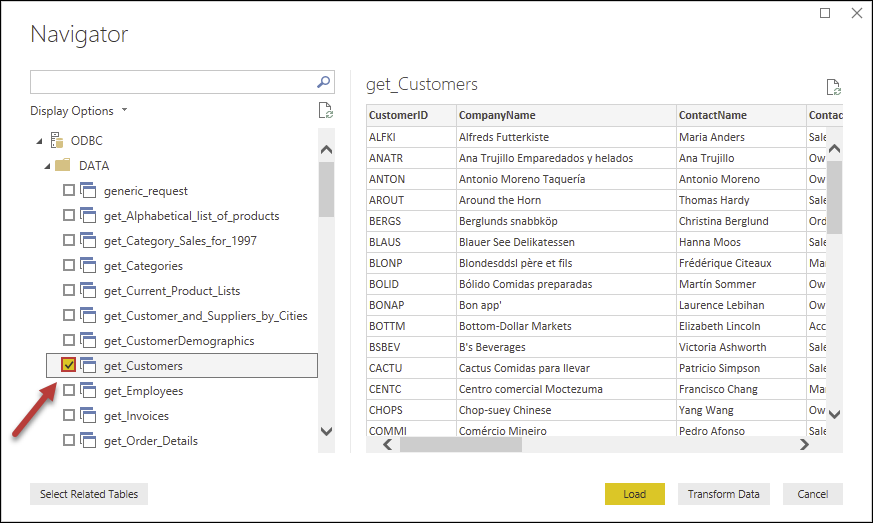
You will be asked to select a table or view to get data. Select one and load the data!
-
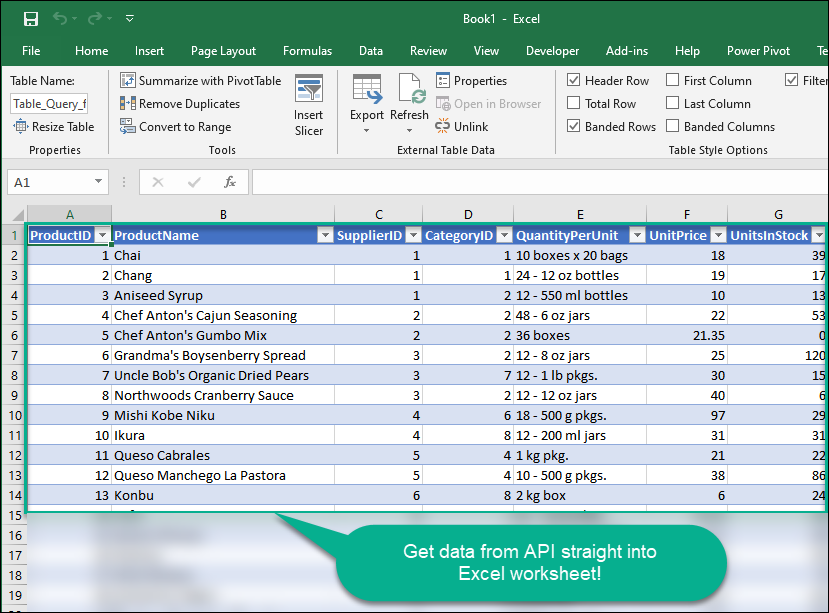
Finally, use data extracted from REST API API in an Excel worksheet:
Considerations
Save the credentials so you do not have to search for them in your account every time.
Video Tutorial
Conclusion
.
The article provides steps to guide users through connecting Excel with Mailchimp services using our ODBC API driver. If you encounter any issues or need further assistance, feel free to contact our support team via chat on our website
