Introduction
This guide will walk you through connecting Microsoft Access to the HubSpot API using the ZappySys ODBC API Driver, enabling seamless data integration and retrieval. The ZappySys ODBC HubSpot Connector provides a robust solution for integrating HubSpot data into MS Access for reporting and analysis.
Prerequisites
- ODBC PowerPack: Download and install the ZappySys ODBC PowerPack from the Customer Download Area or the trial version.
- HubSpot Account: Ensure you have a HubSpot account with Super Admin permissions.
Steps
Step 1: Create/Select an App on the HubSpot Developer Page
-
Log in to your HubSpot account using Super Admin credentials.
-
Click the settings icon in the main navigation bar and navigate to Integrations > Private Apps.
-
Select Create private app.
-
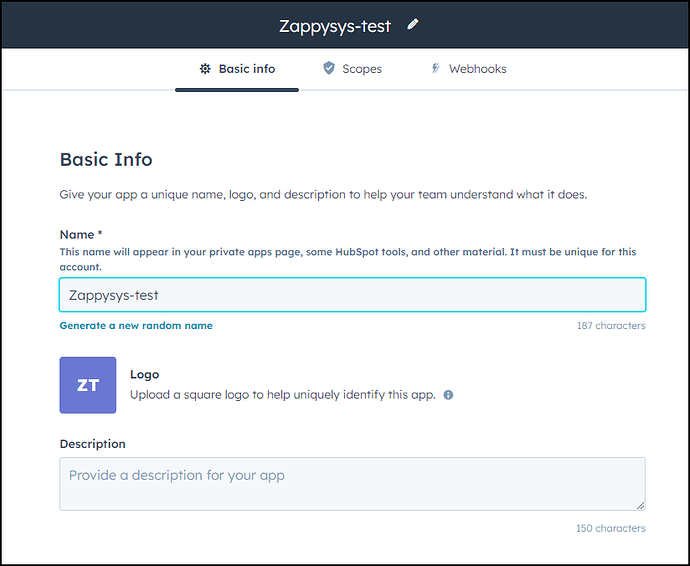
In the Basic Info tab:
- Enter a name for your app.
- Add an optional description and upload an image if desired.
-
Navigate to the Scopes tab and configure the required read/write permissions for your integration.
-
Your integration is a Create app to save the crate the authentication token.
Step 2: Configure a New ODBC Driver
-
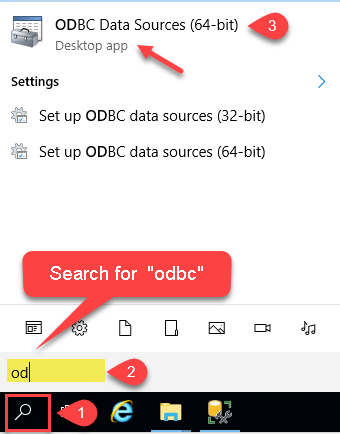
Open the ODBC Data Source Administrator by typing “ODBC” in the system search box.
-
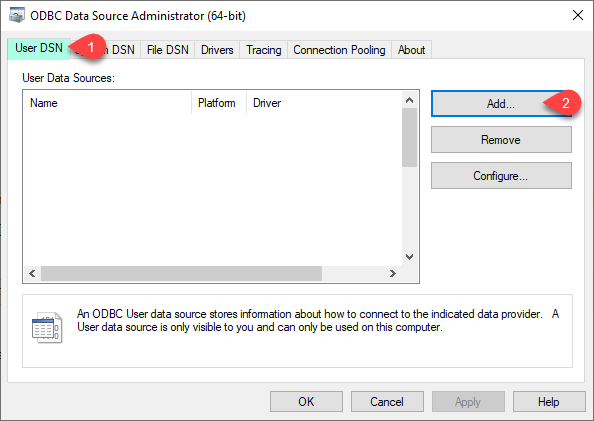
Choose User DSN or System DSN, depending on your preference:
- User DSN: Accessible by the current user only.
- System DSN: Accessible by all system users.
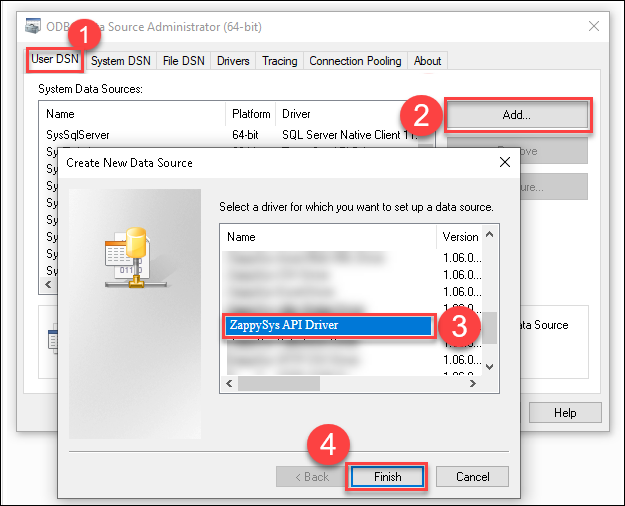
Click Add to create a new data source.
-
Select ZappySys API Driver from the driver list, then choose HubSpot from the connector options and click Continue.
Step 3: Configure the HubSpot Connector
-
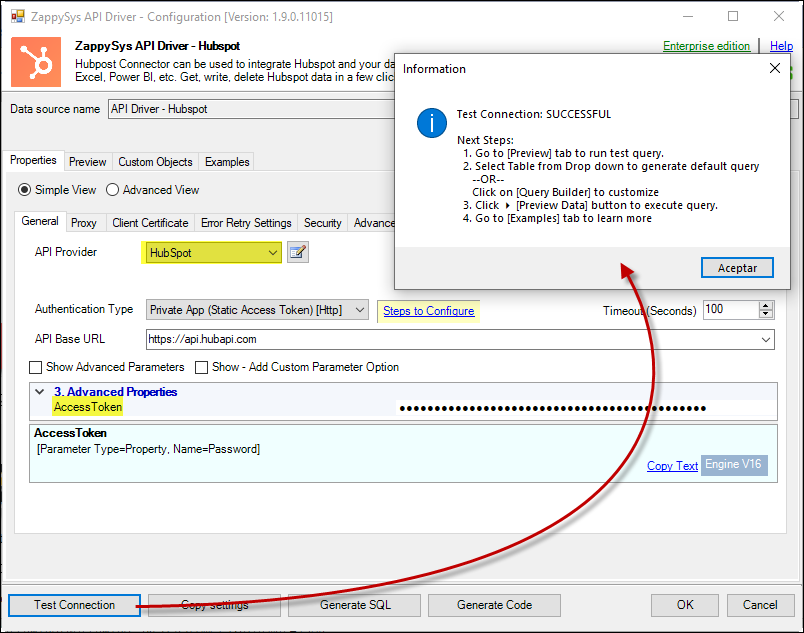
Enter the token you generated in Step 1 and test the connection.
-
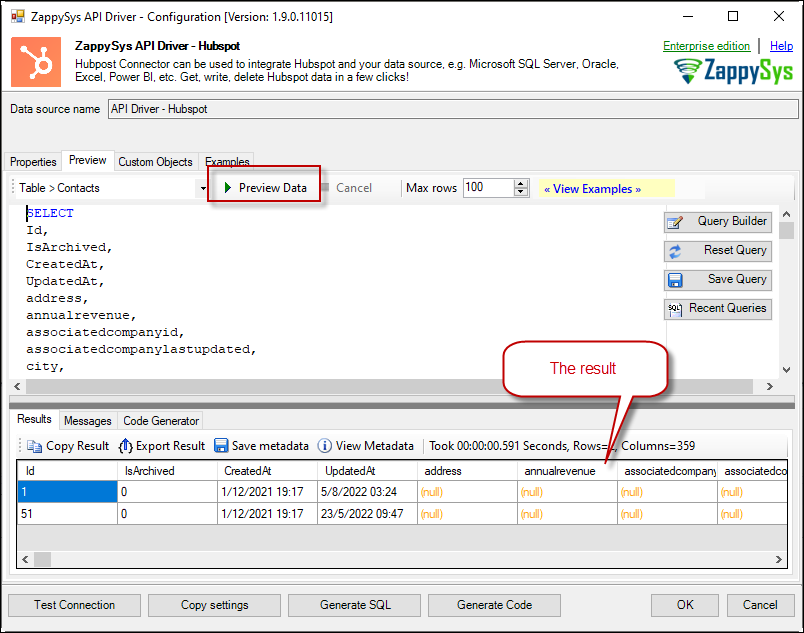
Navigate to the Preview Tab, select any table, and preview the data.
-
Once satisfied, click OK to save the configuration.
Step 4: Import Data into MS Access
-
Open Microsoft Access and create a new database.
-
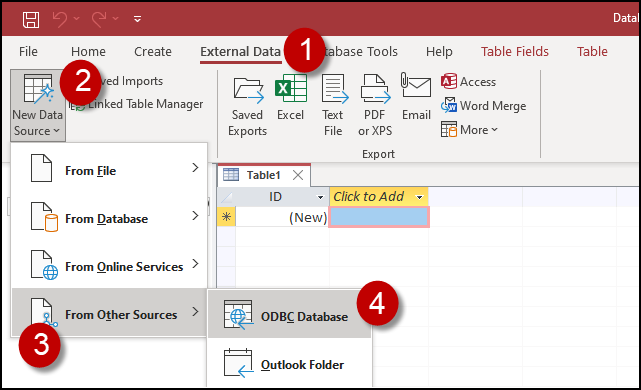
Go to External Data, select New Data Source, then From Other Sources, and choose ODBC Database.
-
Choose Import the source data into a new table in the current database.
-
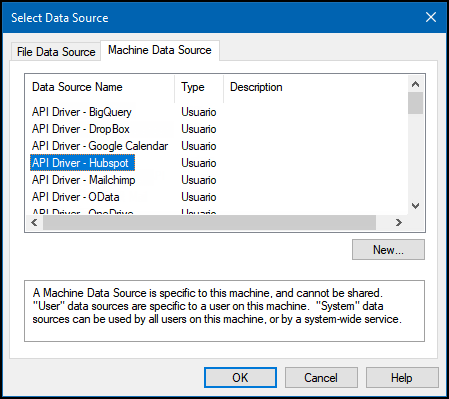
Under Machine Data Source, select the data source you configured earlier and click OK.
-
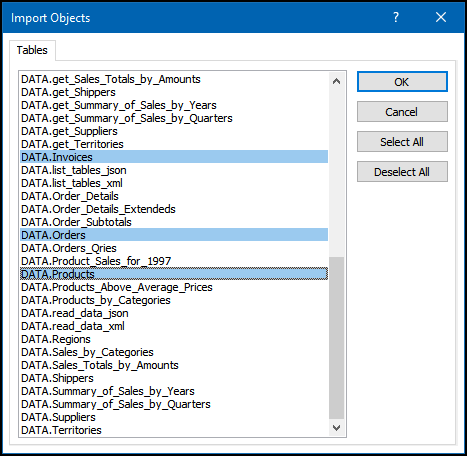
Select the desired tables and views, and then import the data. You can choose multiple tables at once.
-
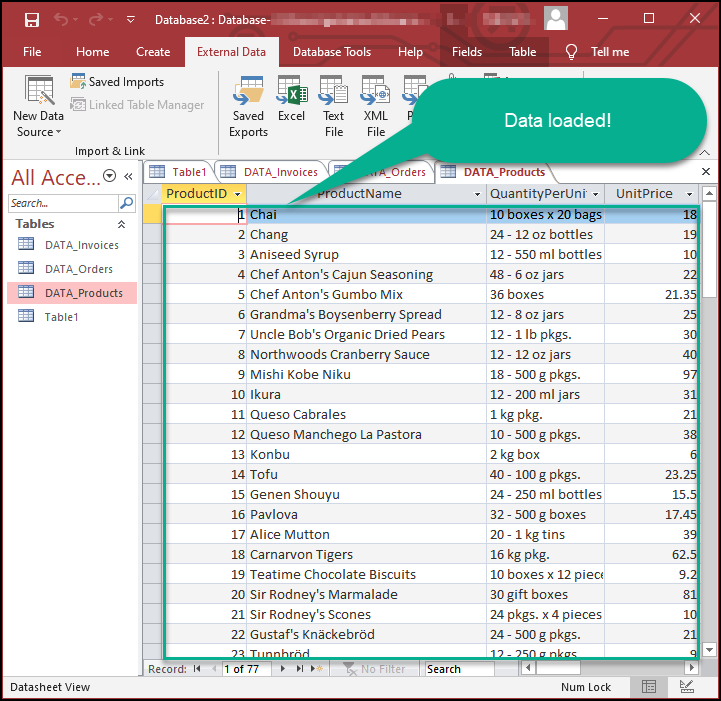
Once the import is complete, your data will be available in the Access database:
Step 5: Use Linked Tables for Live Data
Linked tables allow real-time access to data without duplicating it.
-
Create a new database in MS Access.
-
Go to External Data, select New Data Source, then From Other Sources, and choose ODBC Database.
-
Select Link to Data Source by creating a linked table.
-
Under Machine Data Source, select your previously configured data source and click OK.
-
Select the desired tables or views to link.
-
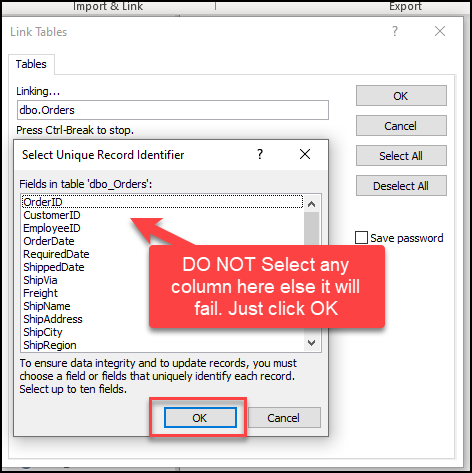
When prompted to select the unique key column, skip this step and click OK.
-
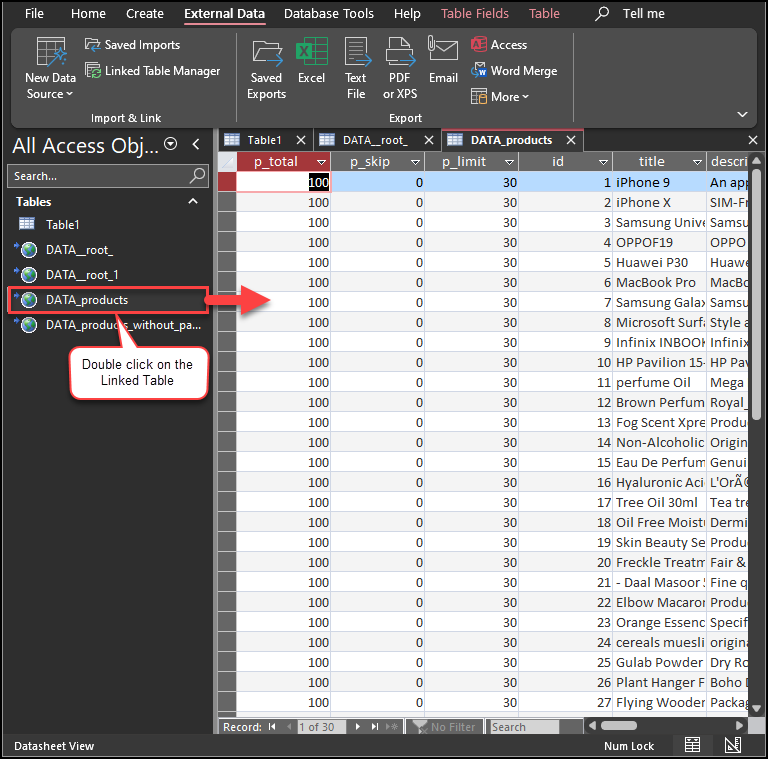
Double-click the linked table to load the data:
Considerations
- Save Authentication Details: To avoid re-entering credentials for future connections, save your settings securely.
- Linked Tables: These are ideal for scenarios requiring real-time data but may perform slower than importing data.
Video Tutorial
Conclusion
By following this guide, you can effortlessly connect MS AccesFollowing using the ZappySys ODBC API Driver. This powerful integration enables efficient data management, analysis, and reporting. If you encounter any challenges, feel free to reach out to the [ZappySys support team](https://zappysys.com/contact# References
