If you like to consume Amazon Athena data into Power BI using a native JDBC Driver, then you might have realized by now that it’s a dead end because Power BI doesn’t have JDBC support. In this post we will learn how to Connect Amazon Athena in Power BI. Using ZappySys JDBC Bridge Driver, connecting to an Amazon Athena database becomes a straightforward process for under applications. This guide will walk you through the steps required to establish a connection, execute SQL queries, and process results programmatically, enabling seamless integration of Amazon Athena.
Step-by-Step Guide
To connect to the Amazon Athena Database with ZappySys JDBC Bridge Driver
System Requirements:
Before we begin, it’s important to have Java Runtime Environment (JRE) or Java Development Kit (JDK) installed on your system. We suggest installing JRE8, but other versions may also suffice. There are multiple ways to obtain the JRE8 installer, but we recommend using one of the following methods. If you already have Java Runtime installed, you can skip the steps below.
Ensure you have Java 8 (or a newer version) installed on your system, either as Java Runtime Environment (JRE) or Java Development Kit (JDK). You can download the latest OpenJDK JRE 8 installer for Windows x64 from here.
You can obtain Java from various sources. For instance, you can download it from Oracle JAVA, use the OpenJDK distribution provided by Amazon, or get it from the OpenJDK distribution by Adoptium. Choose a source that suits your preferences and requirements.
-
Download the JDBC 3.x driver uber jar: First, you need to download the JDBC driver for Amazon Athena. You can obtain it from the Amazon Athena JDBC Connection Options page on the AWS documentation website.
Athena JDBC 3.x driver - Amazon AthenaHere is the Direct link for the Athena-jdbc-3.0.0 jar file:
Note: When using the JDBC driver, ensure you install any necessary requirements. For detailed instructions, please refer to the Amazon Athena website.
-
Download and install ZappySys ODBC PowerPack: Download ZappySys ODBC PowerPack and proceed to install it on your system.
-
Create ZappySys JDBC Bridge Driver: After installing JRE and ZappySys ODBC Driver, you can access the driver in various applications using the following methods:
- Using ODBC DSN: Utilize either a User-level or System-level Data Source Name (DSN) to configure your connection.
- Using Direct ODBC Connection String: Construct an ODBC connection string directly with the required parameters.
- Using Data Gateway: Utilize the ZappySys Data Gateway to connect client apps or servers from Windows, Linux, or macOS to the ZappySys Data Gateway using Microsoft SQL Server Driver (e.g., JDBC, ODBC, OLEDB).
Regardless of the method chosen for your app, the following steps will guide you in configuring your connectivity correctly.
-
Configure the JDBC Bridge Driver: To set up a JDBC Bridge Driver for Amazon Athena, you need go through these steps.
-
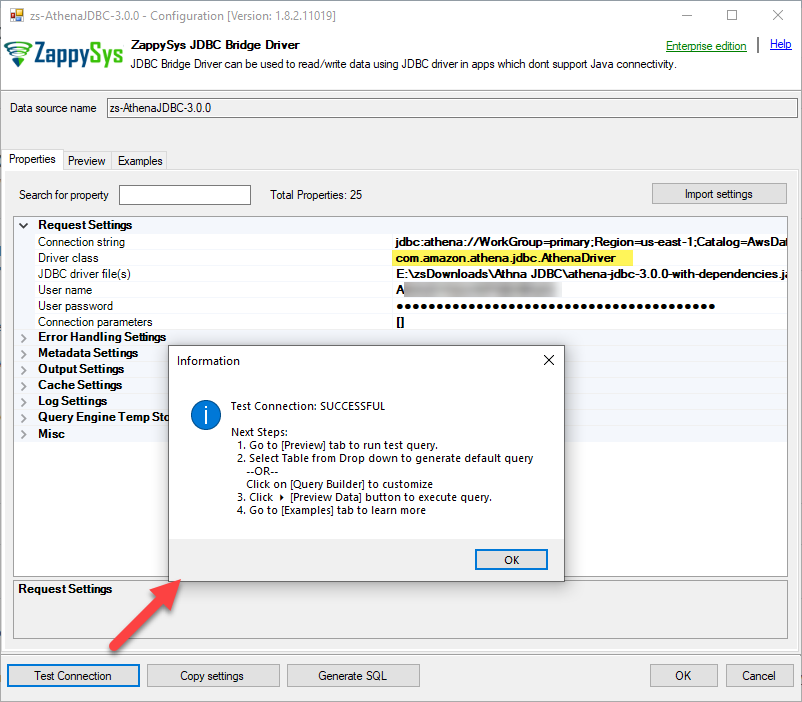
Connection string: Configure the connection string as follows: provide your AWS region and specify the output location path previously set within your Amazon Athena Database.:
jdbc:athena://WorkGroup=primary;Region={{your-aws-region}};Catalog=AwsDataCatalog;OutputLocation=s3://..;
e.g.
jdbc:athena://WorkGroup=primary;Region=us-east-1;Catalog=AwsDataCatalog;OutputLocation=s3://my-s3-bucket/;
-
Driver class: Set the driver class as follows, (** Driver class may be very based on the AWS Athena JDBC driver you used)
com.amazon.athena.jdbc.AthenaDriver
(Note: The driver class may vary based on the specific AWS Athena JDBC driver you have used.)
-
JDBC driver file(s): Specify the file path to the downloaded AWS Athena JDBC Driver *.jar file.
e.g.E:\zsDownloads\Athna JDBC\athena-jdbc-3.0.0-with-dependencies.jar
-
User Name & Password: Set the credentials for the AWS Athena database.
e.g.User name: AKIAIOSFODNN7EXAMPLE;
Password: wJalrXUtnFEMI/K7MDENG/bPxRfiCYEXAMPLEKE
Click on “Test Connection”, and if the configuration is correct, you will receive a “Test Connection Successful” message.
-
-
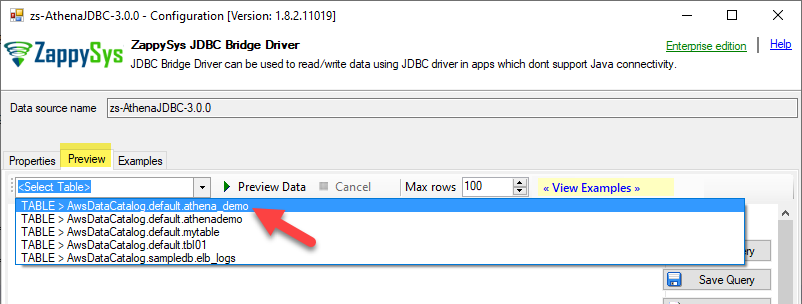
Go to the Preview Tab, expand the Table Dropdown, and select the desired table from which you want to read the data.
-
That’s it! Click on the “Preview Data” button, and it will execute the select query call to load the data. If you prefer to use your own Athena DB query, you can input it directly into the query window.

Connect Amazon Athena in Power BI using ODBC
Once ODBC DSN is configured, it’s time to load it into your app, such as Power BI, Excel, MS Access, and Informatica. For detailed steps, you can refer to this article (generic ODBC)..
Here is the demo of how to connect Amazon Athena in Power BI.
- Open Power BI Desktop and click Get Data to get data from ODBC connection:
- A window opens, and then search for “odbc” to get data from ODBC data source:
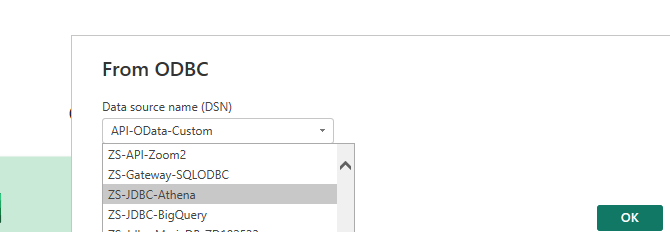
- Another window opens and asks to select a Data Source we already created. Choose Your-Athena-Jdbc-Odbc-DSN and continue:


Table Mode
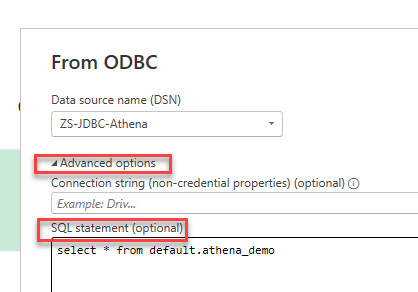
Query Mode
- Most likely, you will be asked to authenticate to a newly created DSN. Just select Windows authentication option together with Use my current credentials option:

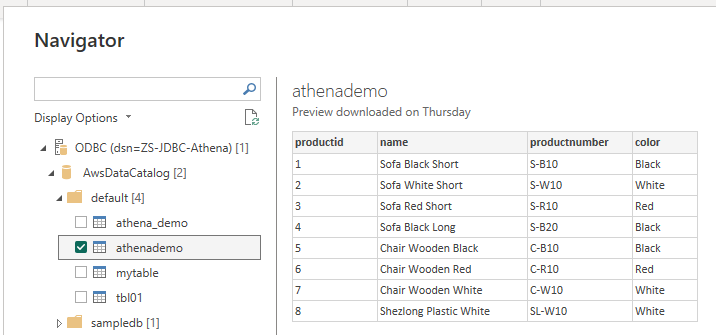
- In the last step, Select (Table Mode only), Preview Data and Click Load
Related Links:
Contact Us
If you encounter any challenges or have specific use cases, please contact our support team via chat or ticket.