Introducition
In this guide, we’ll walk through how to configure application credentials to call the DocuSign REST API using a connector such as SSIS JSON Source.
Prerequisites
- Download and install the ZappySys ODBC PowerPack
Overview
To register your DocuSign app and connect successfully, follow these high-level steps:
- Create a DocuSign Developer Account (if not done already)
- Create an App and obtain the following information (used to configure your connection):
- For OAuth 2.0 (3-Legged User Credentials):
- Integration Key (Client ID)
- Client Secret
- For JWT Authentication (RSA Keys):
- Integration Key (Client ID)
- Client Secret
- User ID
- RSA Private Key file (
.pemformat)
- For OAuth 2.0 (3-Legged User Credentials):
- Set up the connection for the demo (sandbox) environment
- Submit your app for live data access
- Update the connection to the production (live) environment
Now, let’s go through each step in detail.
Create a DocuSign Developer (Demo) Account
Step 1: Go to the Developer Center
Visit ![]() https://developers.docusign.com/
https://developers.docusign.com/
Step 2Click “Start Building” or “Create Free Account”
You’ll be redirected to the demo account signup page.
 Step 3: Fill Out the Signup Form
Provide your:
- Name
- Email address
- Password
- Accept the terms and conditions, then click Sign Up
Step 4: Verify Your Email
DocuSign will send a verification email. Click the link inside it to activate your account.
Create a DocuSign App (OAuth 2.0)
Once you’ve logged into your developer account, follow these steps to create an app and obtain credentials for API access.
-
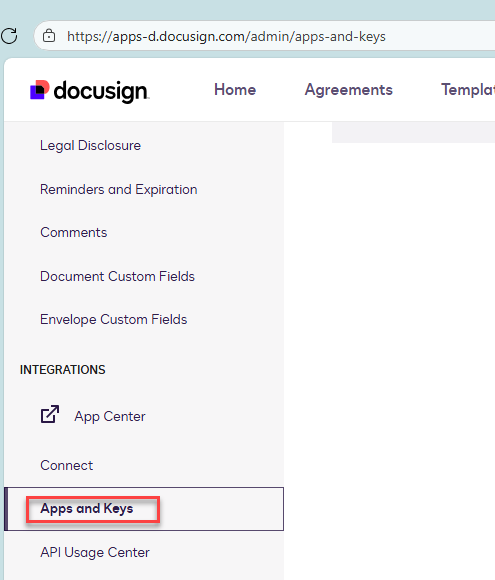
Visit the Apps and Keys section of your Admin Console.
-
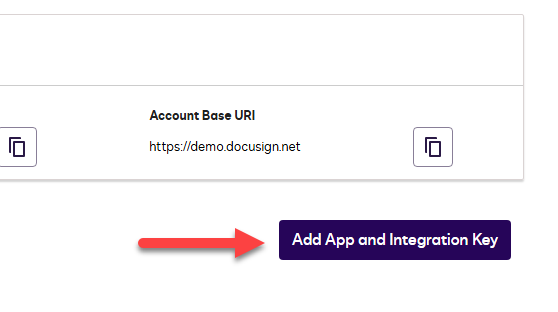
Click Add App and Integration Key.
-
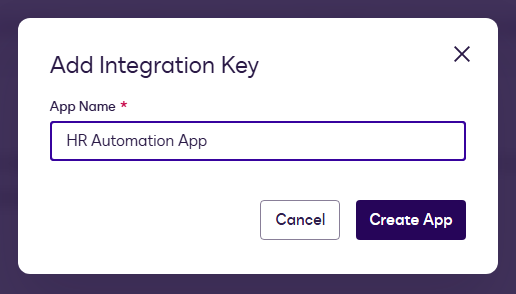
Enter a descriptive name (e.g., HR Automation App) and click Create App.
-
Copy the Integration Key shown.
-
Set the integration type to Private custom integration (if you’ll access your own data).
-
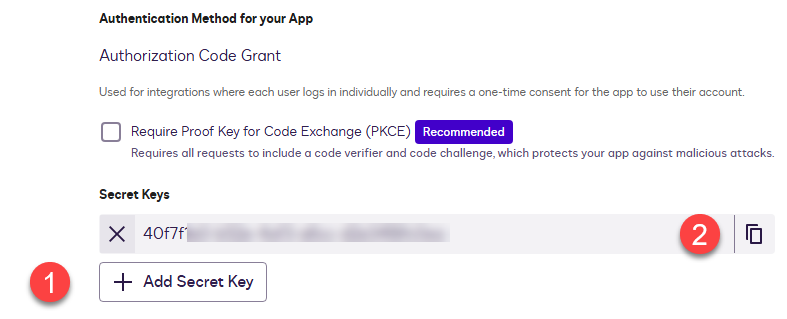
Click Add Secret, copy it immediately (it’s only shown once).
-
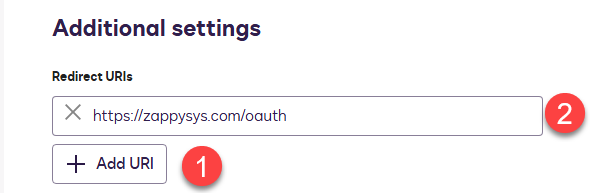
Add a redirect URL — we recommend:
https://zappysys.com/oauth
-
Click Save.
-
Save both your Integration Key and Client Secret for later use.

Create DocuSign App (JWT Auth – RSA Private Key)
If you want to use JWT authentication with RSA keys, perform the previous steps and then do the following:
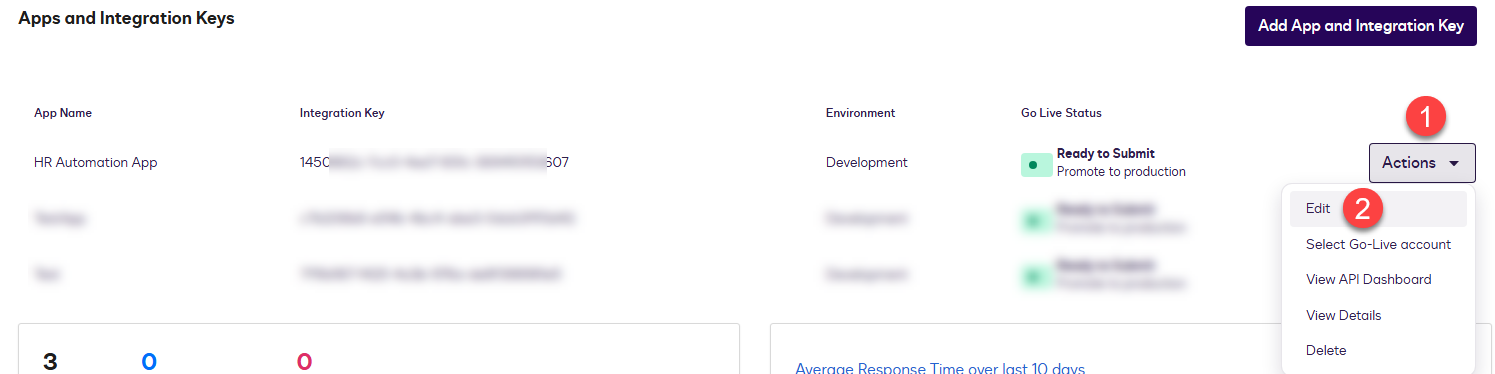
-
In Apps and Keys, click Actions → Edit next to your app.
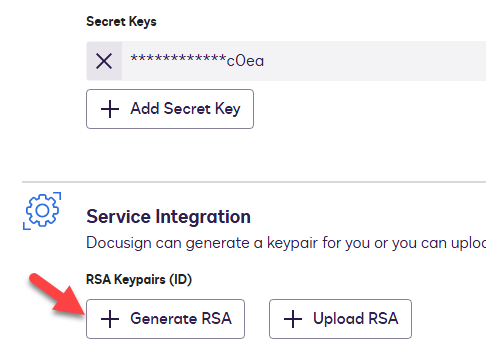
-
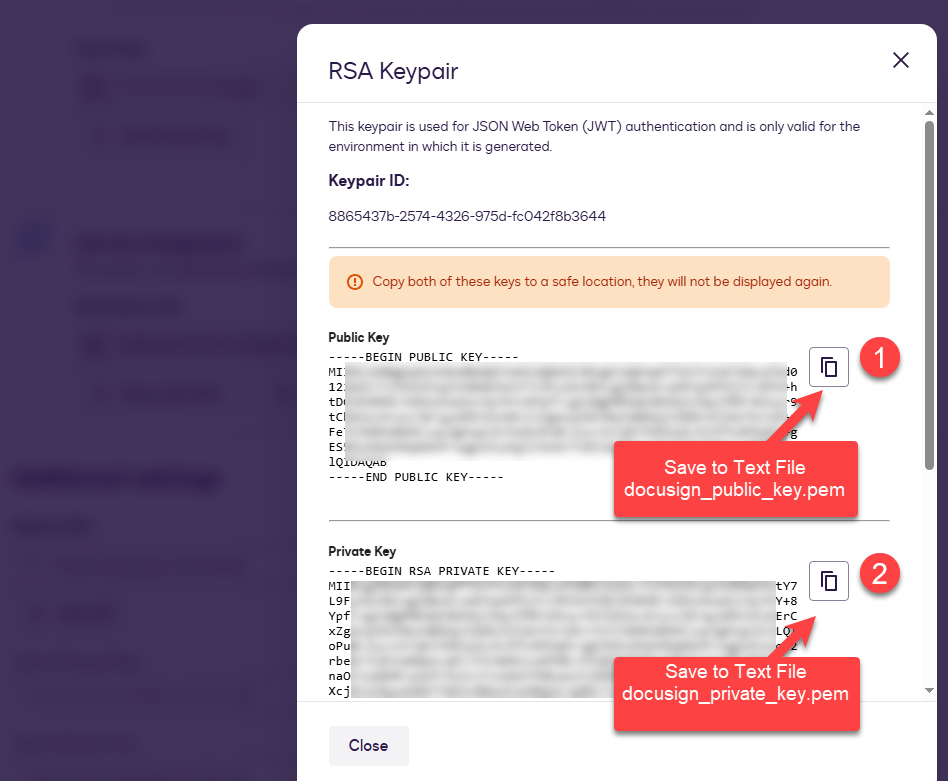
Click Generate RSA.
-
Save both keys (PEM format) as files:
docusign_private_key.pemdocusign_public_key.pem
You’ll use only the private key in your connection setup. Keep both keys secure.
Setup Connection (JWT Auth / RSA Private Key)
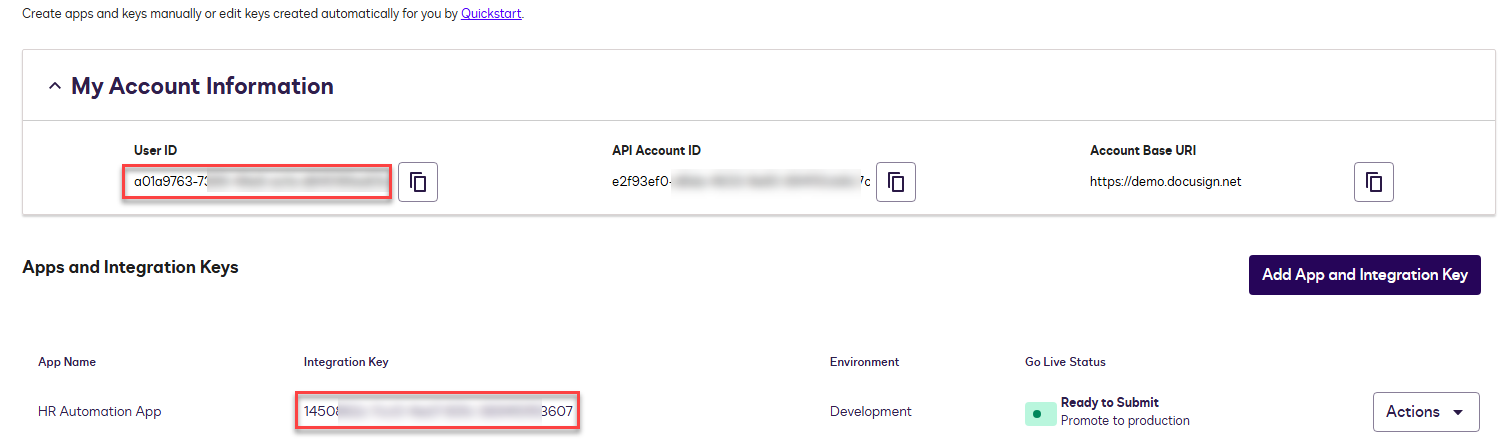
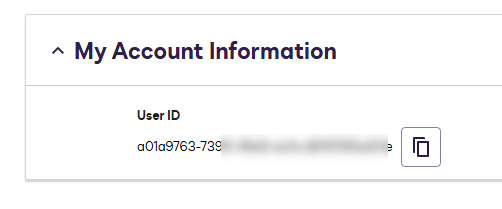
Obtain the User ID
- Go to Apps and Keys
- Copy your User ID (needed for JWT Auth)
Configure OAuth Connection (ZappySys SSIS PowerPack)
-
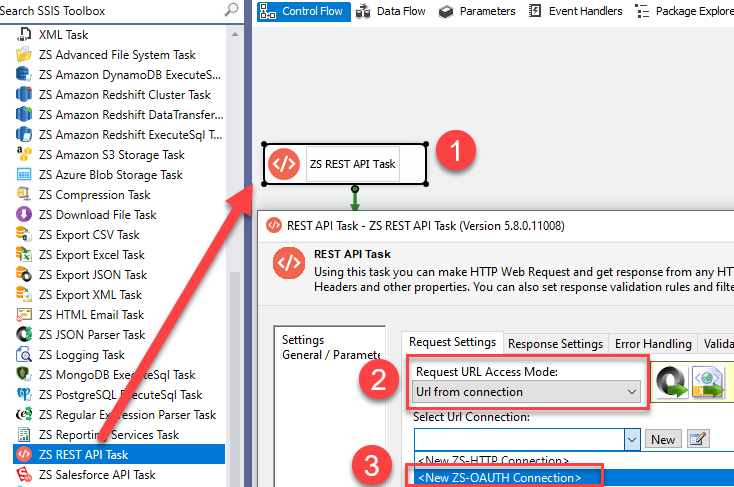
Open SSIS and drag the REST API Task from the toolbox.
-
Double-click to edit the task.
-
Set URL Mode to
URL from Connection.
-
Create or edit the OAuth Connection and configure it as follows.
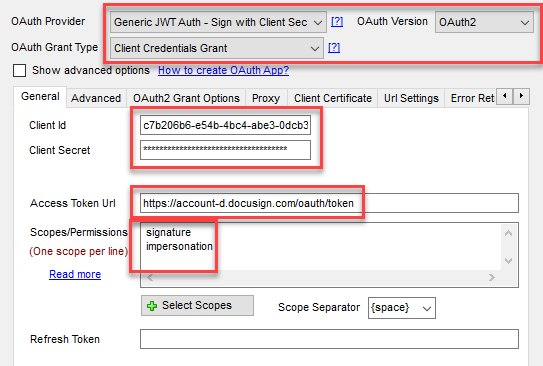
General Tab
- Client ID and Client Secret
- Token URL:
- Sandbox:
https://account-d.docusign.com/oauth/token - Live:
https://account.docusign.com/oauth/token
- Sandbox:
- Scopes:
signatureandimpersonation(add more as required).
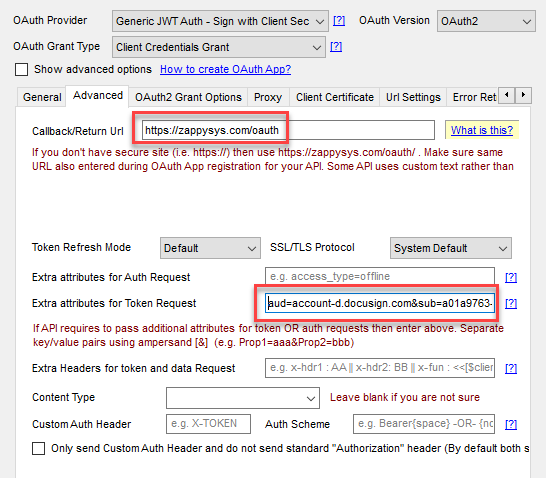
Advanced Tab
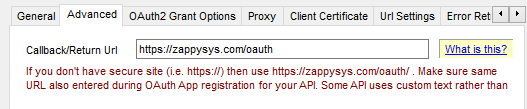
Enter the redirect URL (same as the app registration) and the following extra attributes.
Replace sub=xxxxx with your actual User ID.
aud=account-d.docusign.com&sub=a01a9-your-user-id-d01e&jwt_user_grant=1&jwt_pkcs_version=1&jwt_alog=RS256
For production, use aud=account.docusign.com.
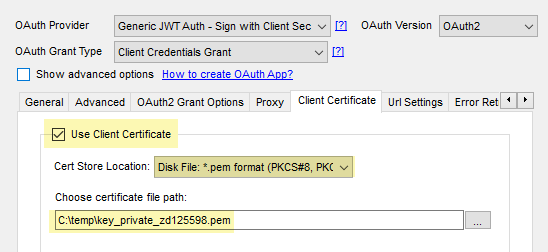
Certificate Tab
Upload your .pem private key file.
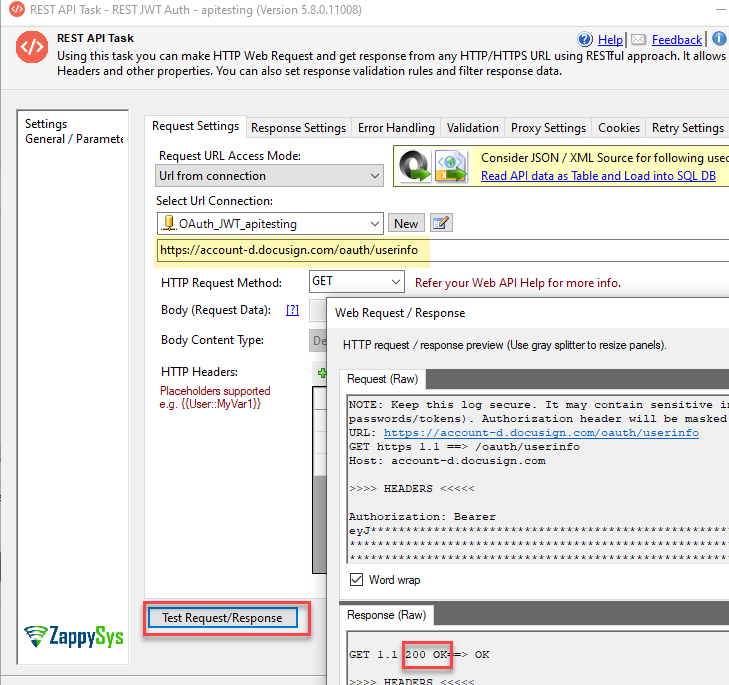
Click OK to save the connection, then test it.
Testing Endpoints:
- Sandbox:
https://account-d.docusign.com/oauth/userinfo - Live:
https://account.docusign.com/oauth/userinfo
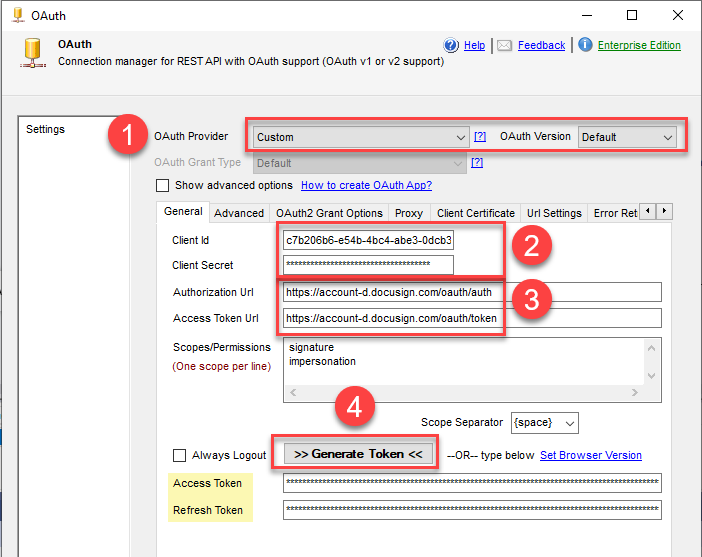
Seting up connection for OAuth 2.0 (Standard Flow)
If you prefer using regular OAuth (no RSA key):
-
Set Provider = Custom.
-
Enter Client ID and Client Secret.
-
Use the following URLs:
Sandbox:
Auth URL:  https://account-d.docusign.com/oauth/auth
Token URL: https://account-d.docusign.com/oauth/token
Production:
Auth URL: https://account.docusign.com/oauth/auth Token URL: https://account.docusign.com/oauth/token -
Enter the required Scopes (one per line).
-
Add the Redirect URL (
https://zappysys.com/oauth).
-
Click Generate Token on the General tab, complete the authorization in your browser, and confirm success.
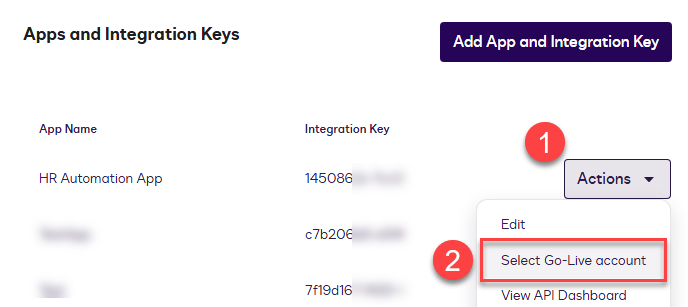
Submit App for Live Data Access
After successfully testing in the sandbox (https://account-d.docusign.com/...):
- Go to App Settings.
- Click Submit for Review / Go Live.
- Approval usually takes a few days (faster for private apps).
Switch to Live Environment
Once approved, simply update your connection URLs to production endpoints.
Common Errors
Error: (400) Bad Request – consent_required)
This means your app hasn’t been authorized yet.
Fix:
Click Generate Token button on the connection UI and follow the screens to approve the App. Or manually authorize your app by visiting this URL (replace placeholders):
https://account-d.docusign.com/oauth/auth?
response_type=code&
scope=signature%20impersonation&
client_id=YOUR_INTEGRATION_KEY&
redirect_uri=https://www.docusign.com
After approving the prompt, retry your connection in SSIS or your client application.
You’re all set!: You can now connect to the DocuSign REST API using OAuth 2.0 or JWT authentication.
Still need help?
If the issue persists, please get in touch with our support team:
- Live Chat: Open the chat widget (bottom right of this page)
- Email: support@zappysys.com
- Support Center: Support | ZappySys